How to make a loft bed with your own hands?

There is no need to say how children love bunk beds, but this option can be an excellent solution for adults. True, in a slightly different variation, called "loft bed". It is possible to do this furniture according to simple schemes with your own hands, having received an ergonomic design at the output. Because it is ergonomic, because the space under the attic bed can be used as a working corner and not only it.

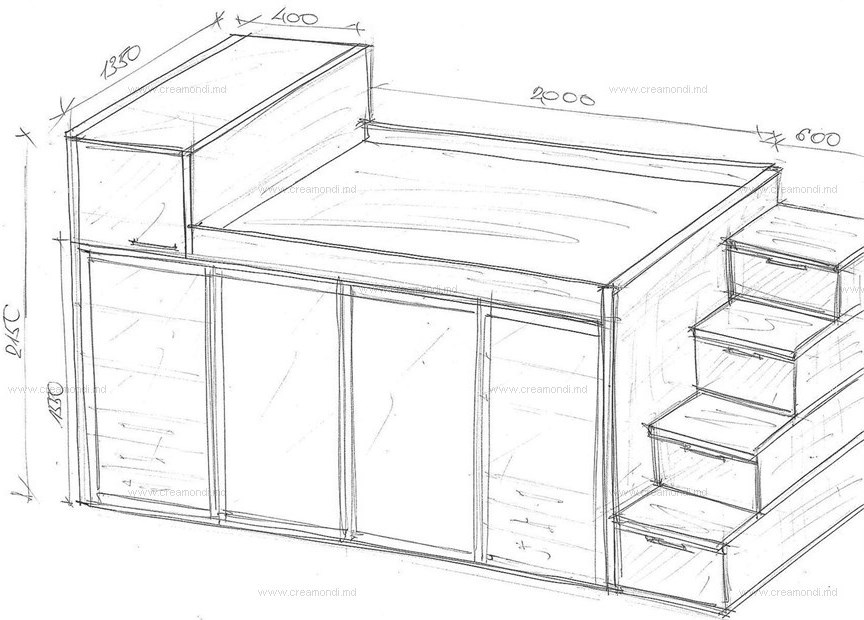
Drawings and dimensions
A loft bed for a child and an adult is not the same thing. The first thing to decide with is whether it will be a standard or non-standard design. In most cases, the first option is chosen, because it is easier to make it with your own hands. Next, you need to decide on the size of the bed, they will always depend on the length and width of the existing mattress - and this is logical, it is easier to make a base for the desired orthopedic mattress than to look for a mattress for a finished bed.

What else do you need to know about bed dimensions?
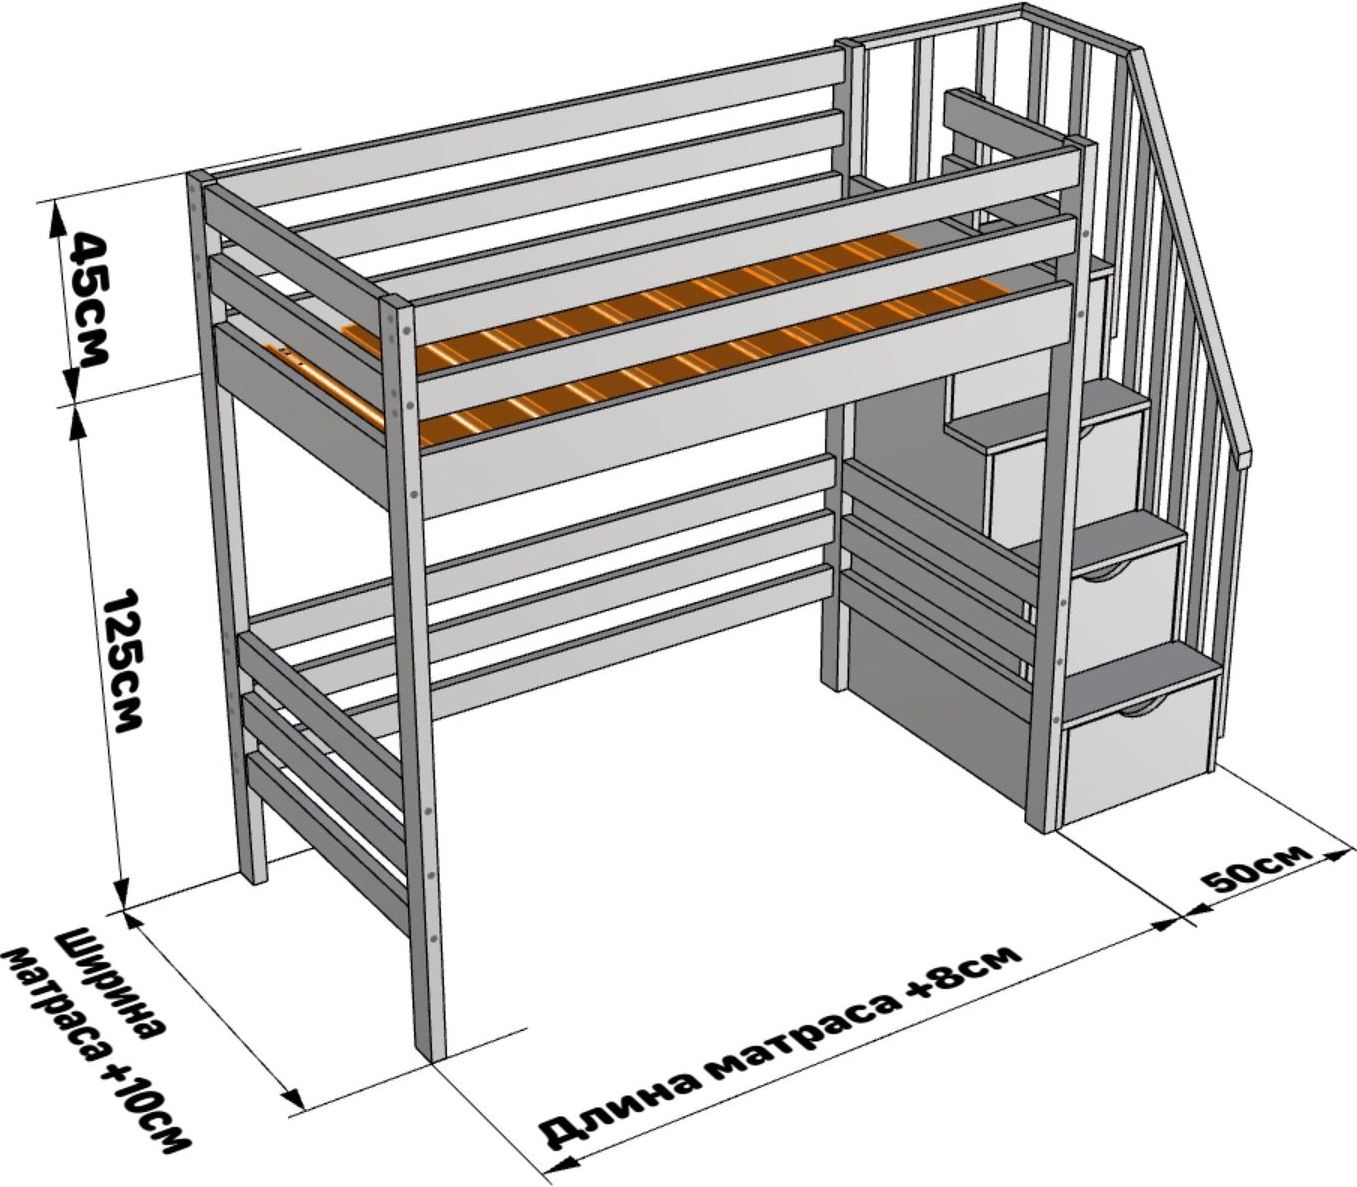
- Usually the height is measured from the ceiling, but at the bottom there should be a maximum of freedom. You can measure your height while sitting, in an adult it is 80-95 or a little more than centimeters. This distance is the very gap between the mattress and the ceiling surface.
- If the design is intended for a child, his sitting height will be 50-70 cm, but you should always take into account that babies grow quickly.
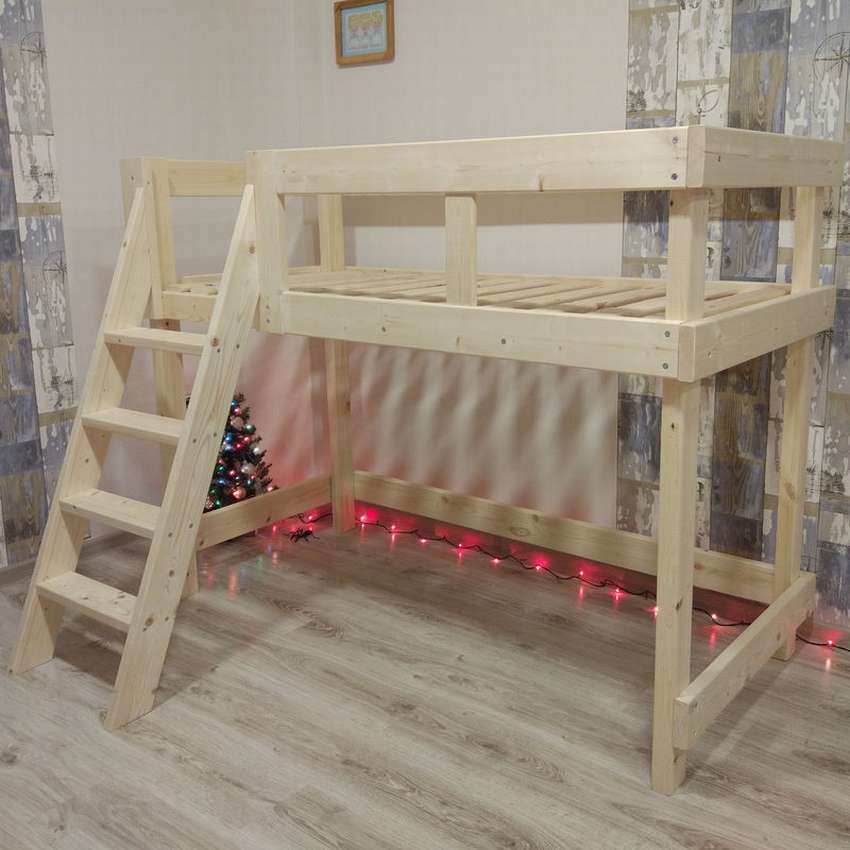
- The dimensions of the bed also depend on the height of the ceilings in principle. What is allowed in "Stalin" is practically impossible in "Khrushchev". But on average, the height of the attic bed from the floor is 185 cm. You can make a meter height, but only if there is something like a chest of drawers under the bed.
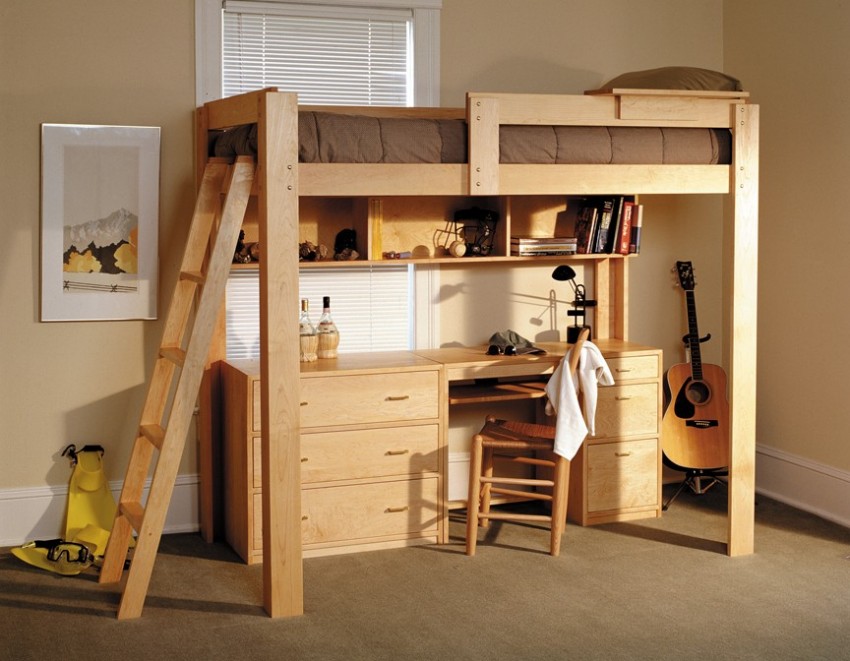
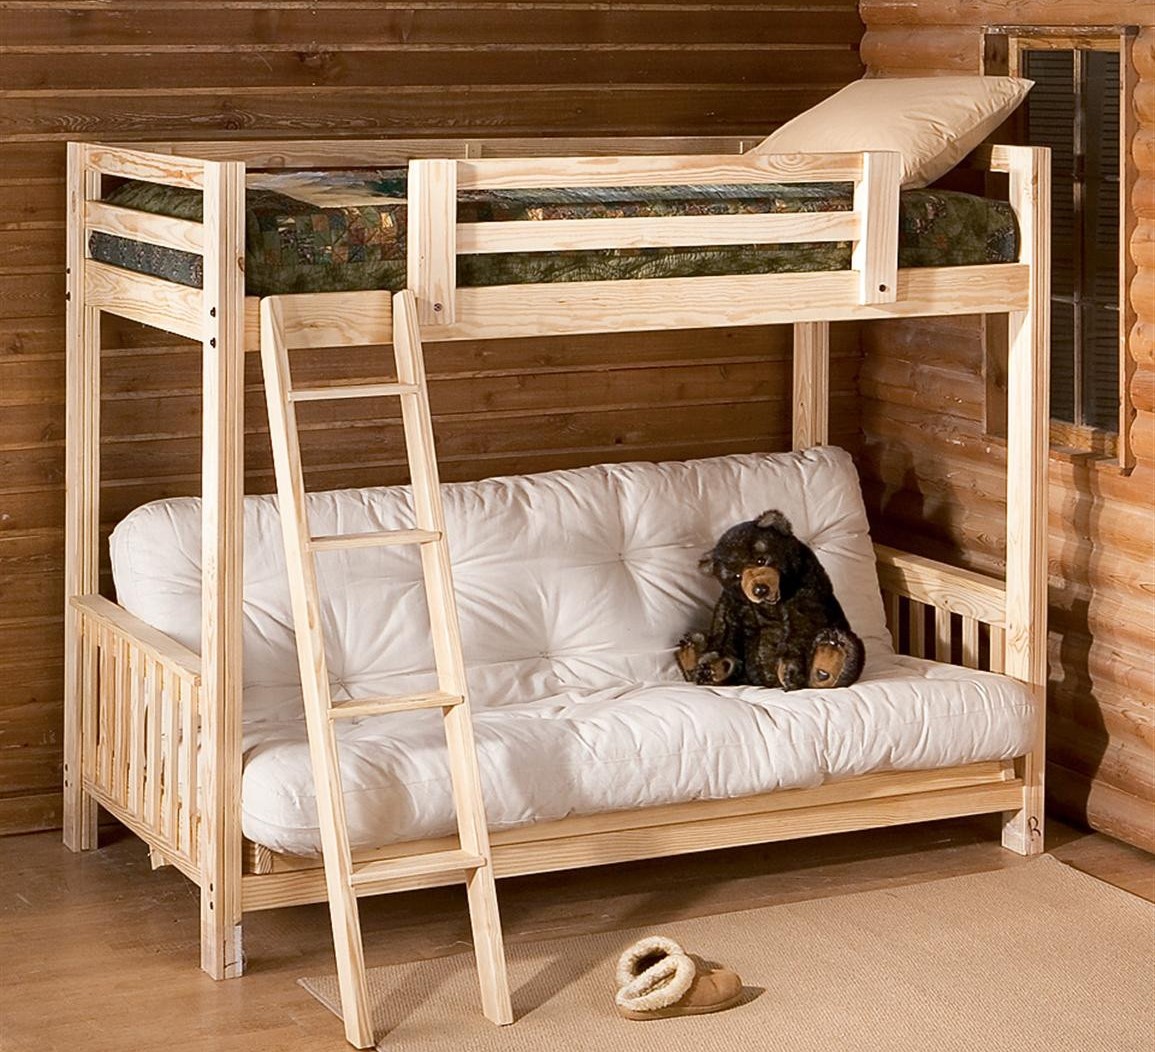
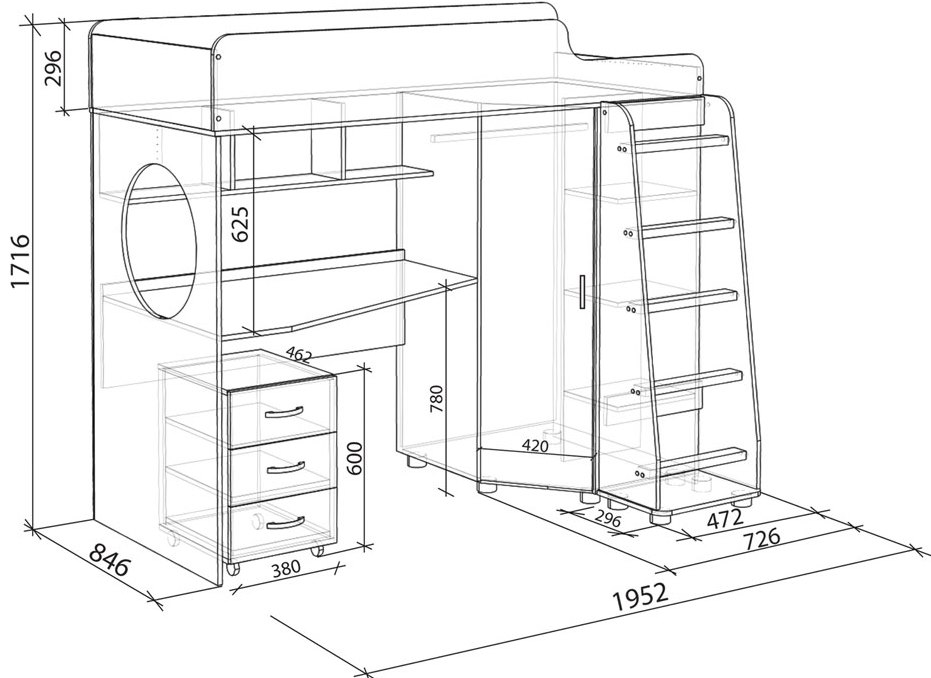
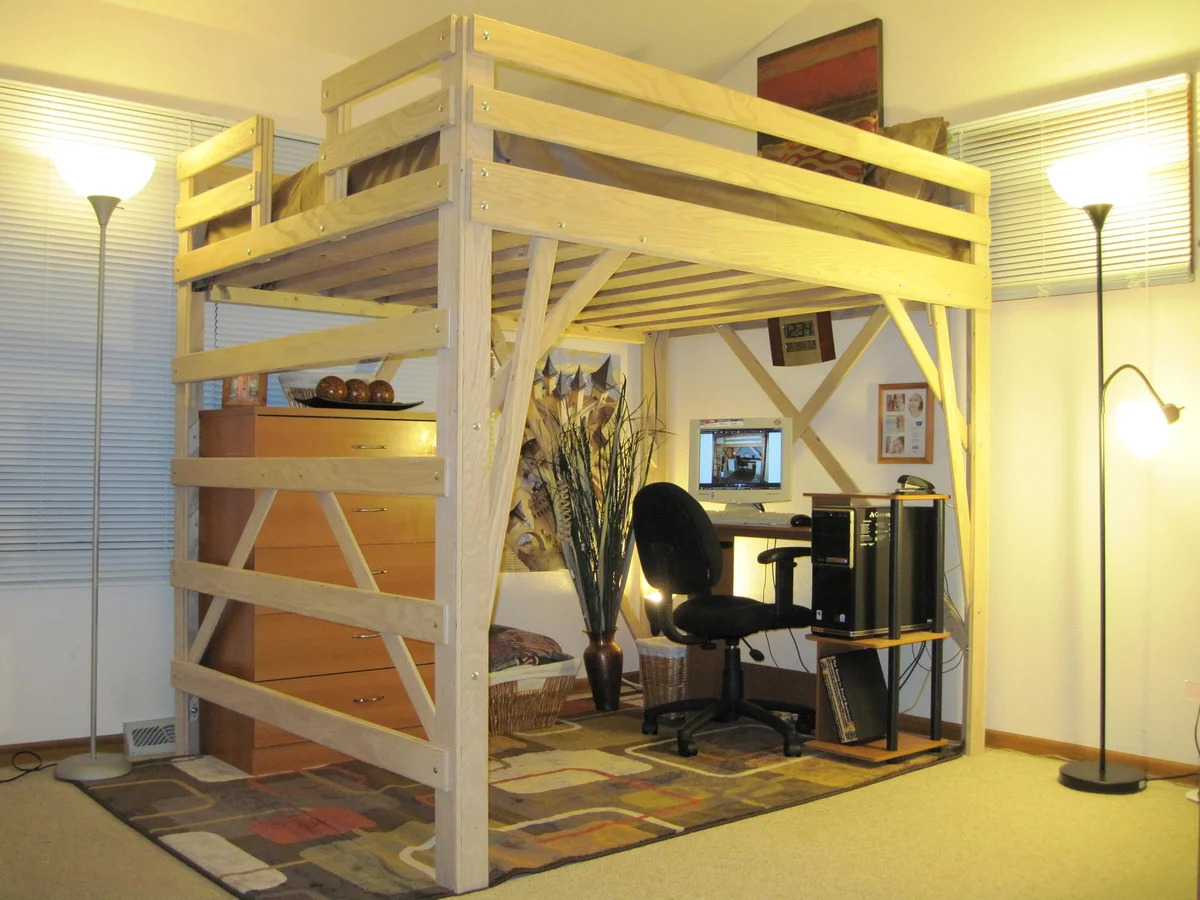
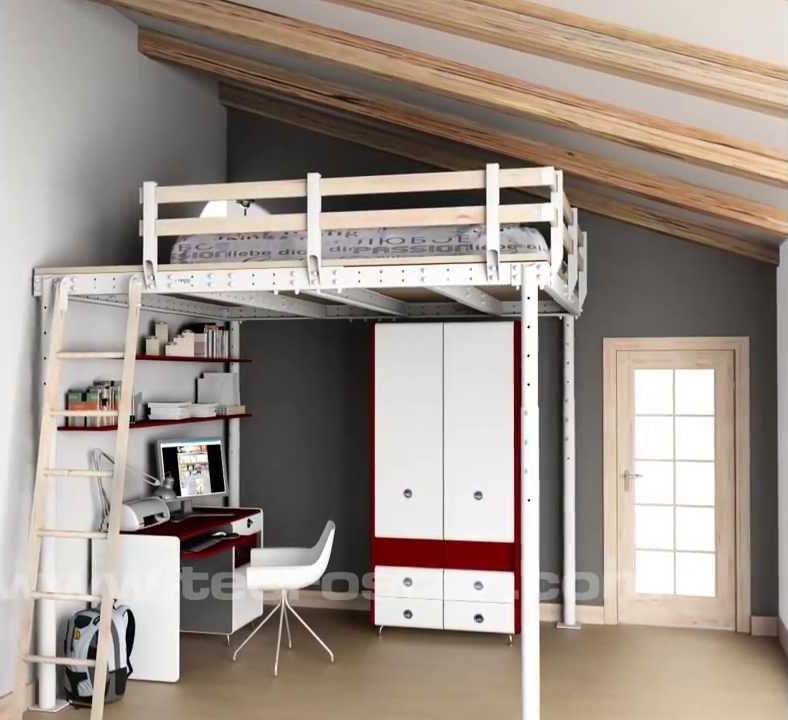
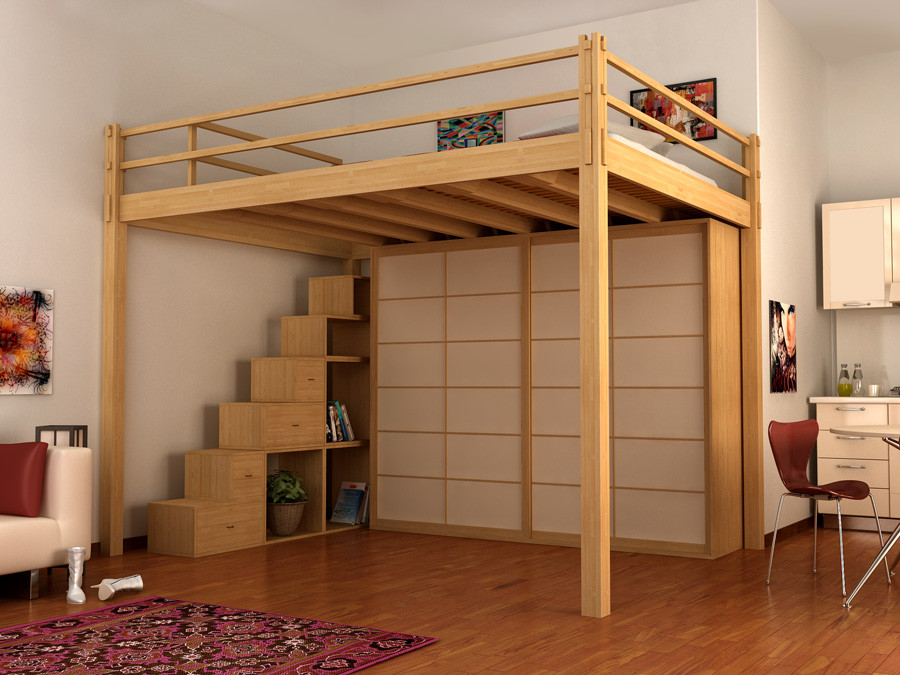
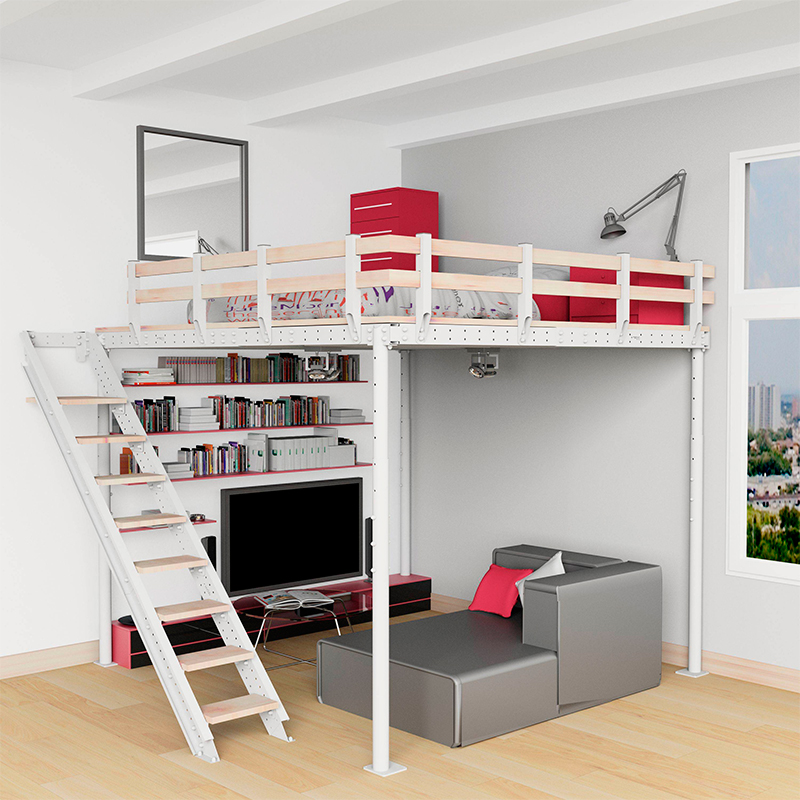
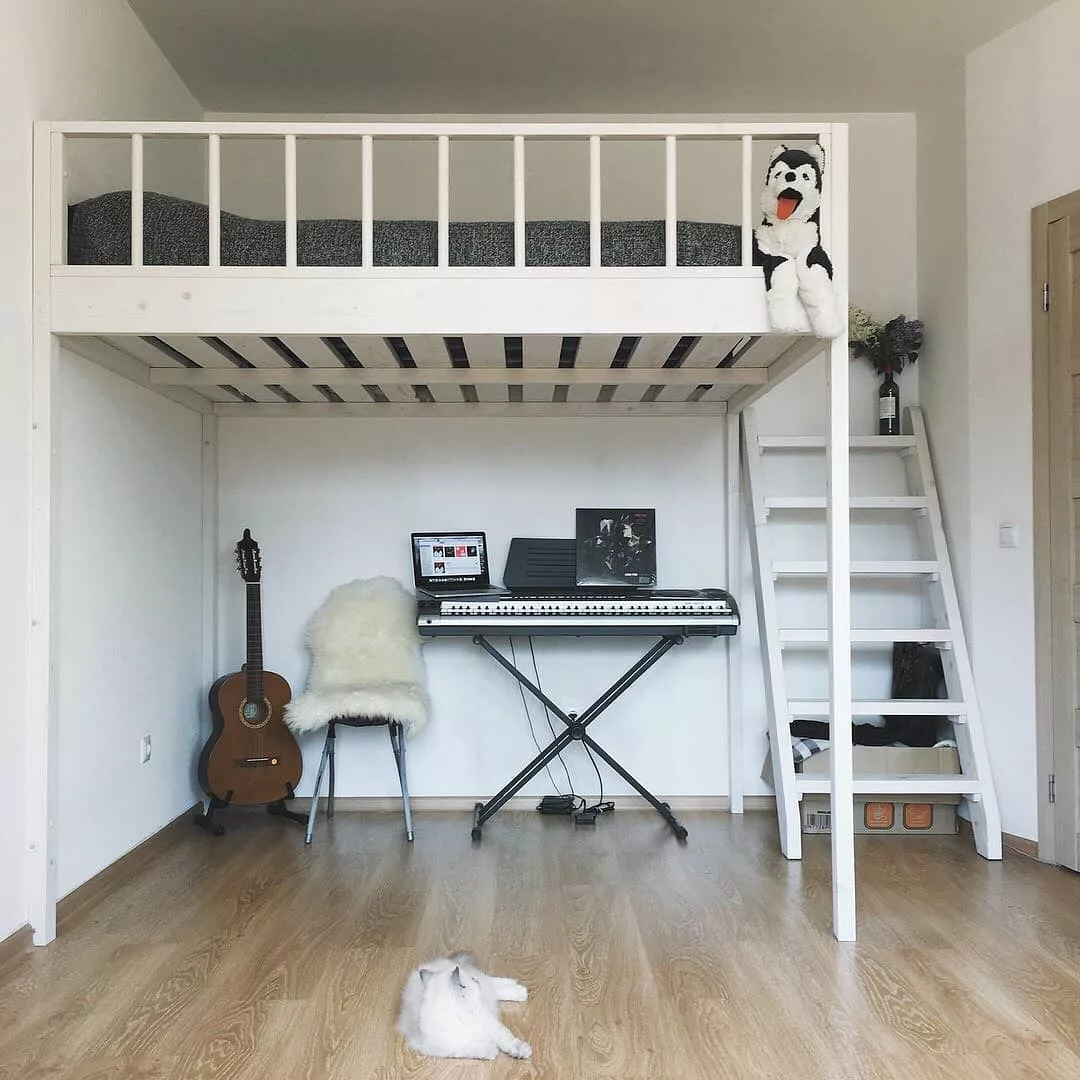
The presented drawings and sketches show options for how such a bed might look, what its dimensions and design are. Most often, such designs are made for one, double options are less common. But for two, you can make a comfortable, homemade bed, under the bottom of which not only a working corner will be located, but also a chest of drawers, an open hanger or a more cozy armchair with a floor lamp.
Preparation
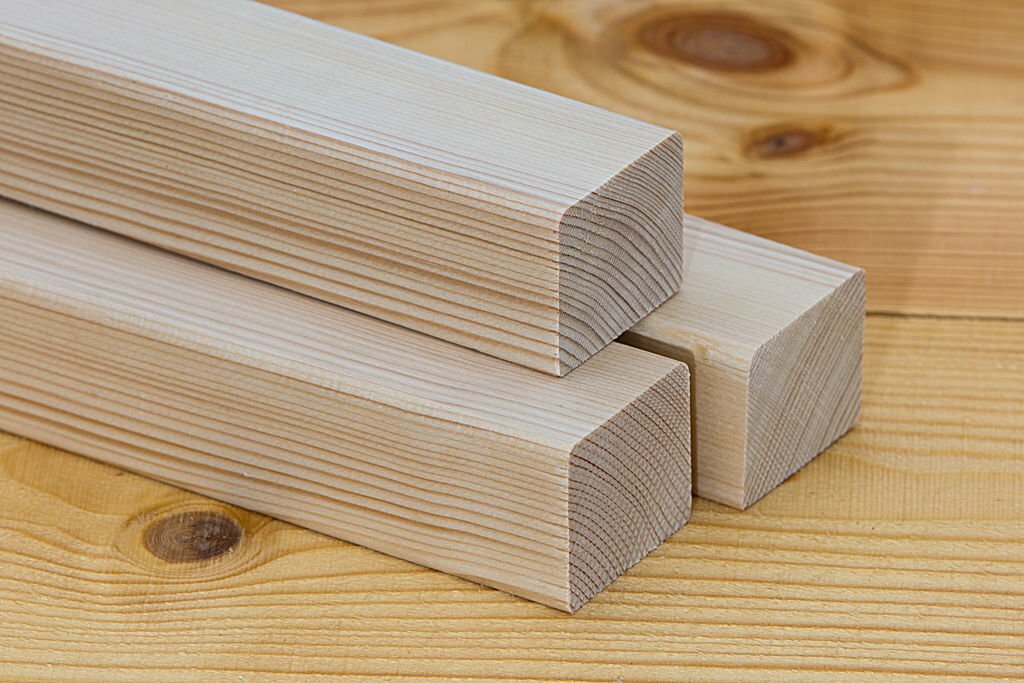
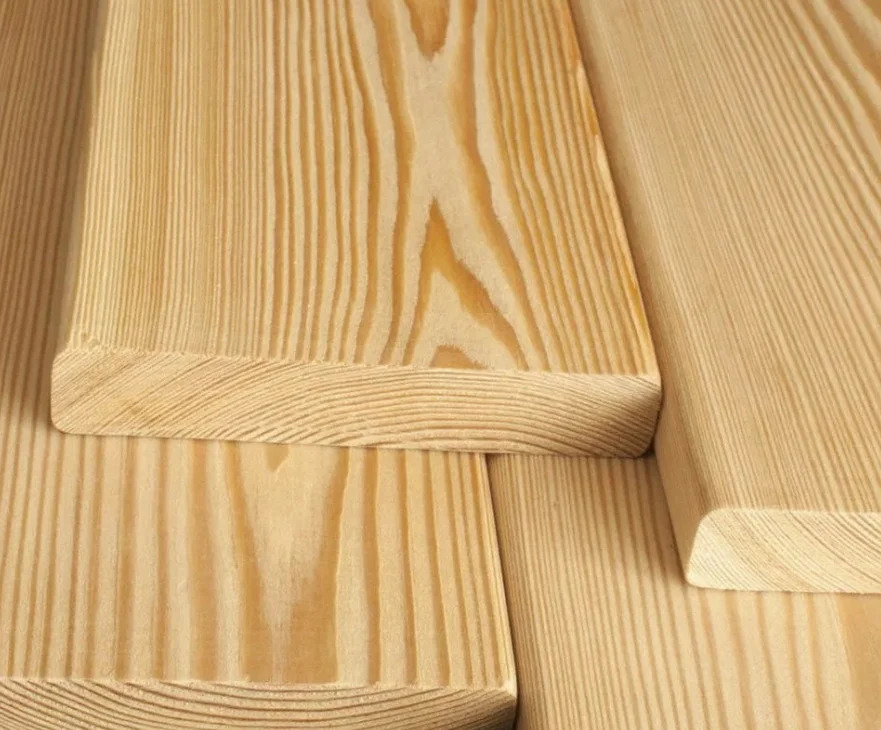
The most affordable and common material for the manufacture of such furniture is wood. It seems that the metal structure is stronger, but few can work with metal. But creating a thing from an array is a more understandable and doable task.
The best solution would be to use a pine log, it can be replaced with alder or oak.
What is involved in the work:
- pine (best option) bars;
- sheathing slats needed for the construction of the railings and staircase;
- plywood (or a ready-made slatted bottom);
- finishing materials (varnish / paint / stain);
- jigsaw or circular;
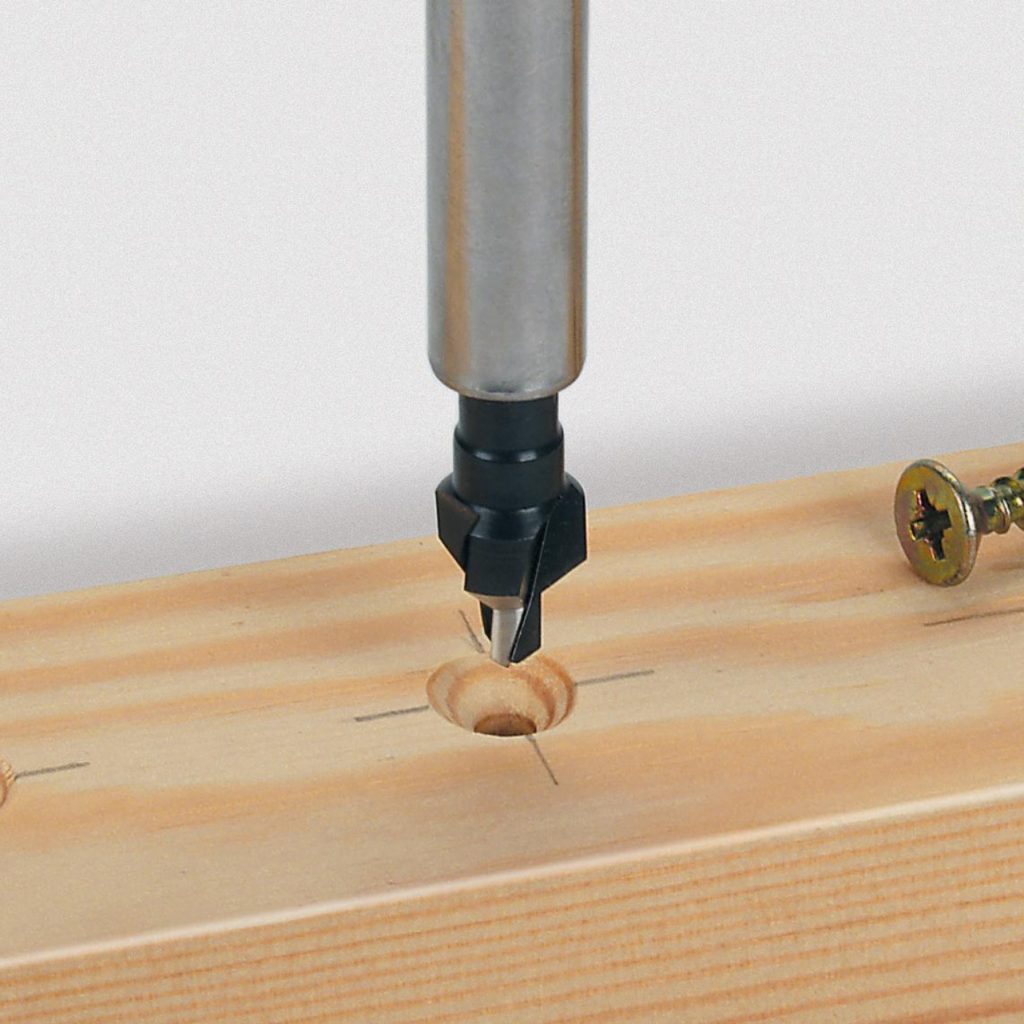
- screwdriver, drill, as well as a jig;
- countersink drill, grinder;
- corner, tape measure, good writing pencil;
- vacuum cleaner and goggles.
This is the base, a little something can come in handy during work. If not just a bed is being built, but also a working area under it, MDF or chipboard, chipboard may also have to be purchased.

List of parts with dimensions (on one of the options for typical models):
- frame racks, 4 pcs., 5-10-165 cm;
- transverse frame beams, 2 pcs., 5-15-95 cm;
- cross bars of bed backs, 4 pcs., 5-10-95 cm;
- longitudinal bars of bed backs, 4 pcs., 5-10-190 cm;
- longitudinal frame beams, 2 pcs., 5-15-190 cm;
- slats for plywood bottom, 2 pcs., 5-5-190 cm;
- podium boards, 2 pcs., 5-10-80 cm;
- upper longitudinal board of the frame, 1 pc., 5-10-105 cm;
- upper transverse podium boards, 2 pcs., 5-10-50 cm;
- podium flooring, 12 pcs., 5-10-55 cm;
- boards for stairs, the end parts of which are sawn at 45 degrees, 2 pcs., 5-15-100 cm;
- boards for supporting stair steps with end parts sawn at 45 degrees, 6 pcs., 2.5-5-20 cm;
- stair treads, 6 pcs., 5-10-45 cm.
This is just one example of the selection of structural parts, which can be adapted to your own request.
Manufacturing of elements
Everything is done gradually, the bed is a system consisting of a frame, railings, stairs and flooring.
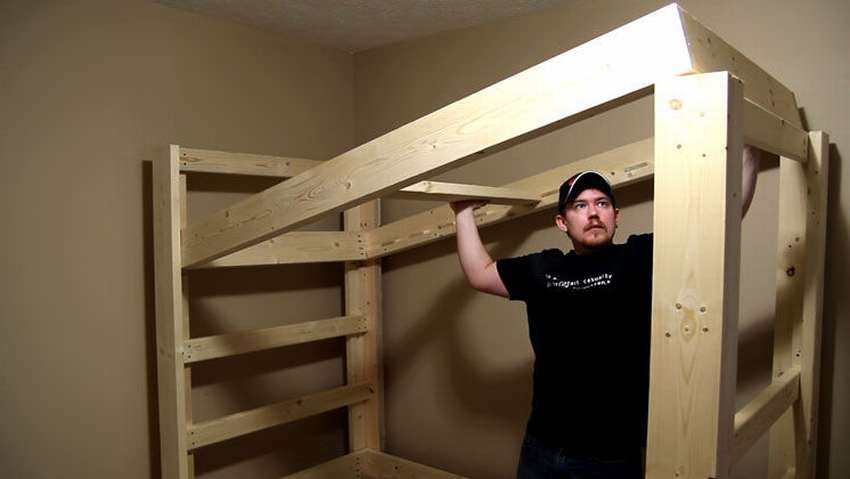
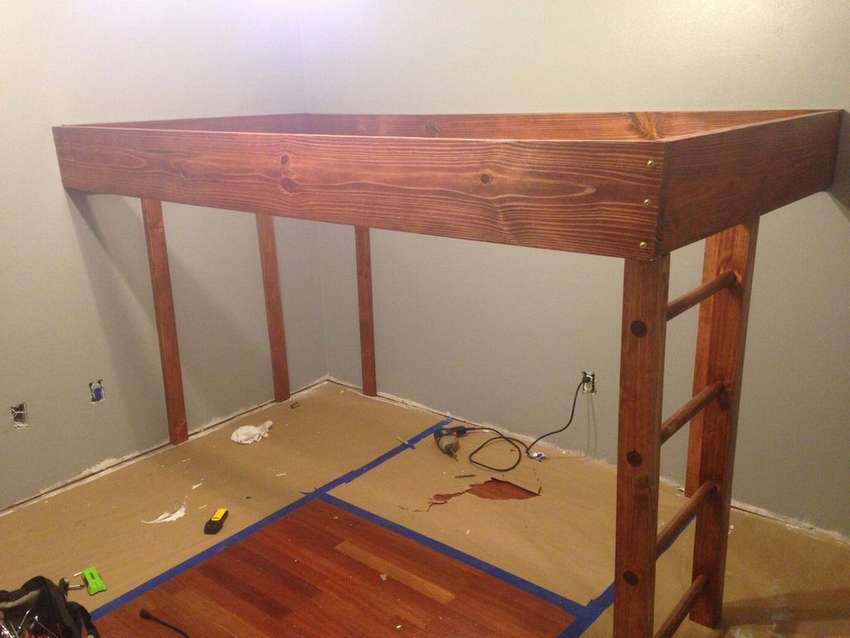
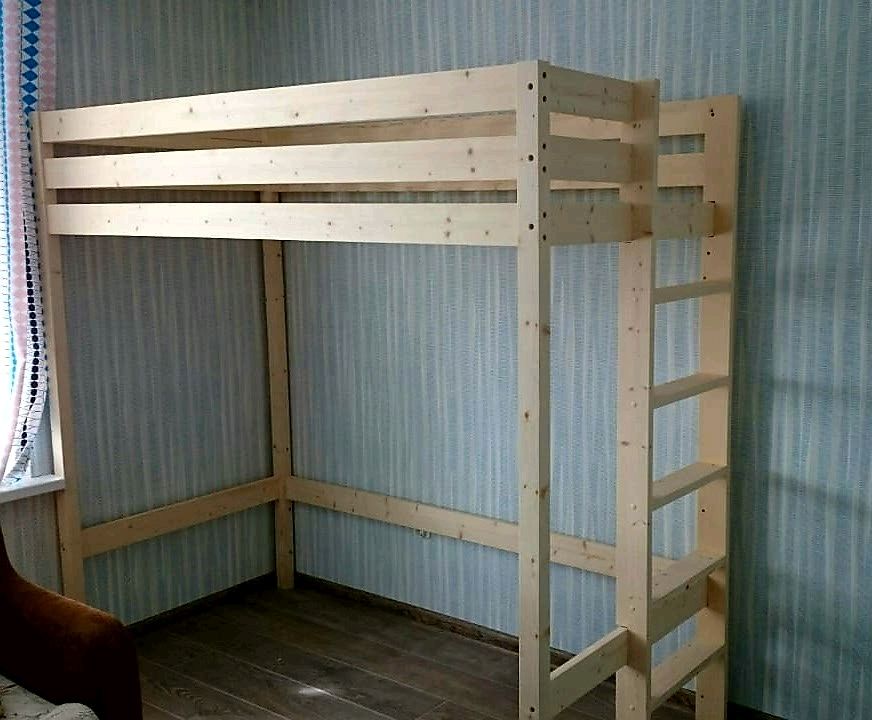
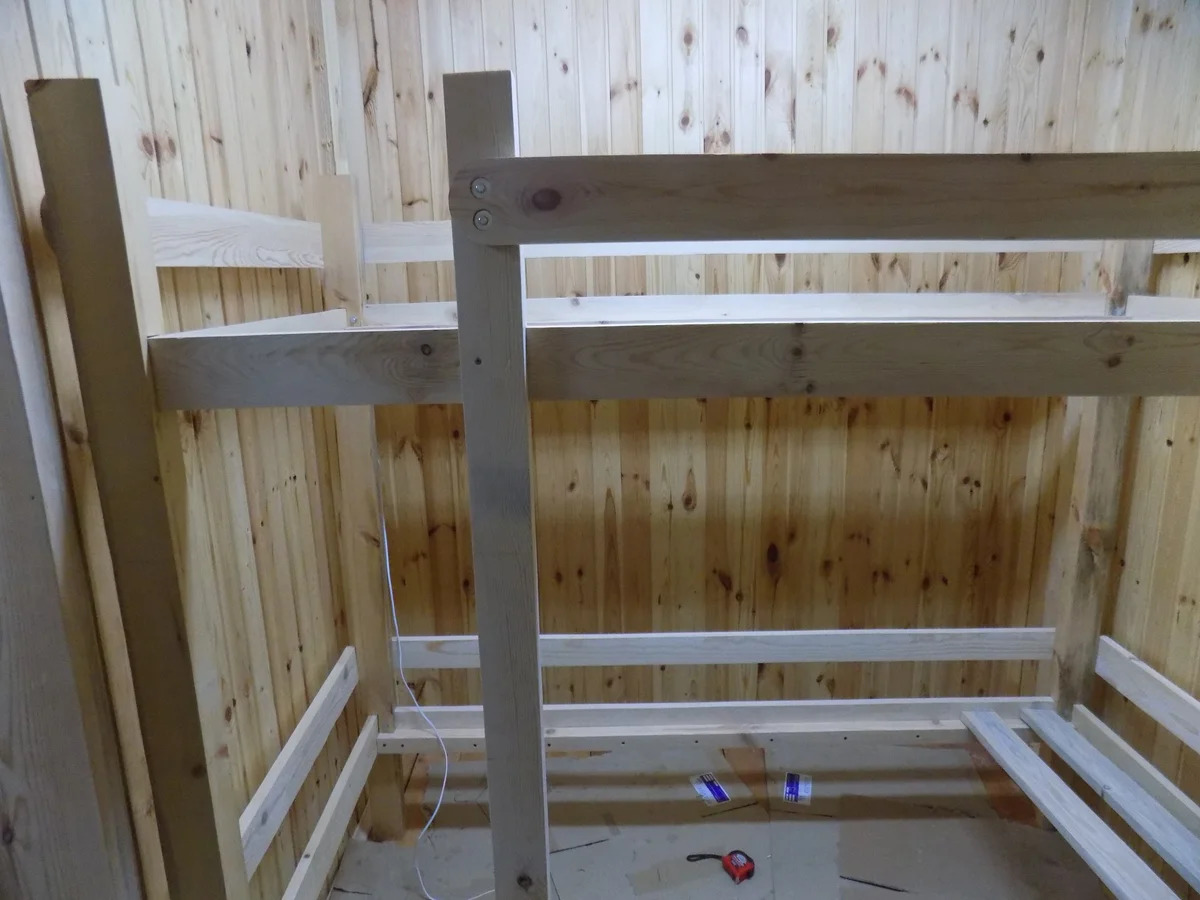
Frame
This is the basic construct of an attic bed. The final build will start here.
Assembly instructions.
- It would be nice to spread the prepared elements in front of you, so that it is clear what and where will go. And the diagram must also be kept in front of your eyes.
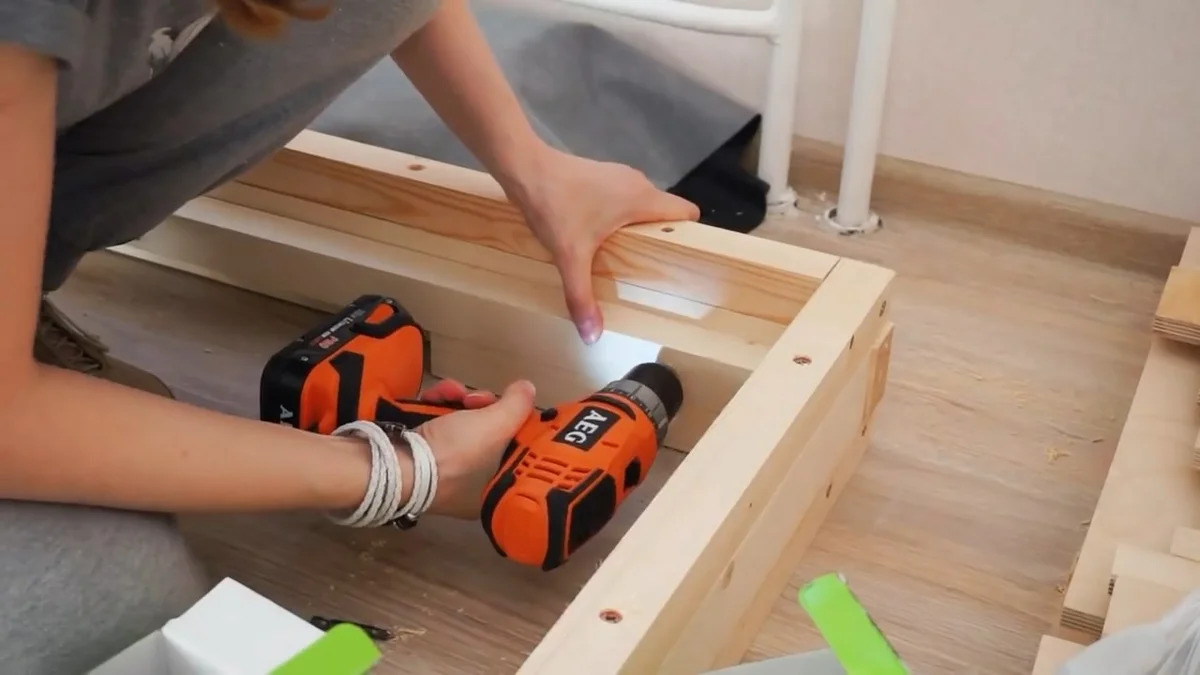
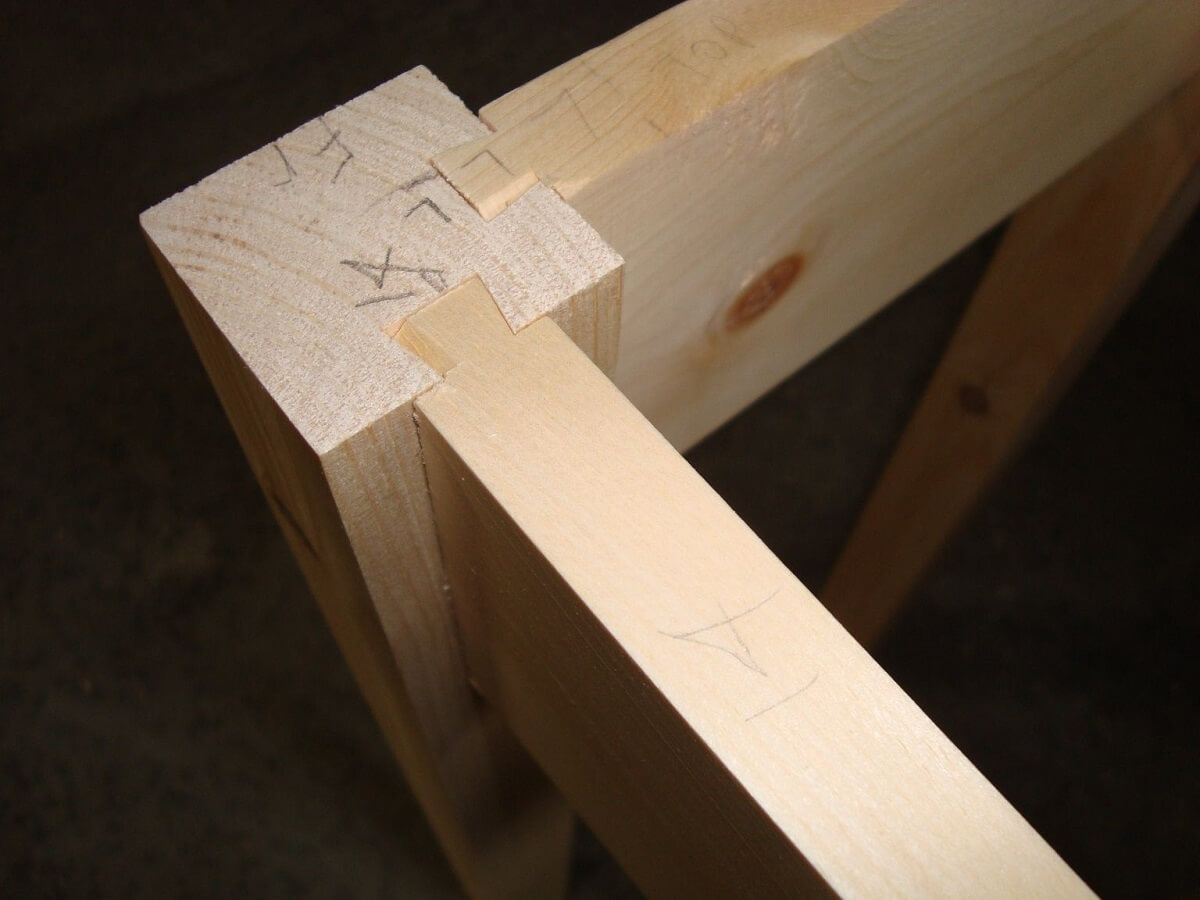
- First, the end parts of the structure are assembled, which consist of two posts, a transverse board to strengthen the frame and a transverse base board. To make the connection strong, the conductor drills holes-pockets.
- The second end side is made up in the same way.
- The end sides of the frame must be connected to each other using longitudinal bars. Before fixing, measurements are checked using a level and a plumb line, whether the parts of the frame correspond to each other.
- Longitudinal bars are fastened using the “thorn-groove” method, in order to strengthen the structure, furniture corners are used.
It must be remembered that the main load falls on the lower frame bars.
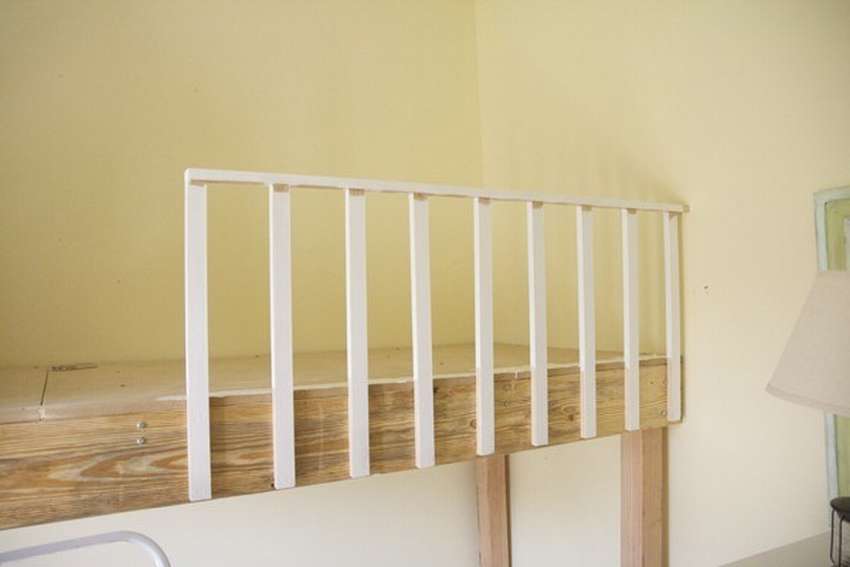
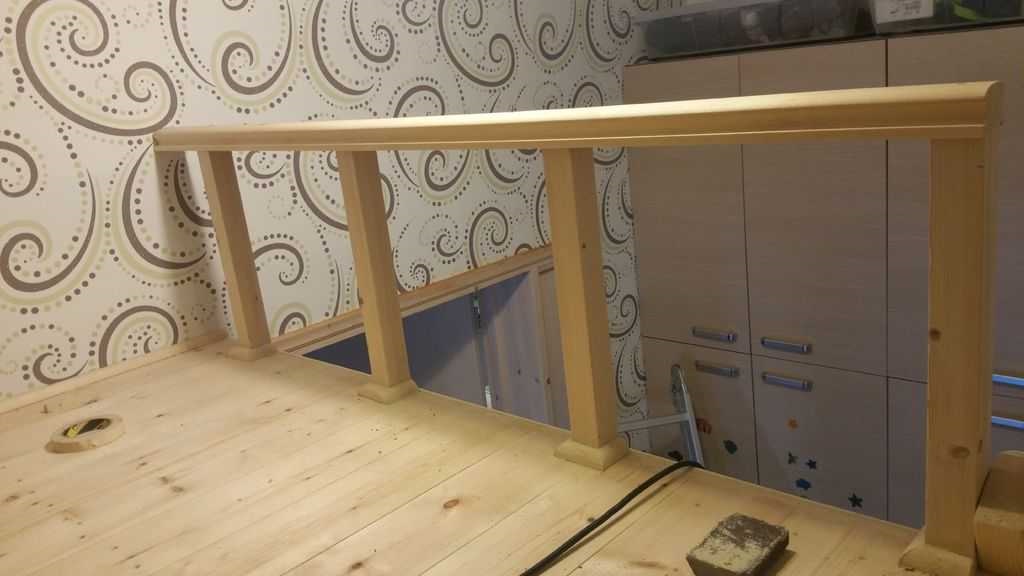
Railings
If necessary, the height of the railing is increased with the height of the posts. The boards are fastened under the railings with furniture screws. It can be fastened using the “thorn-groove” method, or using furniture corners. However, both methods can be used.
Railings are made of:
- MDF boards;
- metal supports;
- wooden blocks, assuming different placement;
- fabrics with a metal frame.
After this element, you can proceed to the flooring.
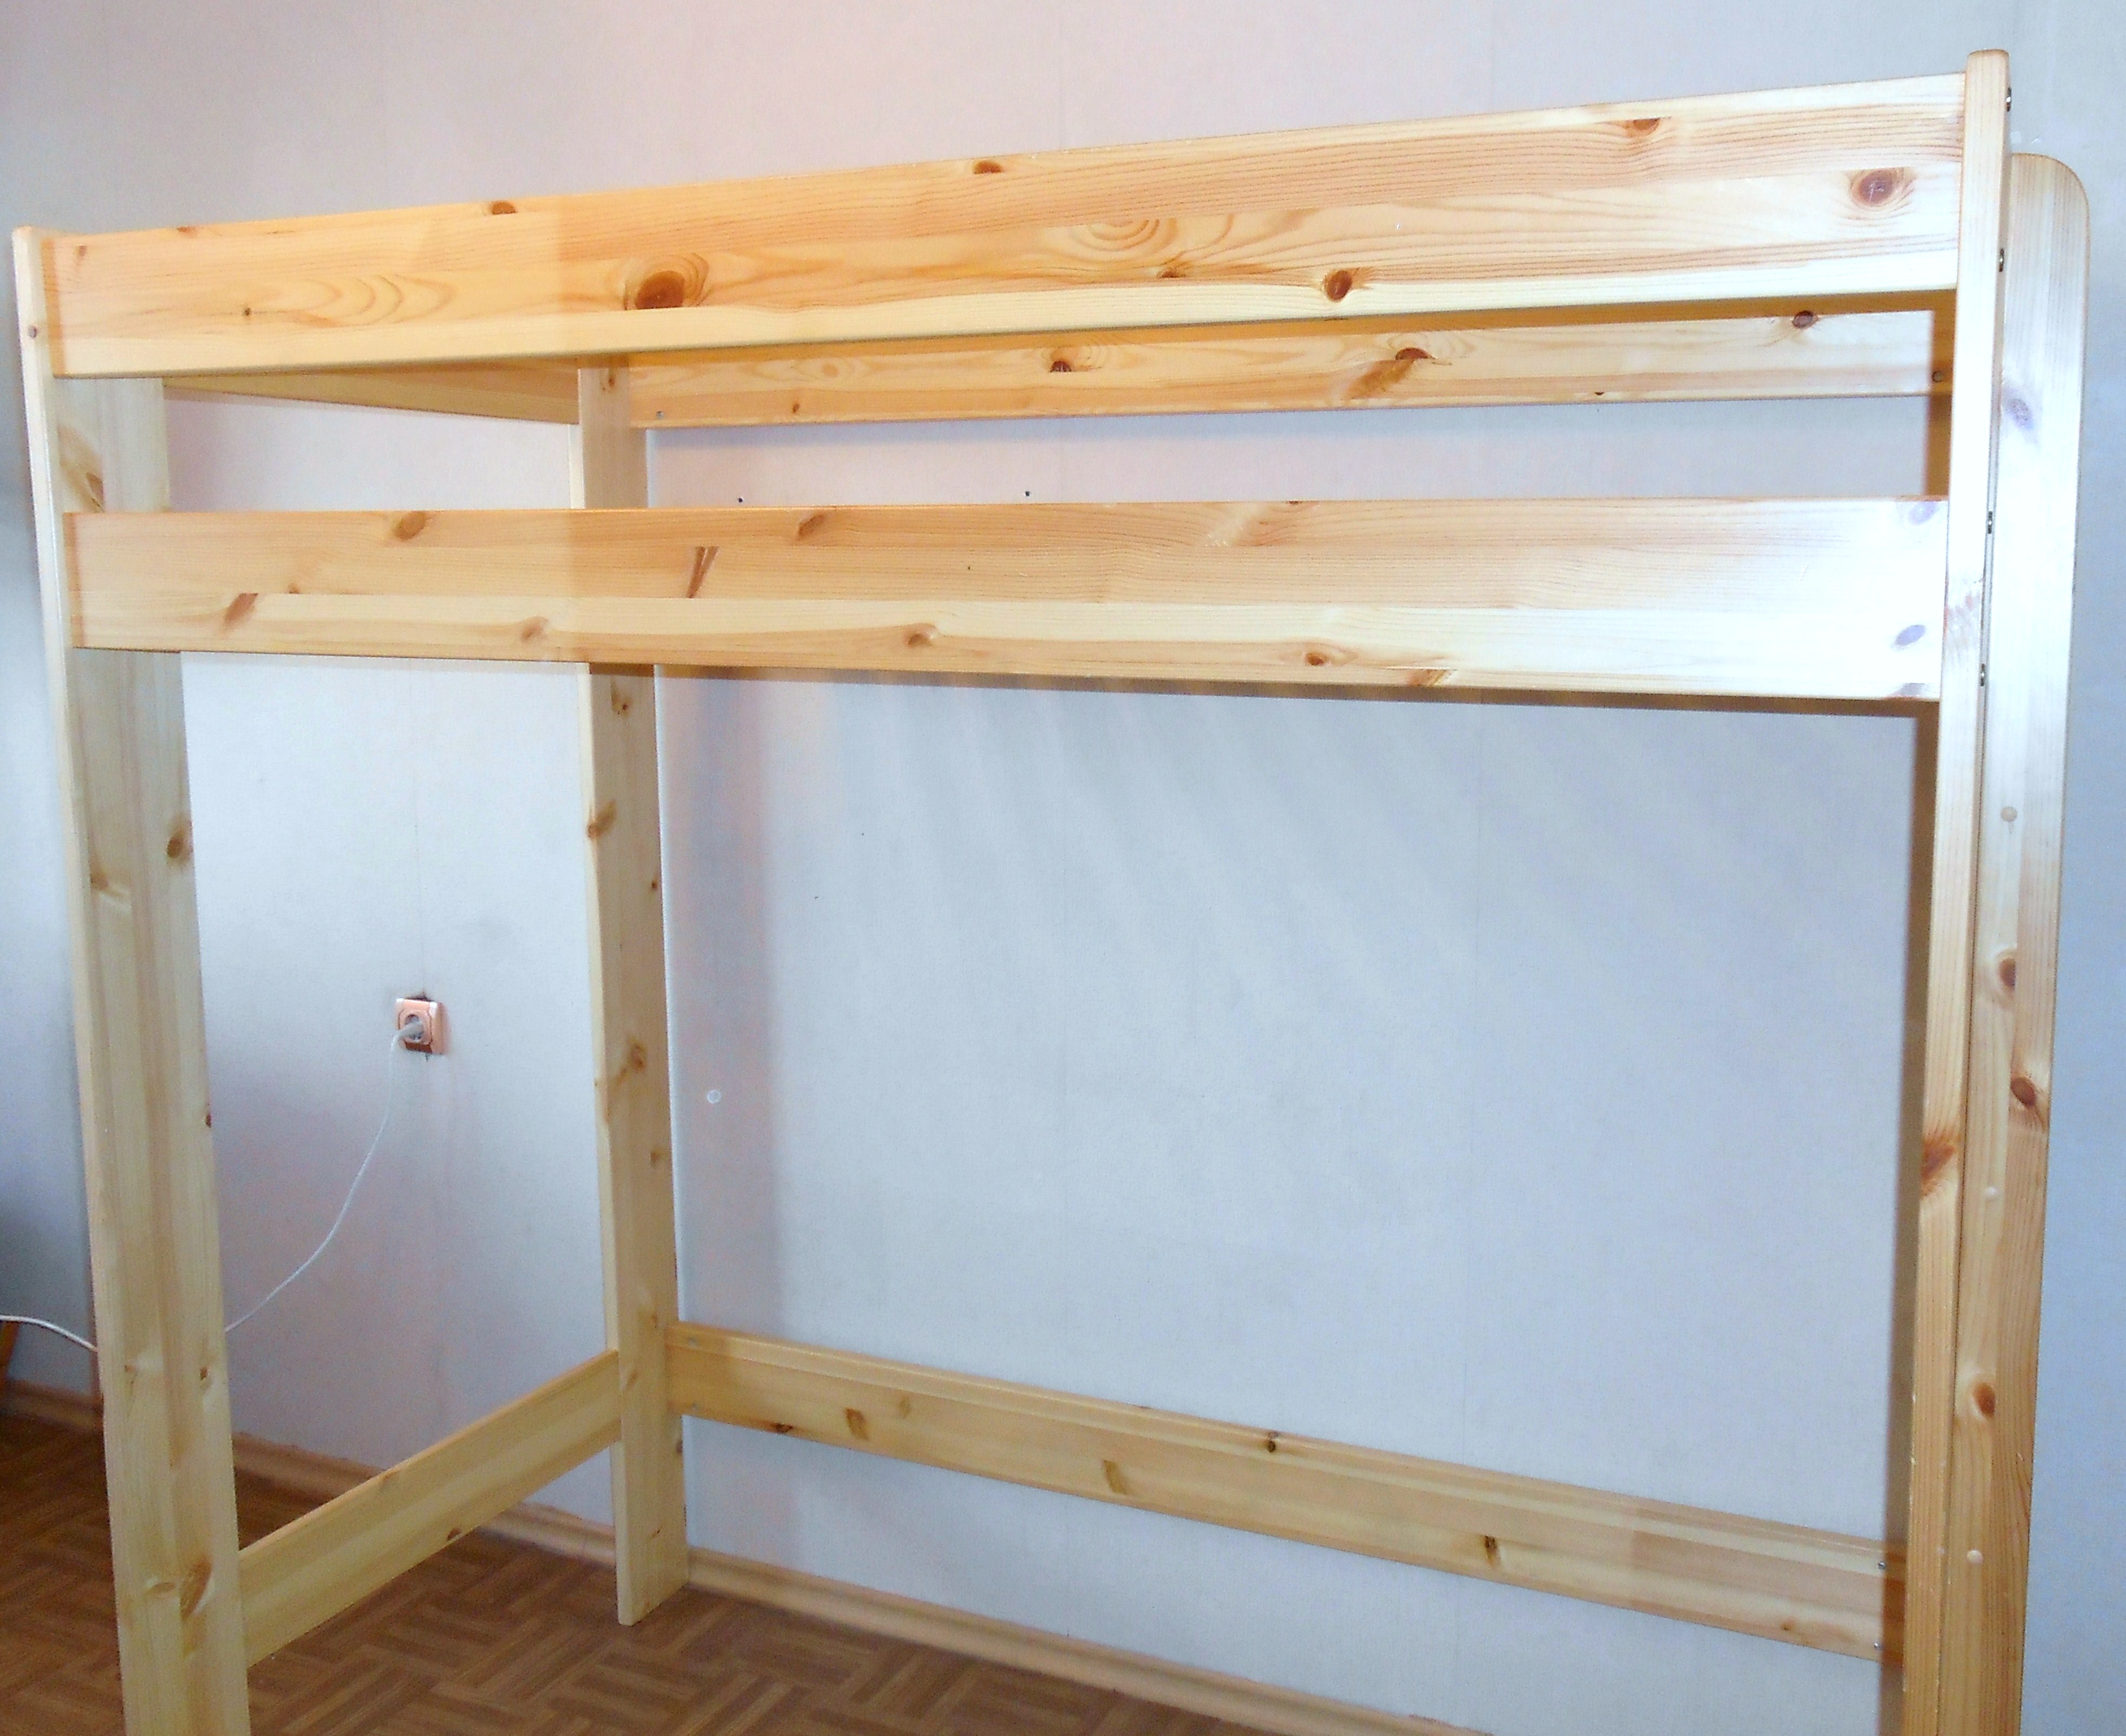
Flooring
First, support bars with dimensions of 5 by 5 cm are fixed on the inside of the structure. It is easier to fix them on self-tapping screws and the same furniture corners. The flooring will be transverse cuts of boards to the size of the base, sheets of chipboard or plywood, it is better to consider them.
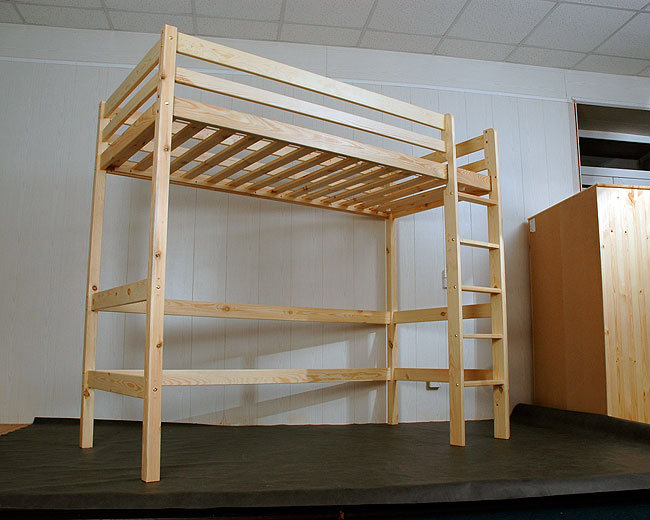
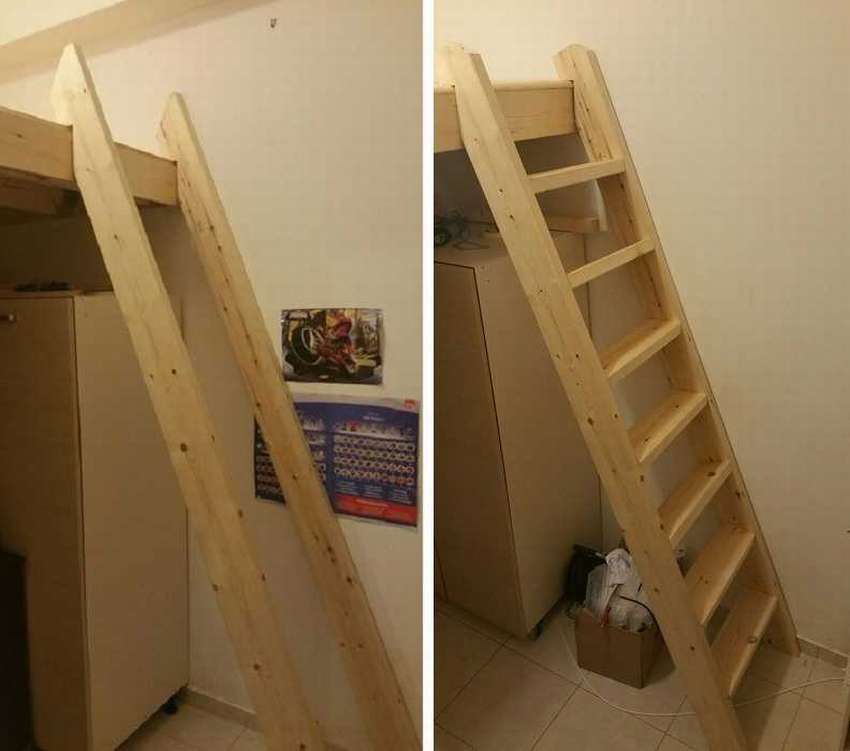
Ladder
It is proposed to make the staircase yourself from steps and a podium-support. However, if the bed is not for children, a vertical ladder, which is attached to the end of the attic bed, will suffice.
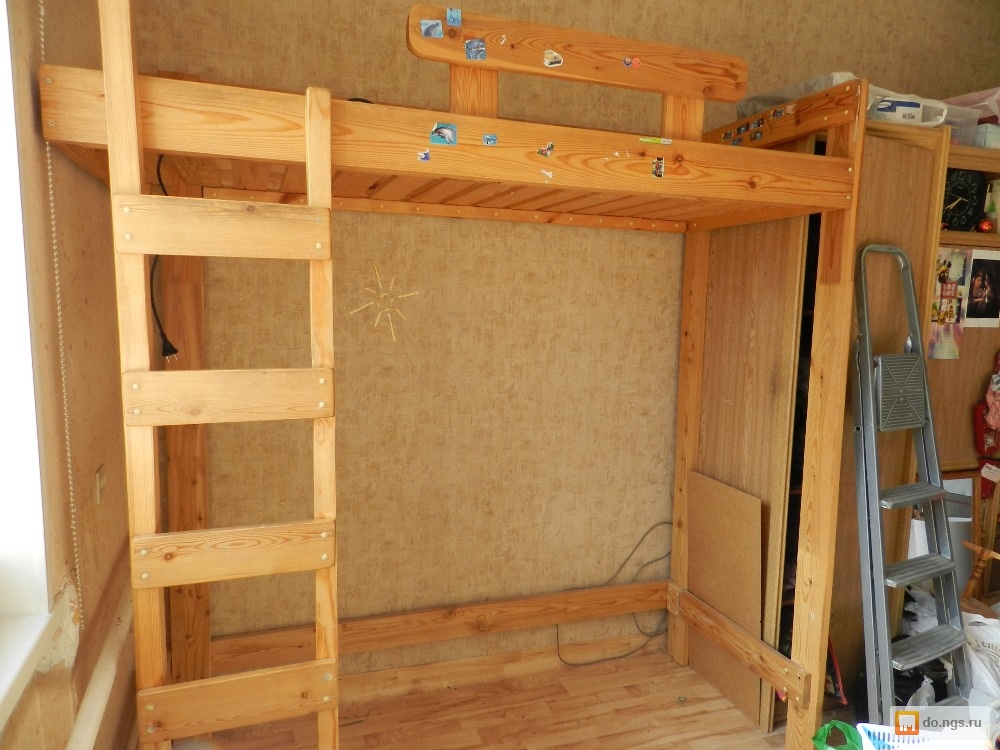
You need to collect the podium from the front frame, which becomes a support. And again we apply the thorn-and-groove method. The front frame is fixed to another support, which in the described example will be the side of the attic furniture. At this stage, stronger metal corners should be used for fastening. A wooden or plywood flooring is placed on this frame; self-tapping screws or furniture confirmations serve as fasteners.
To make a staircase under the podium, the accuracy of the cut corners is important, which means that you cannot do without a ruler and a protractor. The staircase slope also depends on what the angle is, equal to an average of 45 degrees. At the same time, the bars are fixed under the steps. The interval between them will be individual for each specific case, depending on the step of the owner of the bed. You need to fasten the support bars with self-tapping screws and corners.
Step by step assembly
When everything is done point by point, each part is ready, assembled and verified, you can assemble the bed permanently - that is, in the place where it will stand in the apartment.
The process itself is simple.
- Assembling the frame is the first step. This is the main and most extensive stage of work.
- Then you can move on to the railings, remembering to use the furniture corners. Their size is determined in advance, depending on the request of the owner of the bed, his height and age.
- The flooring will be completed faster, it will not take much time to install it. For fastening, use corners or self-tapping screws.
- The ladder completes the assembly process, you may need to install a screed for it.
Building a bed is easier than it might seem at first glance. But there is still a stage of finishing and arrangement of the lower space ahead.
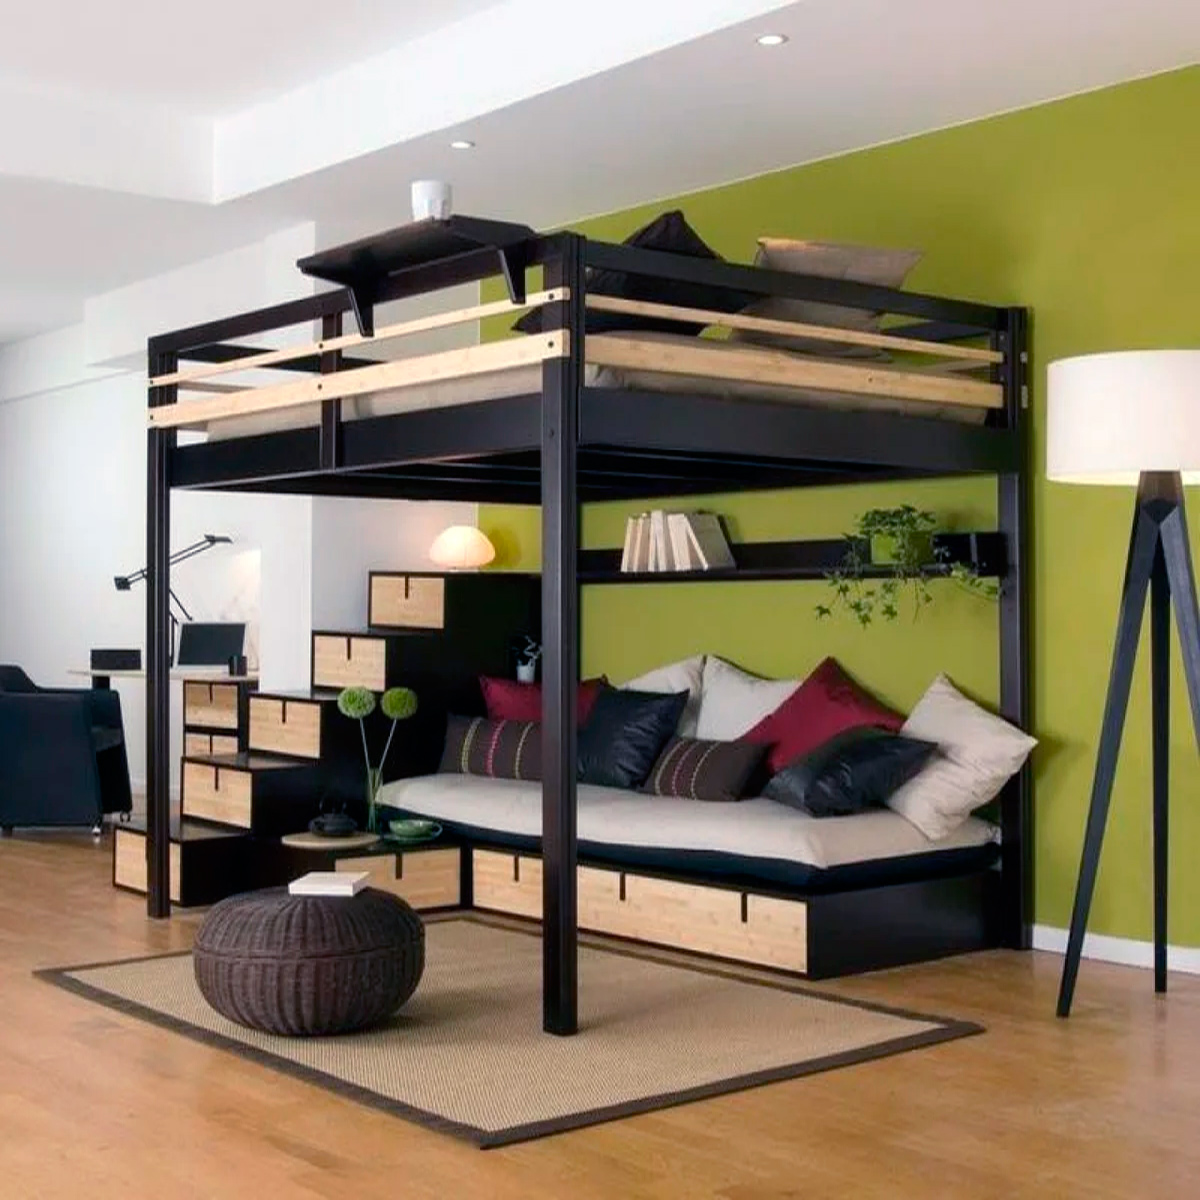
Lower zone design options
The loft bed is not only a decorative structure, therefore the space under the bed is actively and efficiently used.
What could be there?
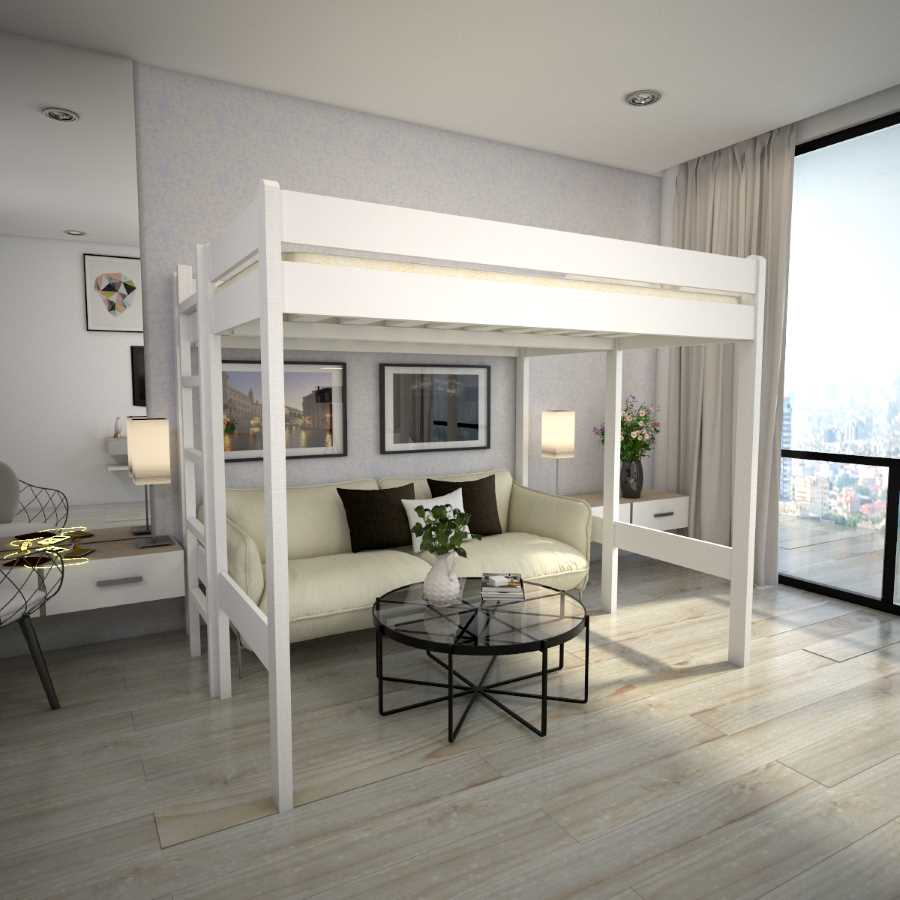
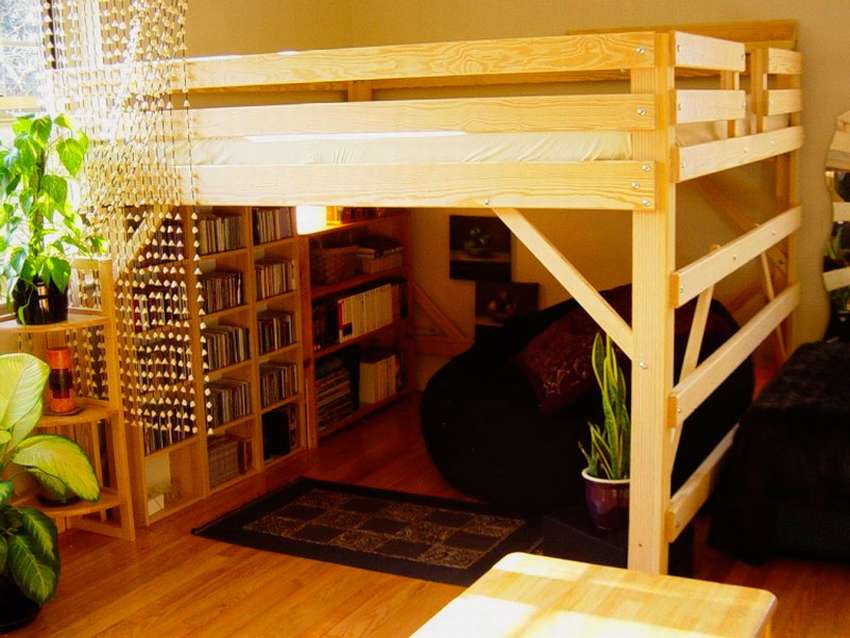
- Sofa, couch, couch - any sleeping place or resting place. In this case, it is a sofa, the back of which is formed by pillows. Above it is a shelf for books and plants. Inside the stairs and under the sofa there are drawers with additional storage space.
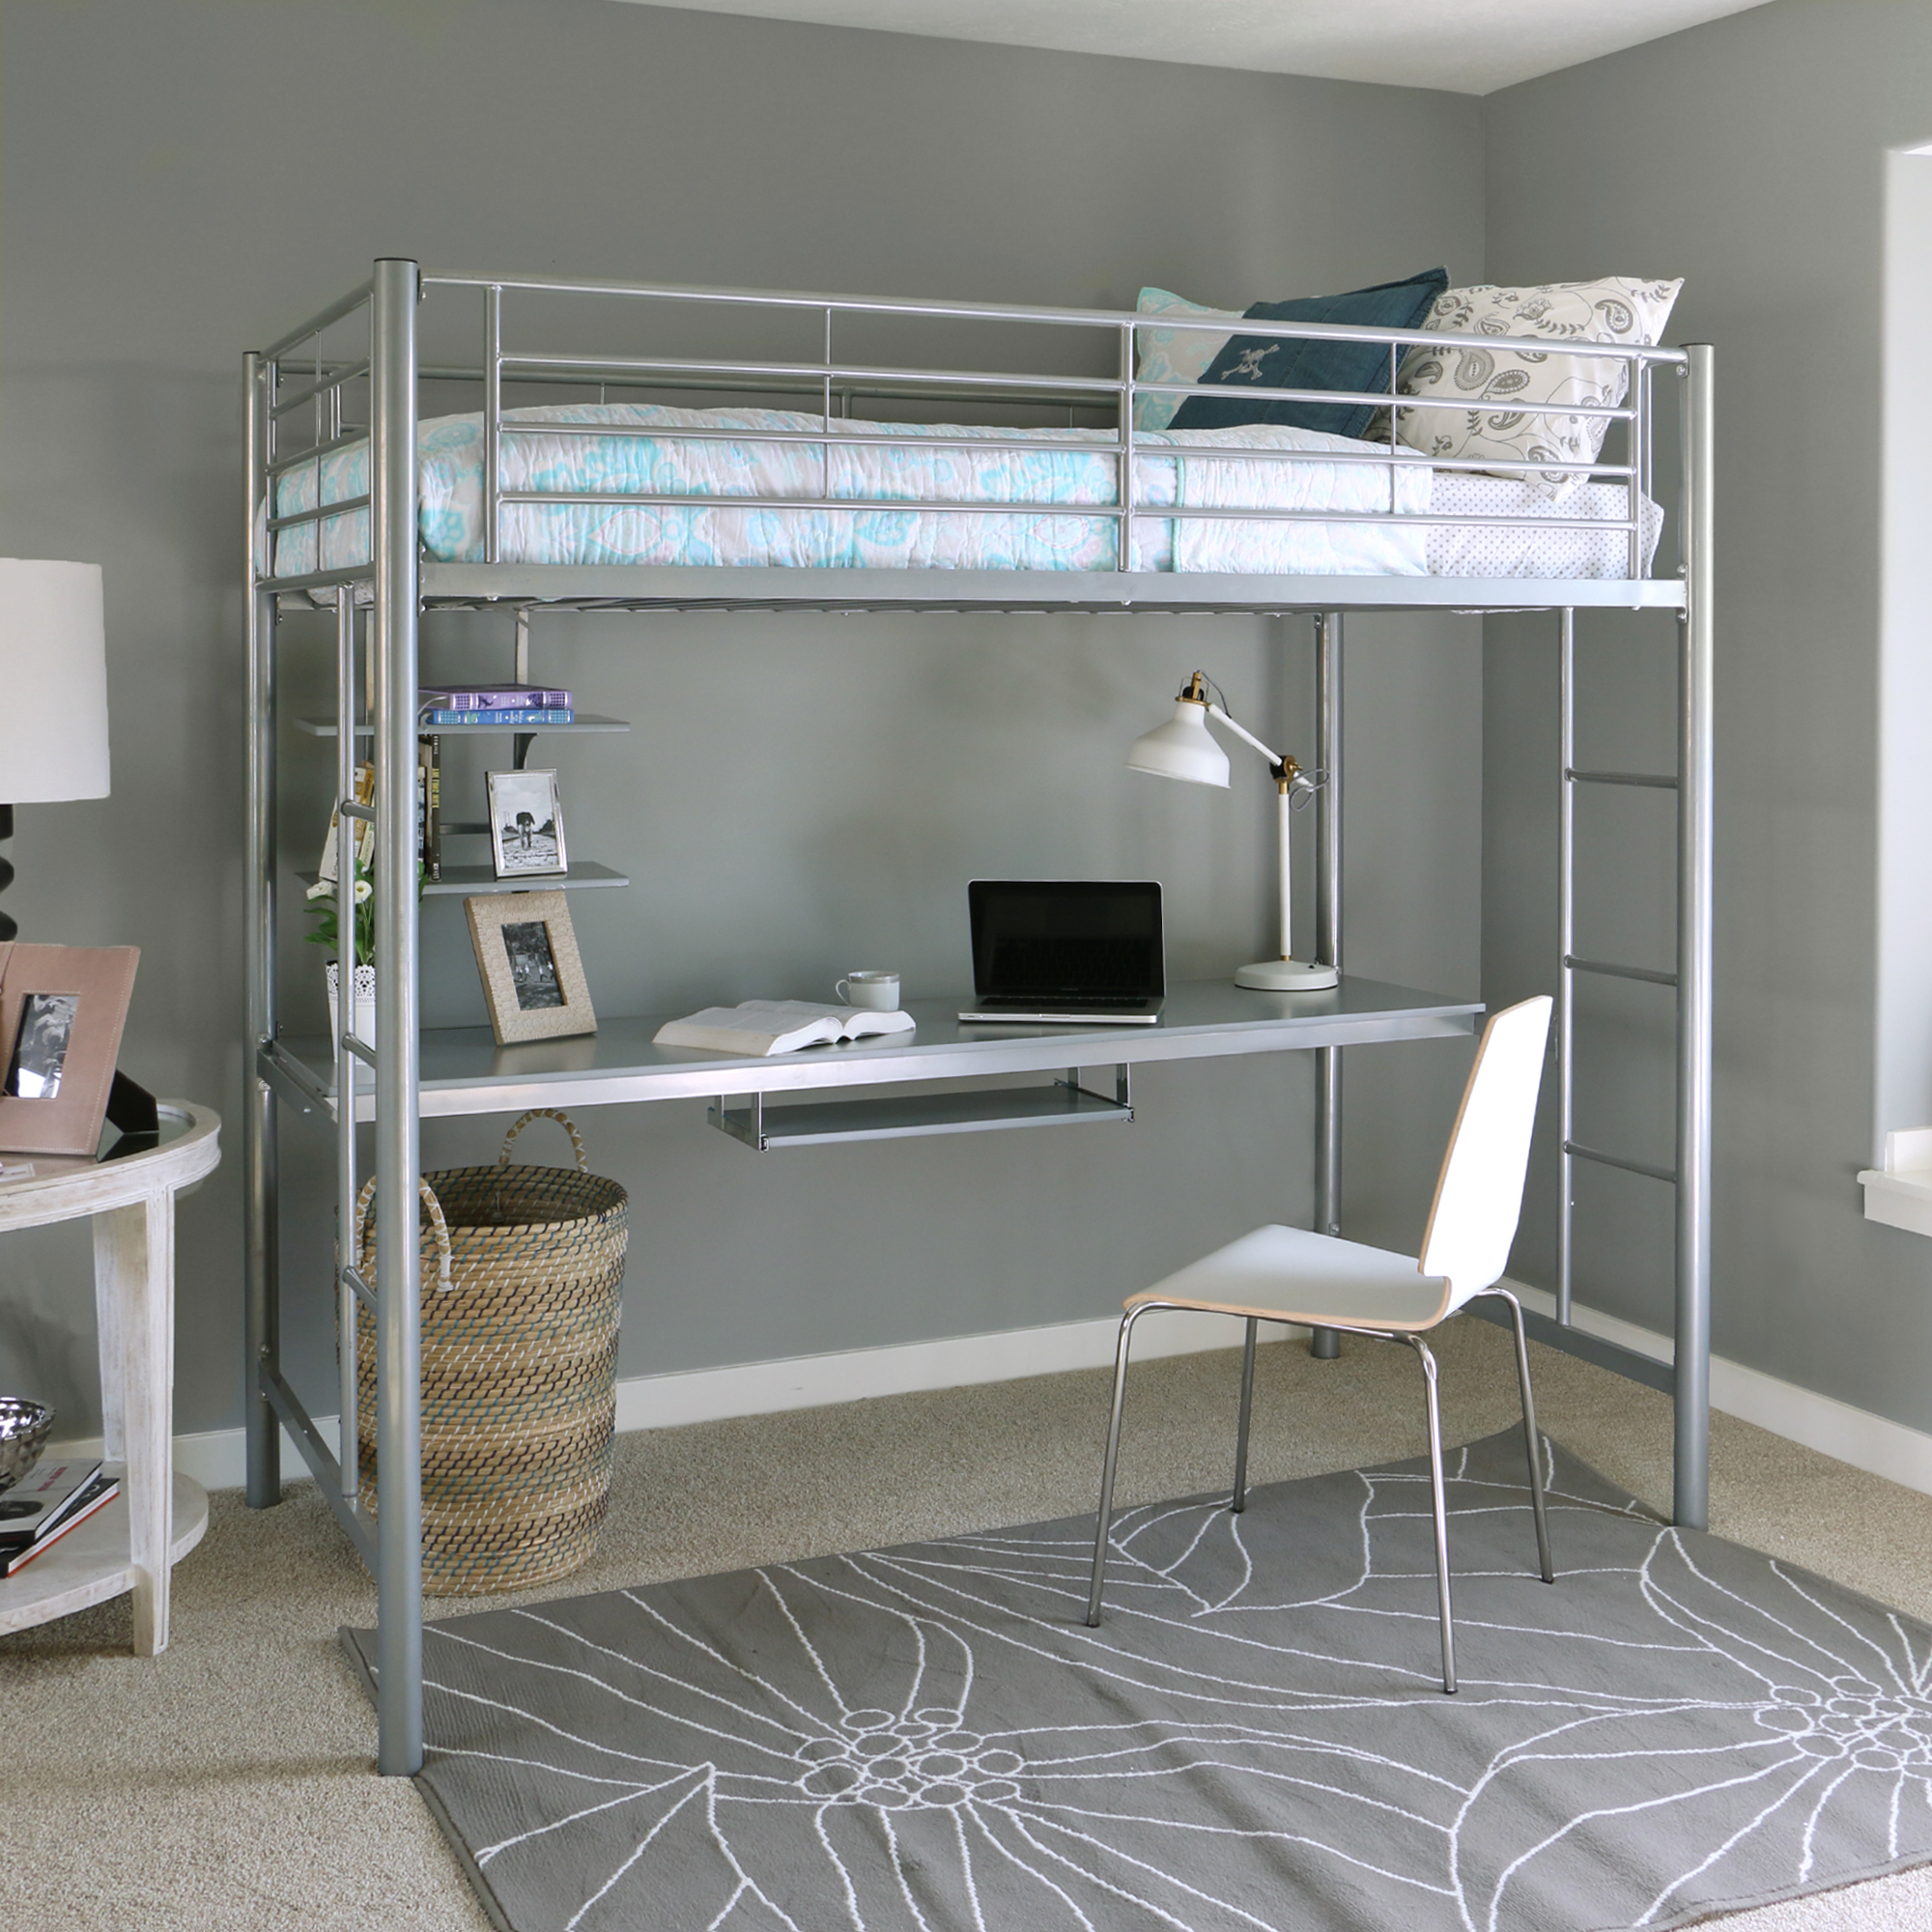
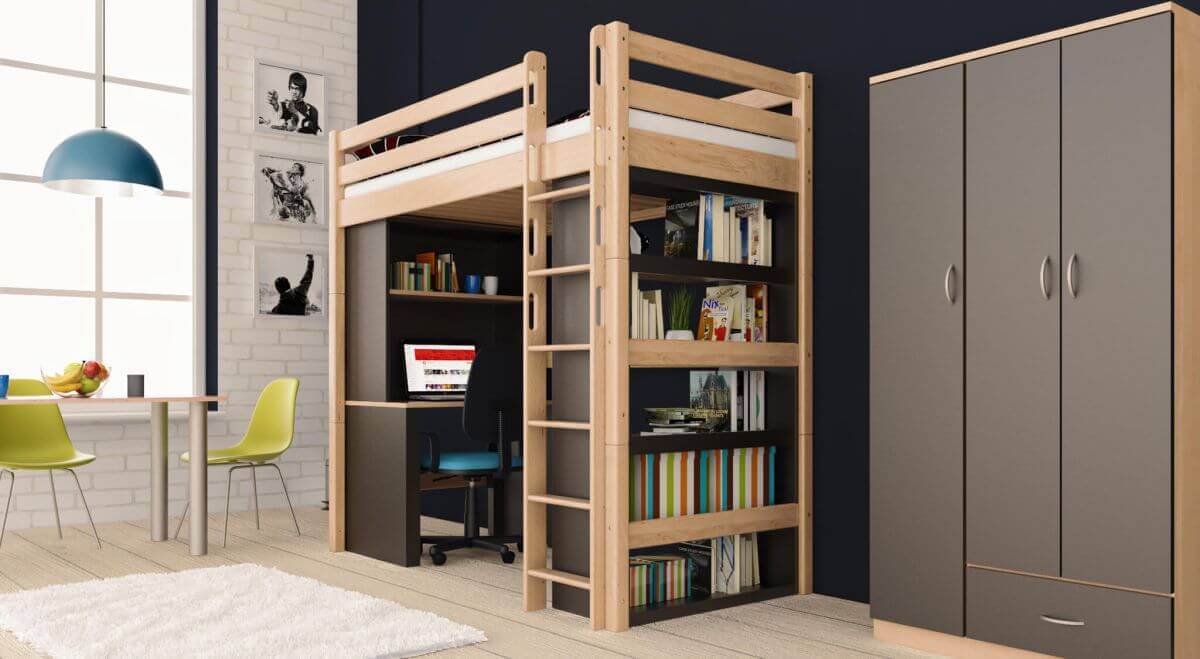
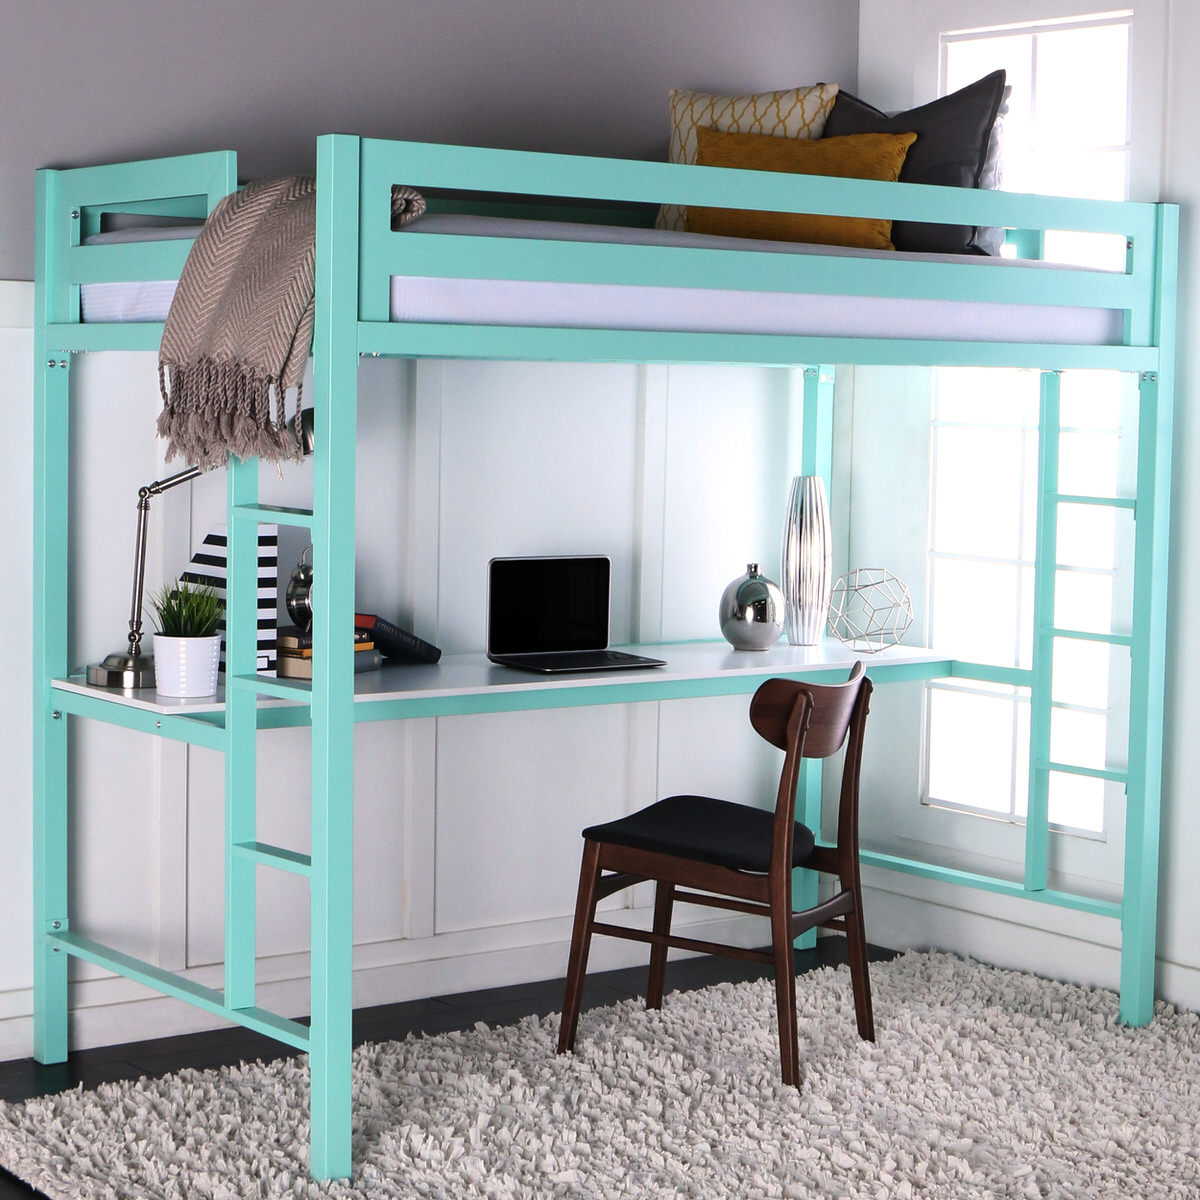
- Complete work area with table, a comfortable armchair, as well as a high roomy chest of drawers. There was a place here and a decor that will delight the eye of the worker.
- Workplace and wardrobe. Everything fits freely, one does not interfere with the other, the color matching is excellent.
- Complete wardrobe, which may not find a place elsewhere in the house, but under the bed it becomes perfect. And the staircase also serves as a kind of rack for books, decor and more.
- Media zone. Slightly unexpected solution, but definitely noteworthy. Especially if the footage of the apartment forces you to save space. A sofa, a sideboard, a TV, bookshelves - quite a lot for the bedside space. But at the top is not just a bed, but a floor on which there is not only a mattress, but also a curbstone, a chest of drawers, a mirror.
- Rest zone. A comfortable chair, a drawer for books, and also a storage system, and together everything looks soundly and harmoniously. Here you can drink tea and look through the magazine.

- Recreation area plus library. Moreover, the library turned out to be rather big. And some twilight, inevitable under the bottom of the attic bed, even suits such a zone, creates a special comfort and pleasant privacy.
- Workplace and library. For apartments with high ceilings - a profitable and laconic option. So allocating space is reasonable and appropriate.
These examples show that there are many options for arranging the lower zone, and each is good in its own way. And it is certainly very ergonomic.
Finishing
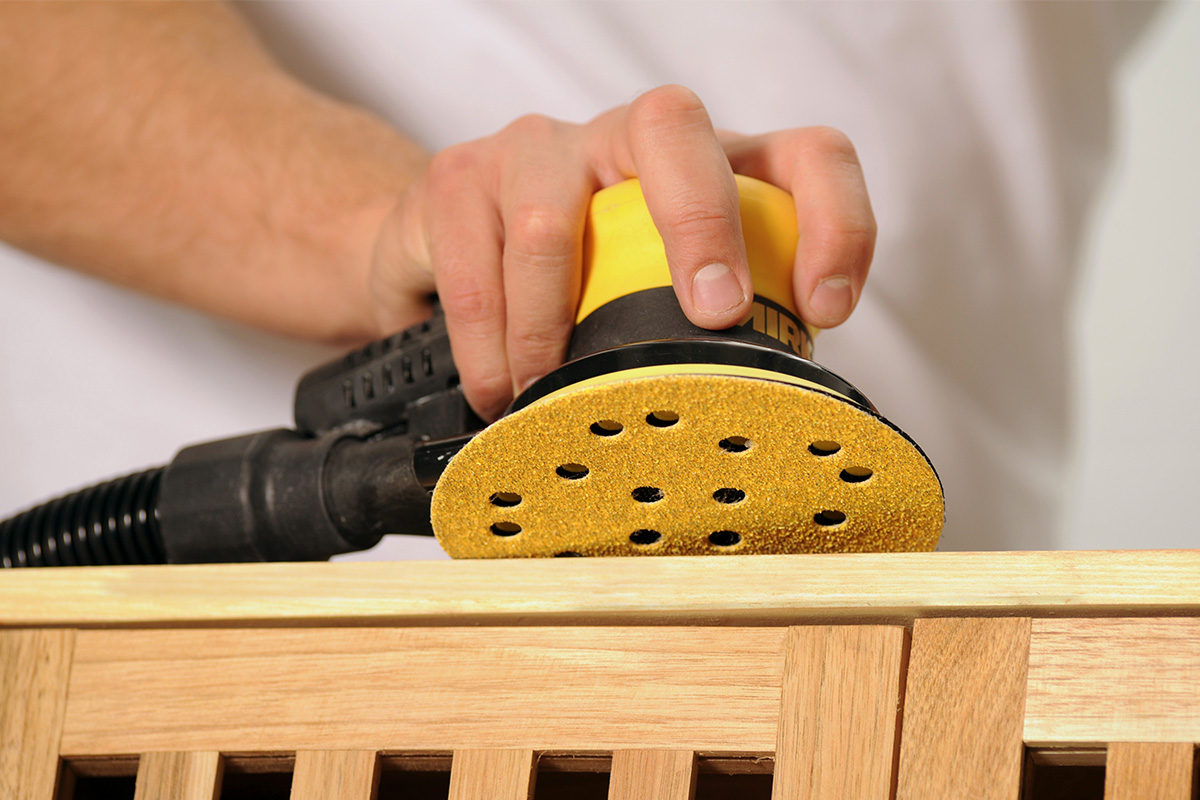
If the bed is made of wood, it will be thoroughly sanded. This will require a sander or sandpaper. The finished structure should be covered with an antiseptic, which will save the tree from rotting and attack of parasites, as well as varnish or paint, possibly stain.
What's special about finishing:
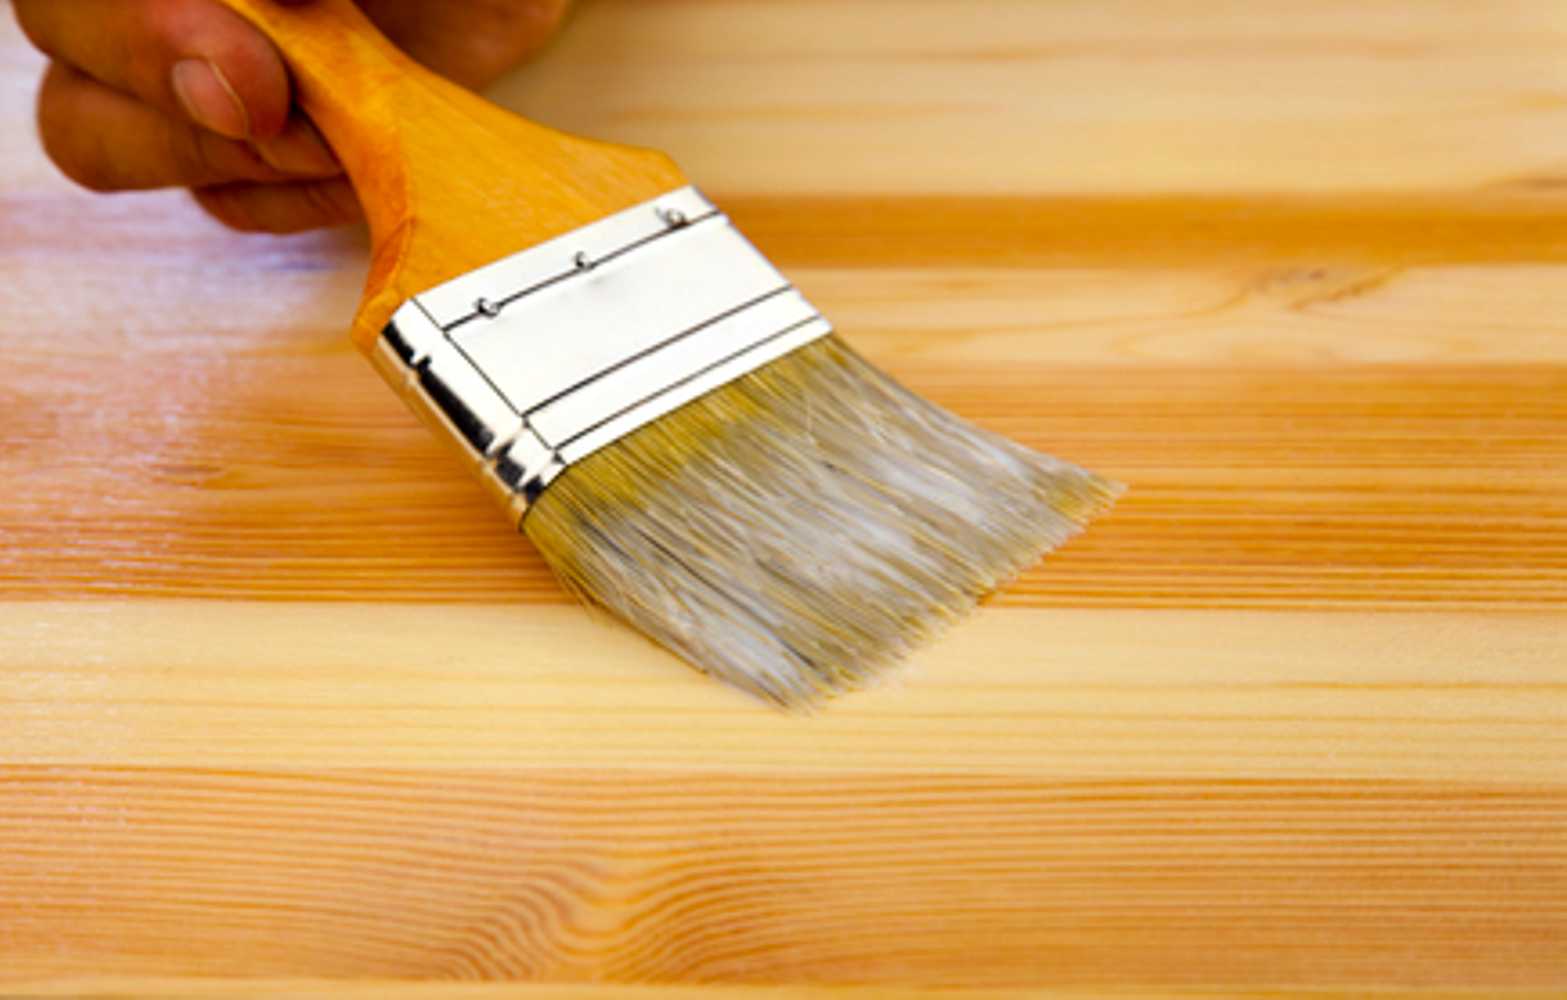
- before applying varnish, it is worth covering the tree with one layer of stain, it can be tinted, it can be transparent;
- if you want to get a rich wood color, the varnish is applied in 3 layers;
- varnish and paint dry at room temperature, optimal humidity level, in the absence of drafts;
- between each layer of finishing there should be a pause for the complete drying of the previous one;
- if you want originality, you can apply an ornament to the elements of the bed using a stencil;
- furniture can be painted with modern chalk paints, environmentally friendly and easy to use.
Colored beds are very beautiful - white, blue and even red. Of course, the color should fit into the interior. The cost price of a bed made by yourself will be at least 5 times lower than a design purchased in a store or made by craftsmen to order. And maybe this difference will be even more impressive.
How to make a loft bed for a child with your own hands, see the video.


