How to make a hallway with your own hands?
The fashion for designing furniture with your own hands according to your own diagrams and drawings has never passed. But now, it seems, this trend is tending to its peak: a huge amount of materials and tools, almost endless Internet resources, from where ideas "float", and plans for their implementation turn ideas into ready-made projects. A great reason to try is the arrangement of the hallway.

Which material should you choose?
It should start with the fact that blindly copying someone's calculations is not very correct: even if the person in the video shows step by step how he assembles a wardrobe for a typical hallway, the nuances of finishing, plaster layers, ceiling and floor decoration can make adjustments to the project numbers. In dimensions, indents, fastening steps, etc. Therefore, everything and always needs to be measured in the current context, and already using someone's scheme, adapt it to your conditions.
As for the choice of materials, everything is simpler here.
The appearance and technical parameters are universal, except that the indicators of humidity and temperature in the hallway can share the choice, the same material in different conditions will differ in the features of operation.
But even these are nuances that do not affect preferences so much.
And these material requirements are considered basic.
- Moisture resistance. The material chosen for the arrangement of the hallway should not suffer from contact with wet objects, clothes, umbrellas, bags, etc. Still, the hallway is a kind of buffer zone between the street and public space and personal area where people do not wear outer clothing ... The outer layer of furniture must be waterproof, otherwise such furniture will not last long, and the cost of constructing the hallway will not pay off.
- Abrasion resistance. Doors, shelves will be used every day. They will put bags on them, put a variety of objects, including those with metal parts. That is, a plywood or drywall shelf becomes vulnerable to such conditions. This does not mean that only metal furniture will be resistant, there are more affordable and effective options.
- Strength. The hallway may have enough storage space, and not just light clothes and cosmetic bags. Tools can be stored there, and therefore the shelves must be strong, possibly with a metal profile body.
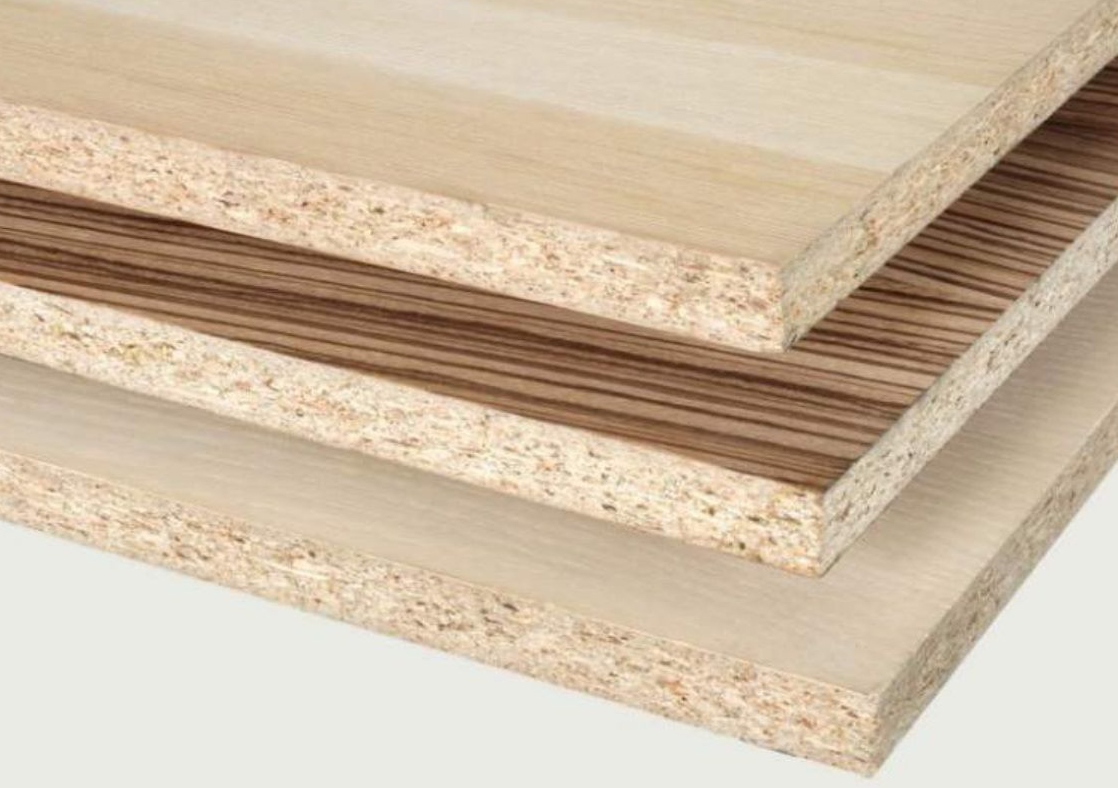
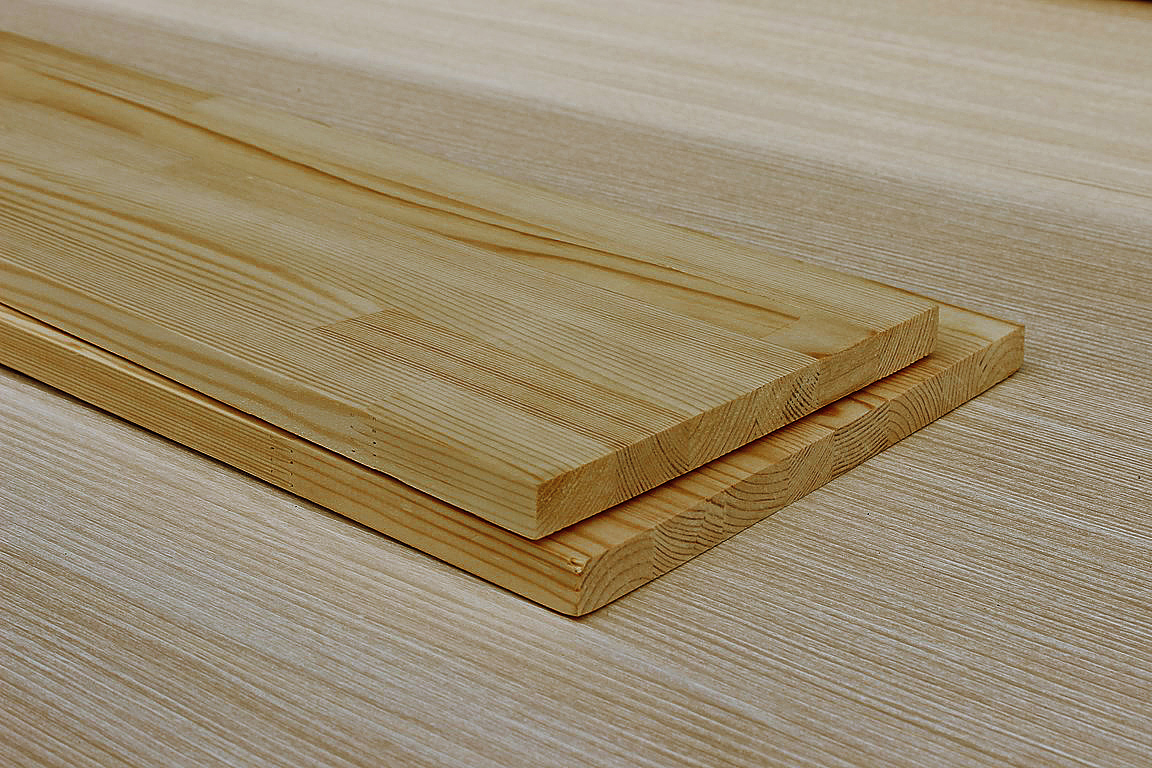
Specifically, you can use the following materials: chipboard, chipboard, MDF, solid wood and fiberboard. Only, for example, fiberboard (hardboard) is used exclusively for decorating the rear walls of furniture, which are not subjected to mechanical stress. The material is easy to cut, it will calmly endure more than one wet cleaning, and its appearance is not important.
Characteristics of other materials.
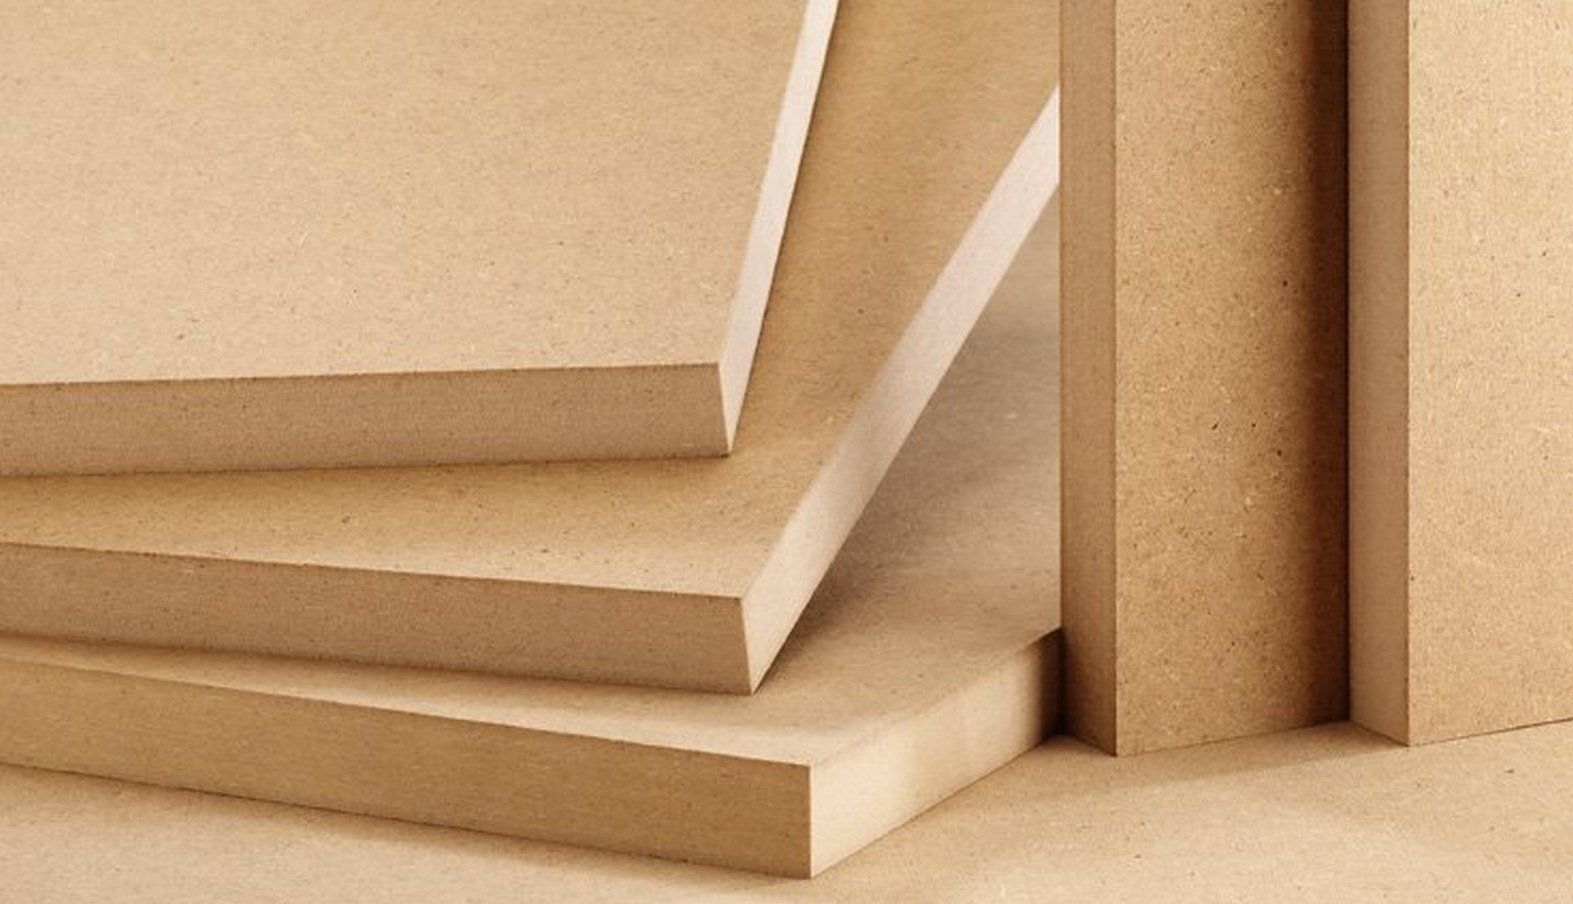
- MDF. Finely dispersed dried sawdust, as well as their binding components. They are stacked in layers, which is aided by the hot pressing method. The product will be durable and resistant to moisture. True, it is more difficult to process it, if it is already decided to make the hallway yourself.
- Chipboard. These are laminated particle boards. They are often used to decorate the floor and walls, as well as the ceiling. The laminate itself is a paper-polymer film that protects well against abrasion and wetting.
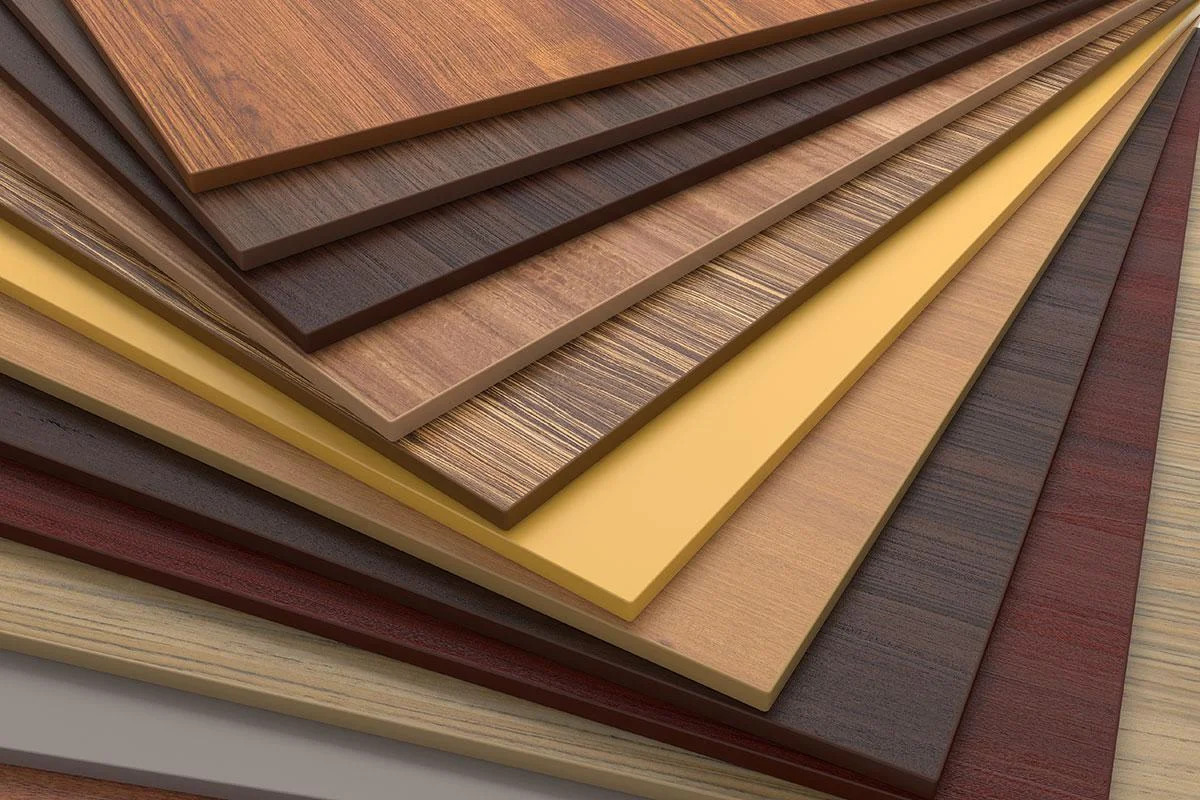
- Chipboard. The boards are made up of sawdust and glue. Products covered with veneer or melamine paper are considered successful. Such material is not afraid of dampness, as well as "chemistry". You do not need to process them additionally.
- Natural array. The main advantage of the array is the appearance, but the veneer copes with this.That is, the use of natural wood is usually more a matter of principle than rationality. The massif is not so resistant to deformation caused by temperature and humidity. There are many defects in natural wood, its fibers, alas, can rot. You will need different impregnations and antiseptics, varnish coating, etc. That is, it is definitely impossible to call this material ideal for designing a hallway.
But the choice is always up to the author of the furniture, and it also depends on the possibilities, conditions in which the hallway will be assembled. For example, you have to tinker with an array, which means that this requires both space and time.

Required tools
There is a so-called basic set, which should be sufficient for performing simple operations. Perhaps it will have to be expanded due to the nuances of the project.
What's in this set:
- tape measure and pencil - as already noted, measurements are strictly required;
- hacksaw, jigsaw - what will be used to "prepare" the material;
- screwdriver, screwdrivers - for connecting parts;
- sandpaper or grinder with a diamond disc;
- carpentry knife.
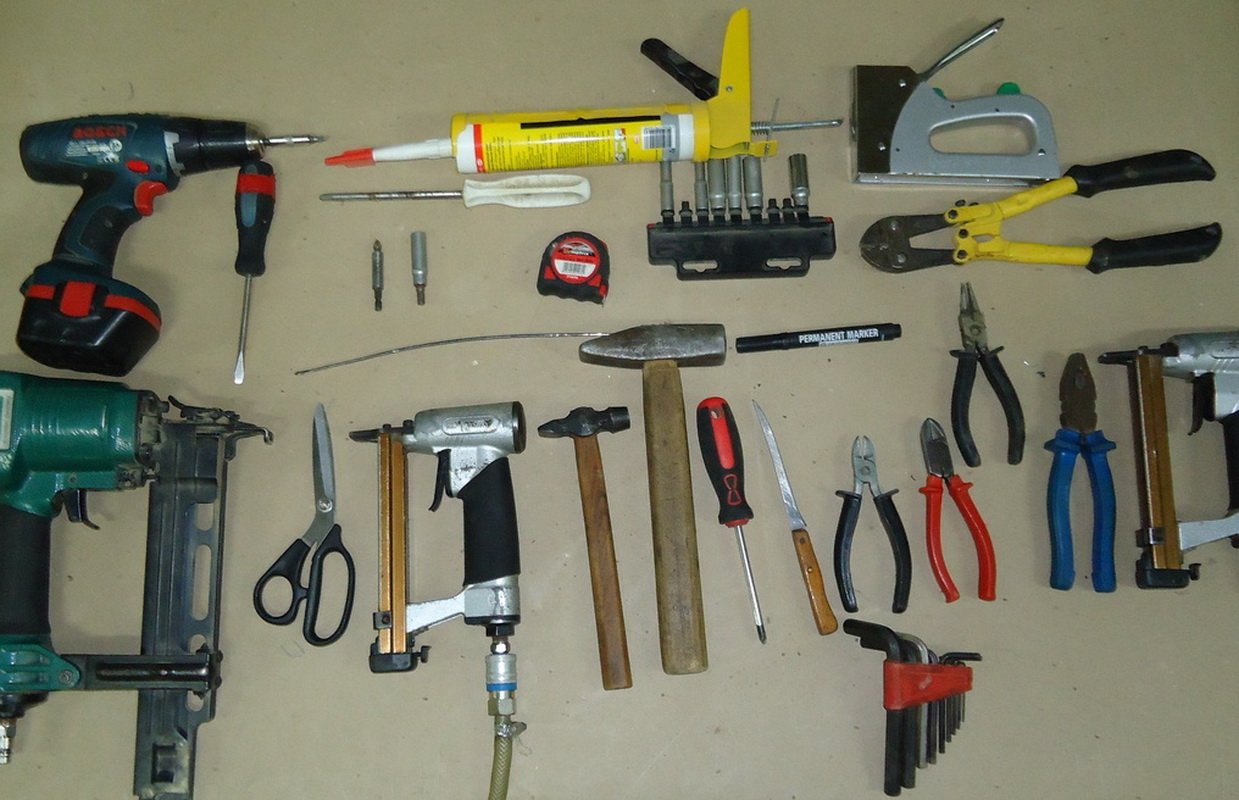
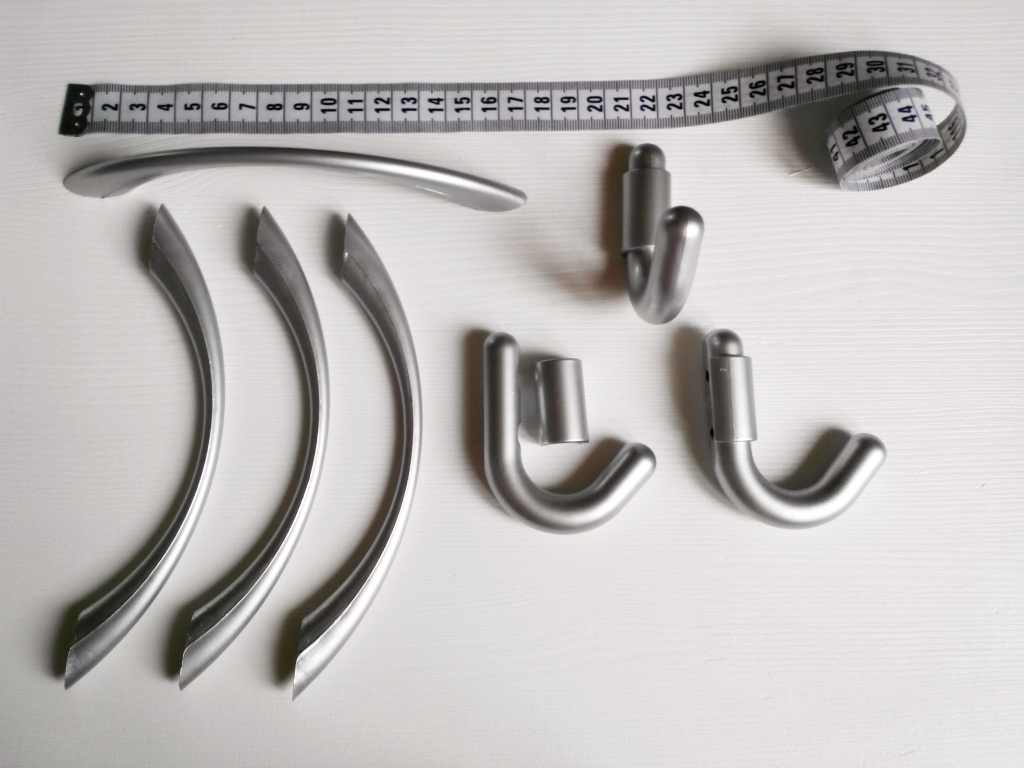
But fittings may need more than tools. Therefore, in the building market, you cannot go past the department with corners, hinges, furniture handles, door closers, a bar for hangers, adjustable legs, runners from a drawer, basket holders, etc.
Making a regular model
First you need to decide on the dimensions of a simple but functional wall for the hallway.
We perform material calculations as follows.
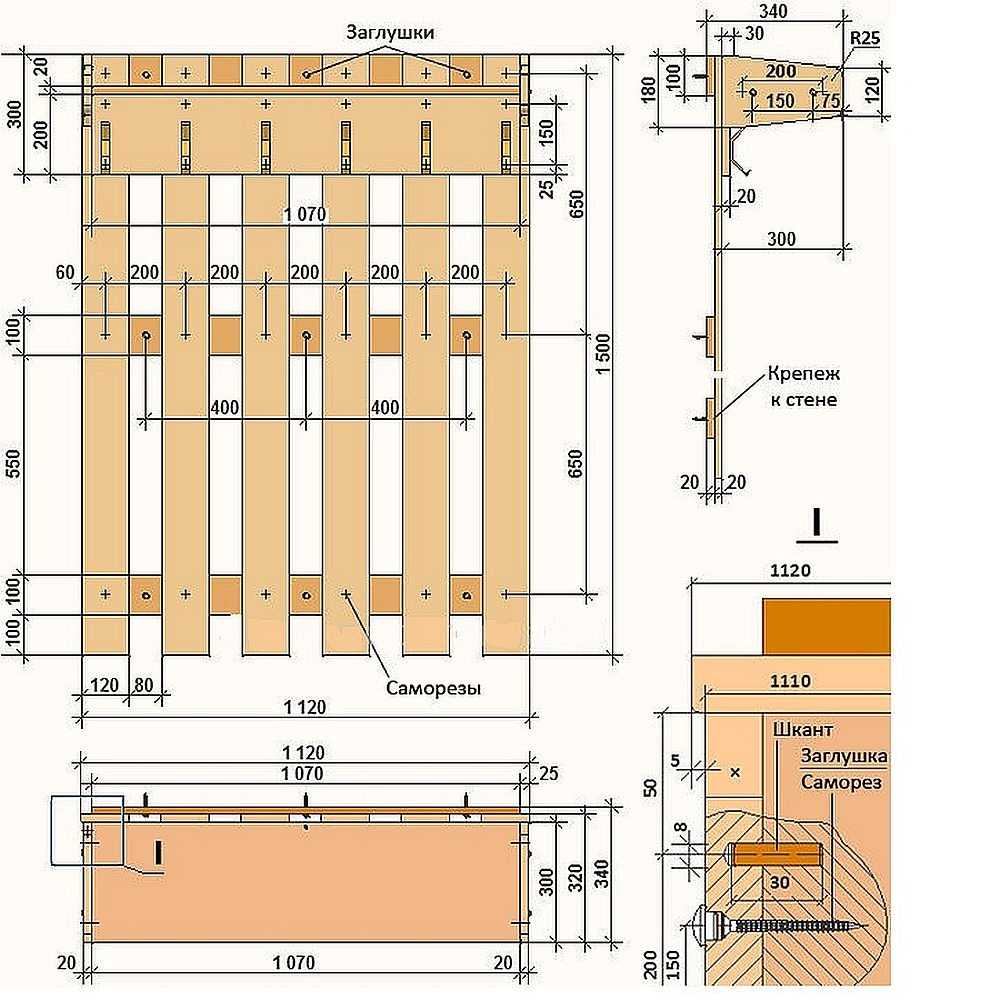
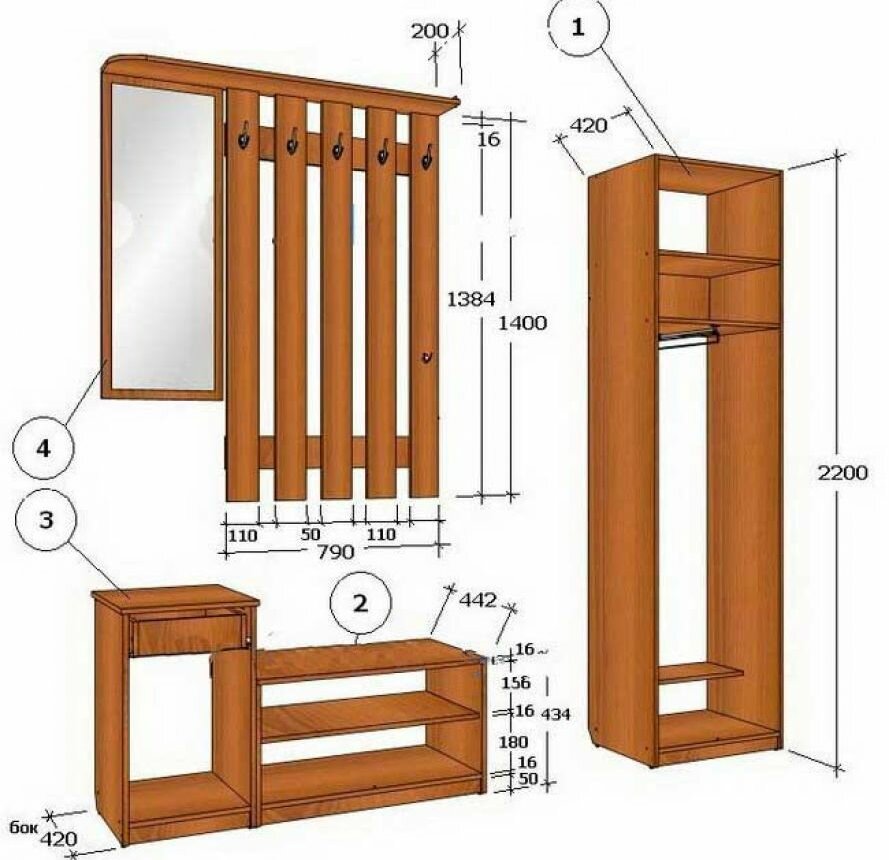
- The basic (standard) column dimensions are 2x0.4x0.4 m. To form the back wall, a laminated chipboard sheet with sides of 1.6x0.4 m will be required, and a zoning shelf, the top and bottom of the furniture will also be cut from it. The sheet should be taken with a thickness of 18 mm.
- We take the width of the inner space 364 mm, the width of the inner shelf is the same. The height of the walls is 1964 mm.
These dimensions go under the wardrobe wall, which will suit different interiors of a typical, not very large corridor.
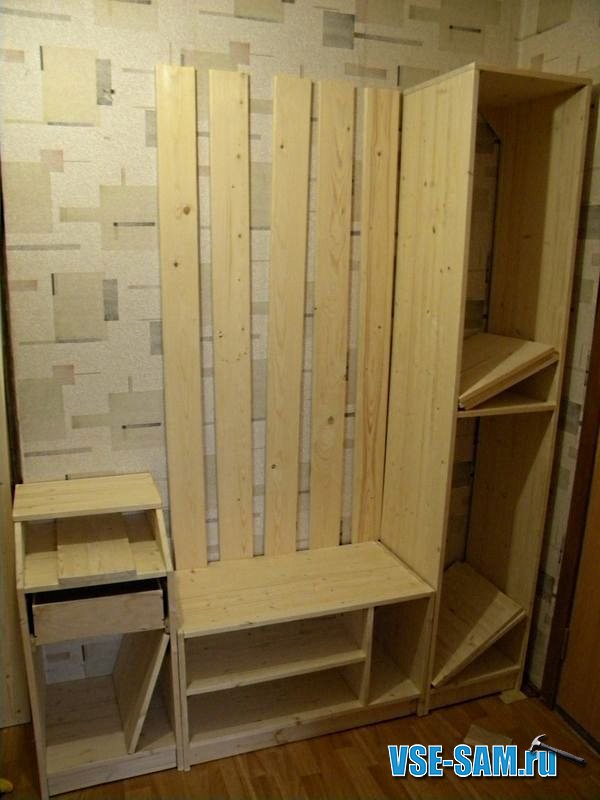
A simple hallway model step by step.
- The upper part, as well as the lower one with installed legs, must be fixed to the ends of the model.
- The sides are pulled together with corners, they will give stability to the furniture. The shelf is placed on the holders. The back will be hardboard.
- There can be one door, but you can attach two. They will cover the two interior zones separately. This is a good solution as it will reduce the stress on the fittings. The rod is screwed to the ceiling.
- Now you can fix the lower block to the column, it is represented by a pair of pedestals. They can be different in width and height, assumptions are possible. The closest cabinet is made with two doors, in height it is equal to the depth of the cabinet. The distant curbstone is divided by a shelf: you can make the curbstone 20 cm higher and twice narrower.
- Under the countertop there will be a drawer that can be freely drawn inside. Its parameters will be affected by the side skids. The bottom is traditionally cut from hardboard.
- There will be hangers above the curbstones. They will be based on vertical laminated chipboard strips, which are placed at equal intervals. From above they are fixed by a shelf on holders of a triangular shape (can be made from scraps of material).
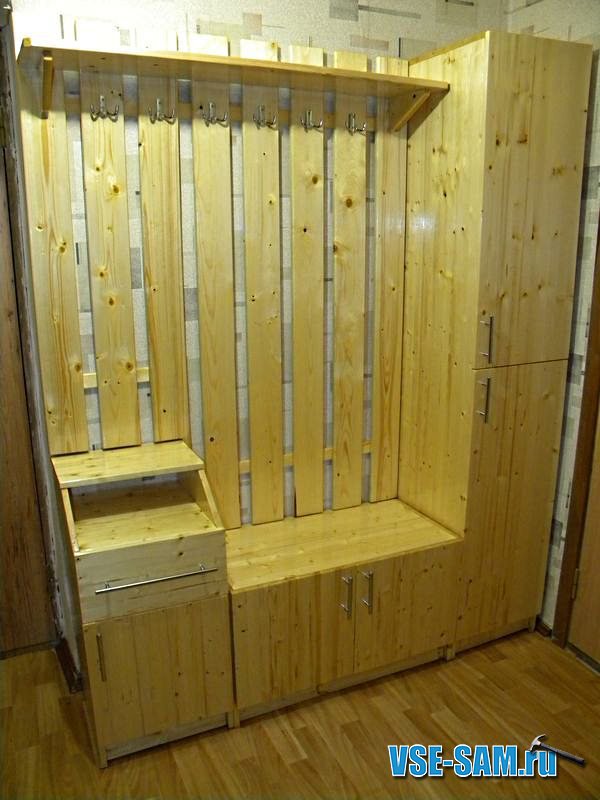
This is an example of a simple, but most functional non-separable model, if you want to make exactly the wall, and not a separate wardrobe or wardrobe, a chest of drawers with a mirror, etc. By the way, a mirror can be on the door.
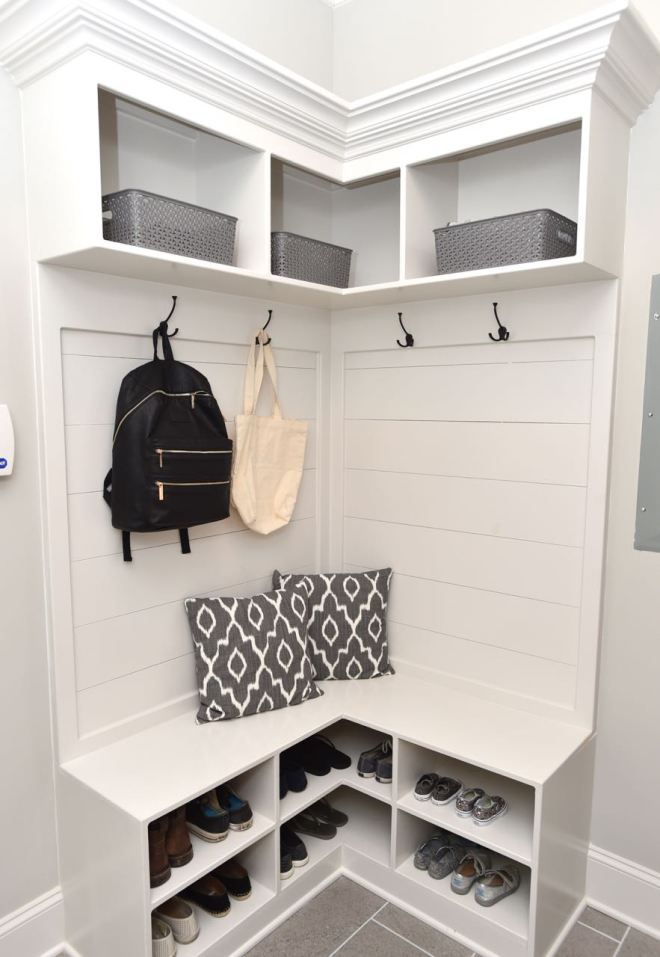
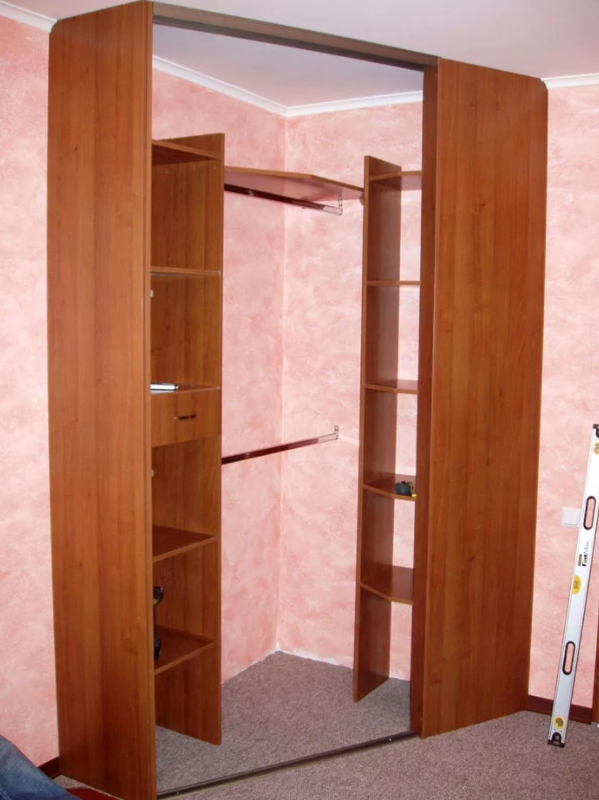
Homemade corner hallway
Corner furniture requires even more attention to measurements, because unaccounted centimeters are worth the consistency of the entire structure.
Taking measurements, checking the walls is the first thing to start designing a hallway. If the wall surface is crooked, you will have to make a common frame, whatever one may say. If the walls are even, everything is simpler, they will become the basis of the cabinet.
But even, ideally and categorically, walls are a rarity. Therefore, in this example, there will be a cabinet with inner walls.These two drawings are considered universal examples of comfortable, roomy, ergonomic models of corner hallways.
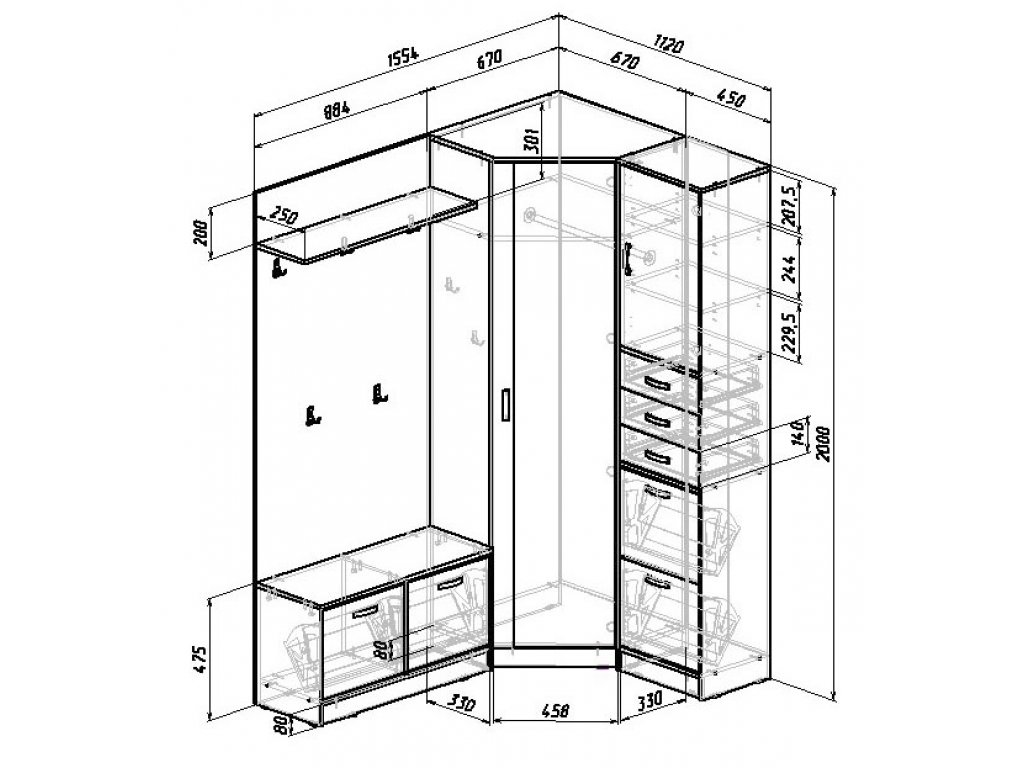

There are 6 parts to be made for the case:
- upper strips and lower;
- back walls;
- side walls that increase the functionality of the product.
First, the frame is assembled, then the internal shelves, boxes and baskets, rods and hooks are installed. The principle "from more to less" does not change. It is very convenient for a corner hallway to use doors on a roller mechanism, and then it will actually be a corner wardrobe. Plus, it's a good option for confined spaces.
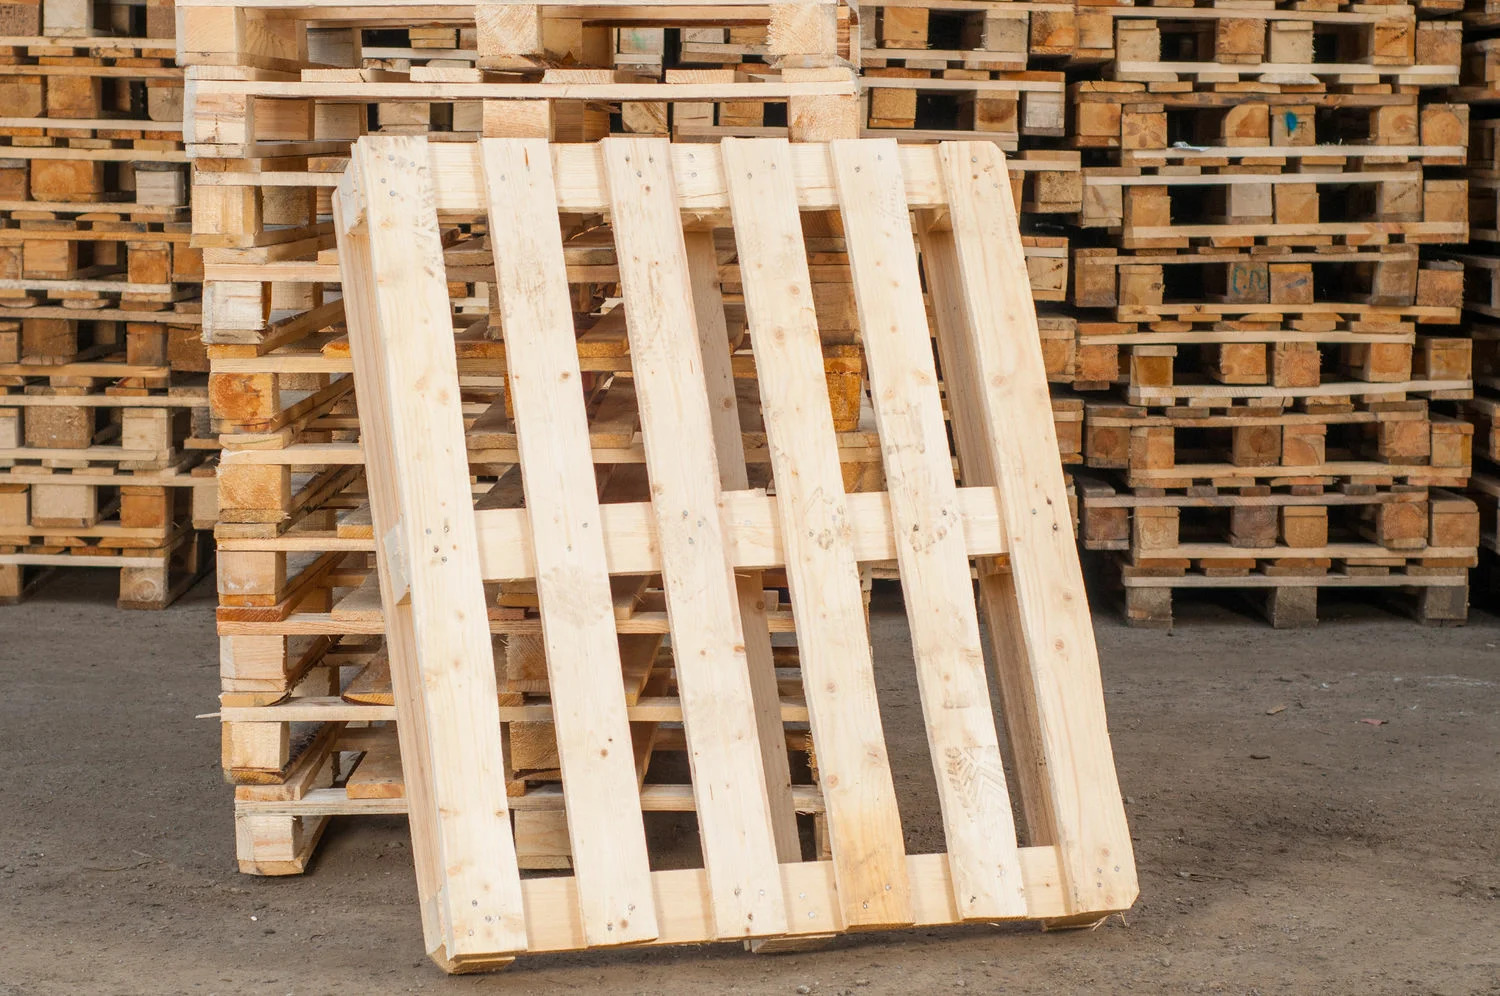
How to make from pallets?
Pallets (or pallets) have become a convenient, practical and cheap construction product.
Previously, such options were used mainly for country furniture, but now unusual modules have become so thoughtful and relevant that they are not just suitable for an apartment, but become desirable objects. The reason for this is the dominance of democratic interior styles, such as scandi, country, etc.
Preparation
To make such a budget option yourself, you need to prepare a hacksaw, sandpaper, screwdriver and nail driver, as well as wood screws with many turns. Also, the selection of pallets itself should be included in the preparation: you will have to take those that look stronger and are proportional to each other. With a high probability, the finished set will then be painted or stained, so the difference in the shades of the pallets is not so fundamental.
Step-by-step instruction
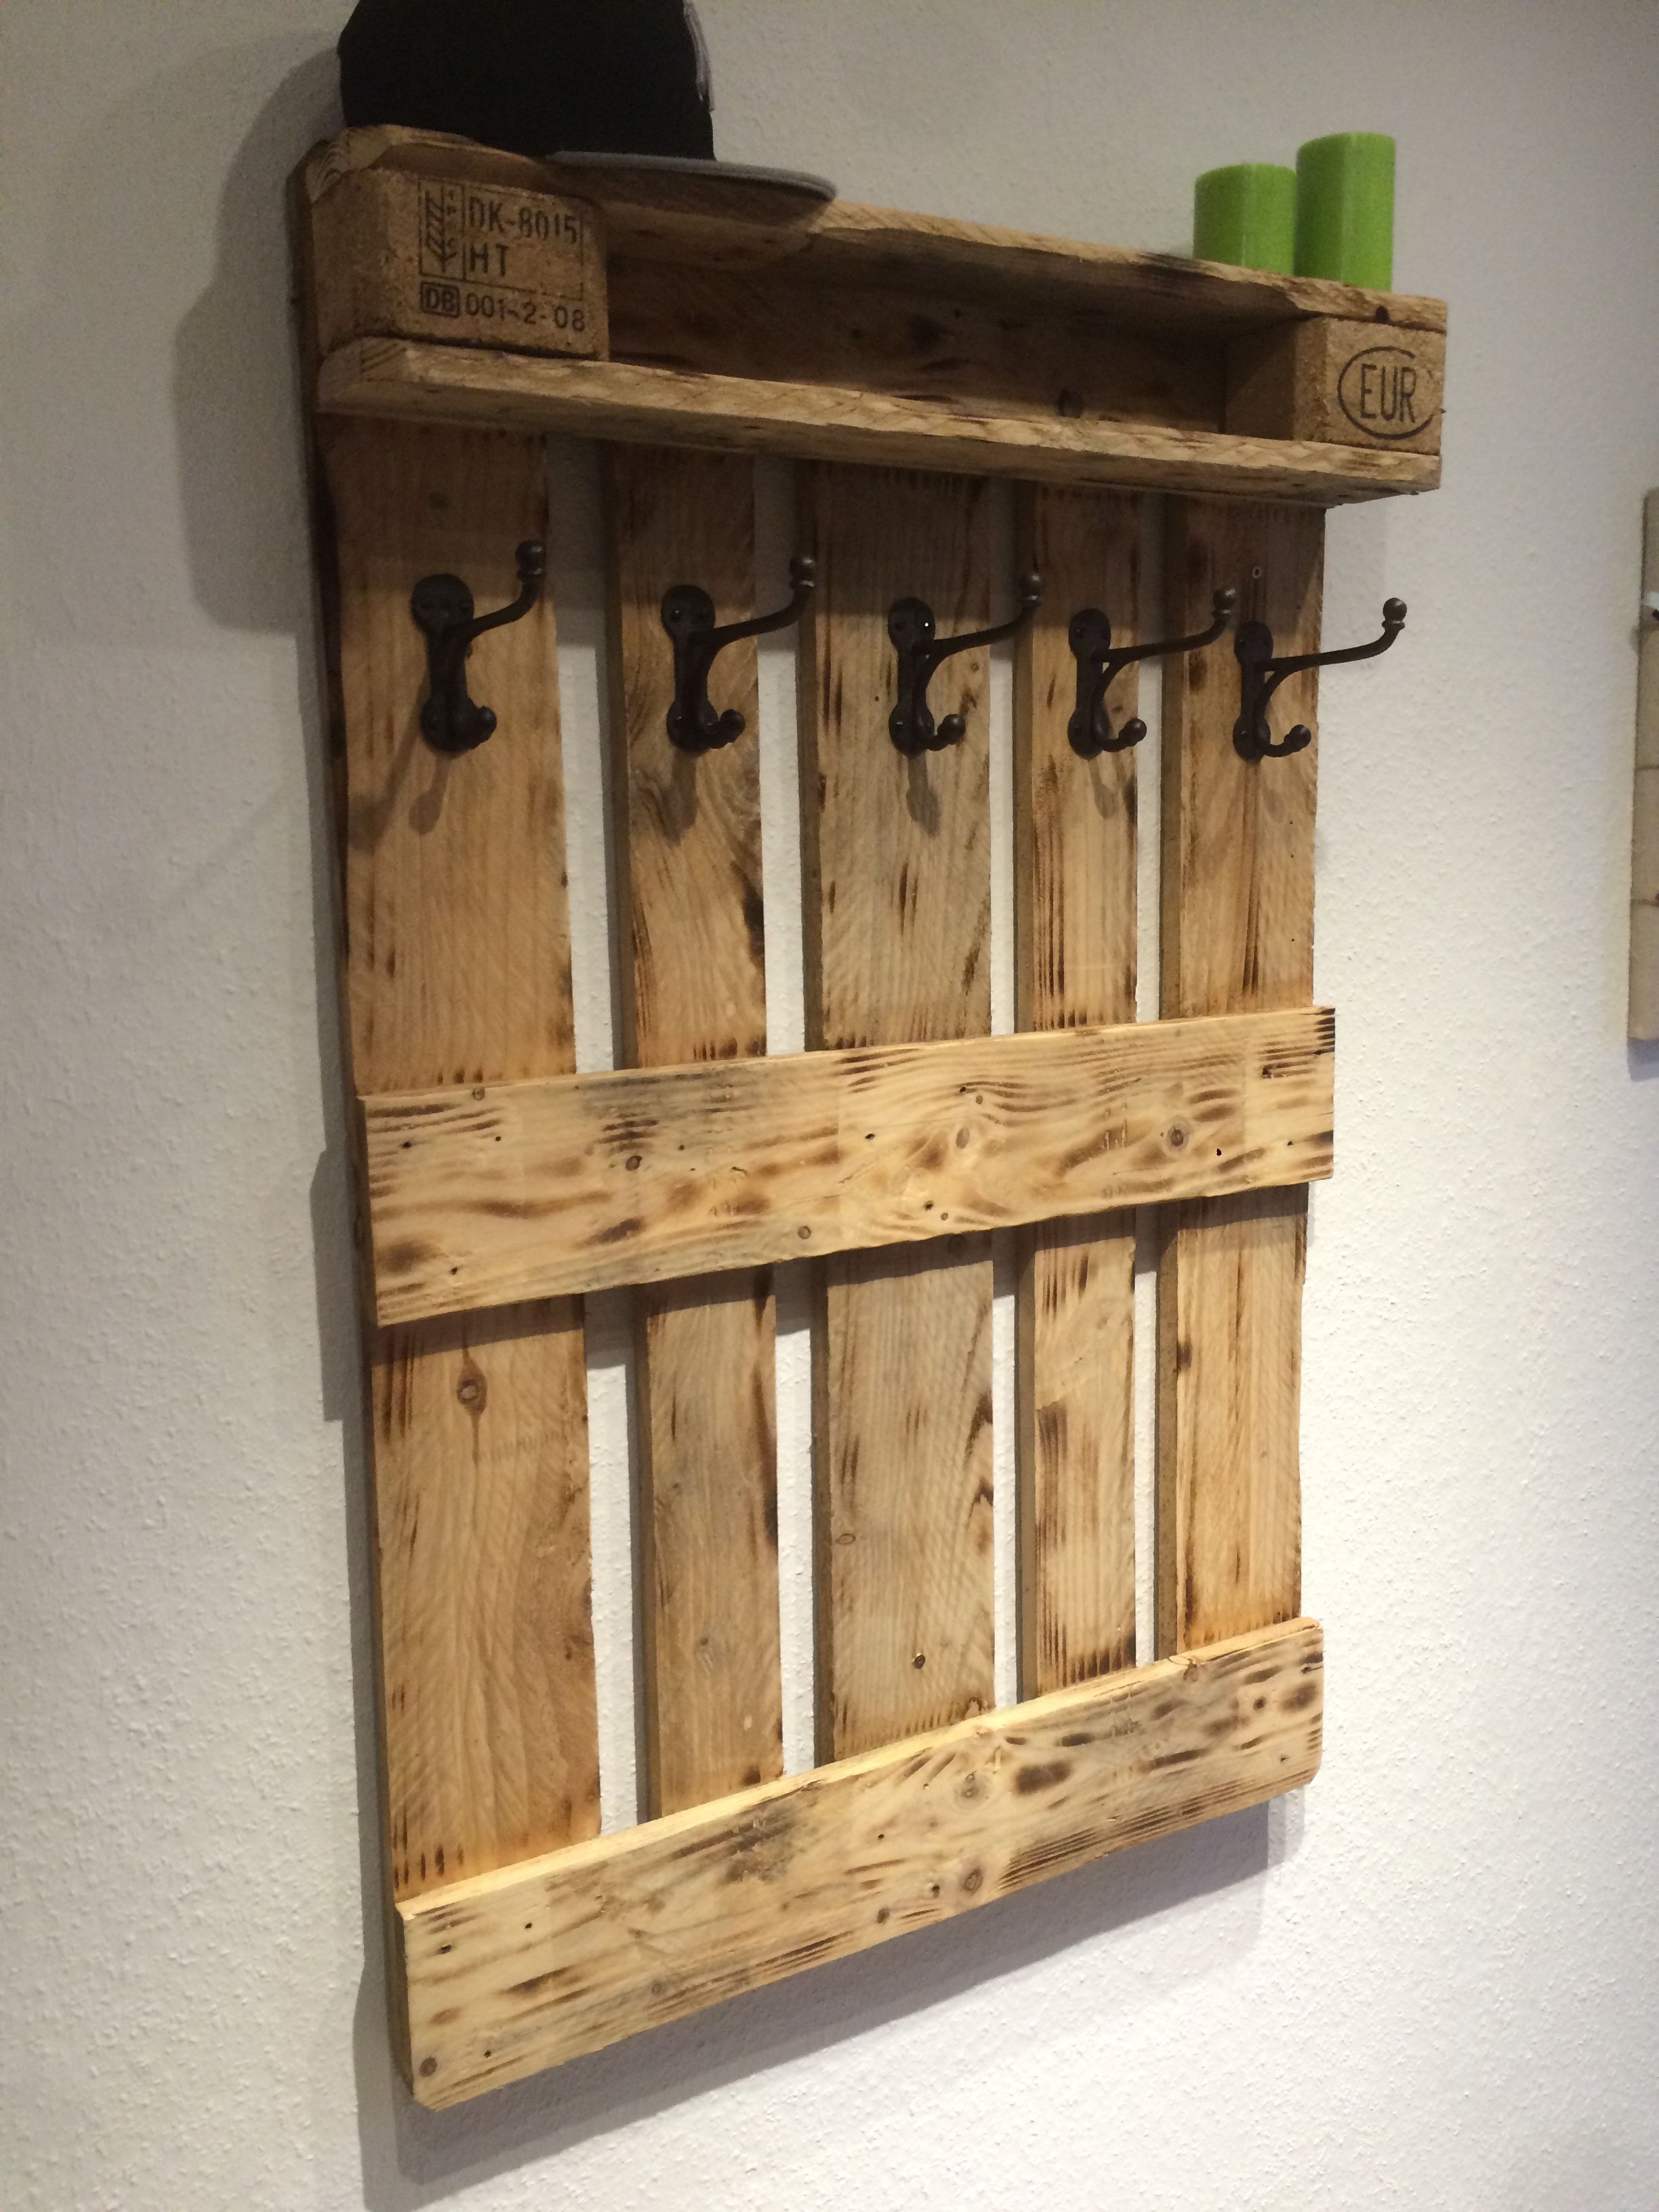
First, you can make a clothes hanger, because it will be the center of the hallway module.
How to do it in stages.
- Attach the pallet or part of it (previously cut off) to the wall using self-tapping screws for plastic dowels.
- In several places, hooks are attached to the wall from the pallet on which clothes will be hung.
- Even before installation on pallets, it is worth walking with sandpaper, otherwise you can injure your hand during the design process.
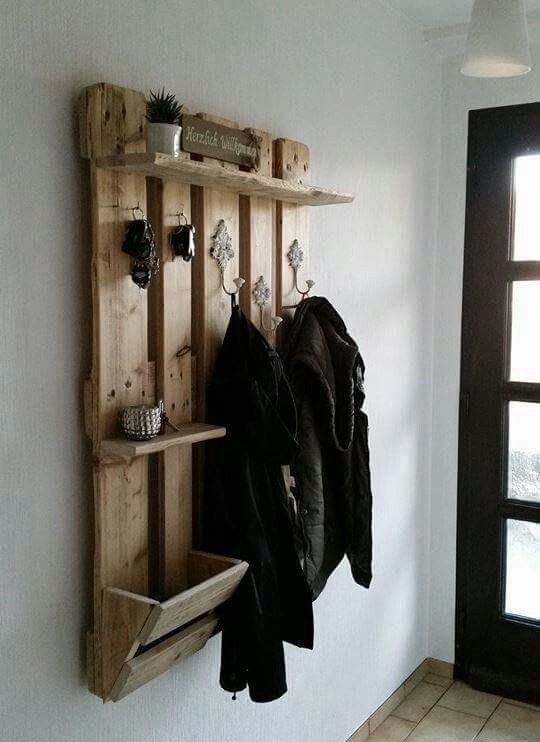
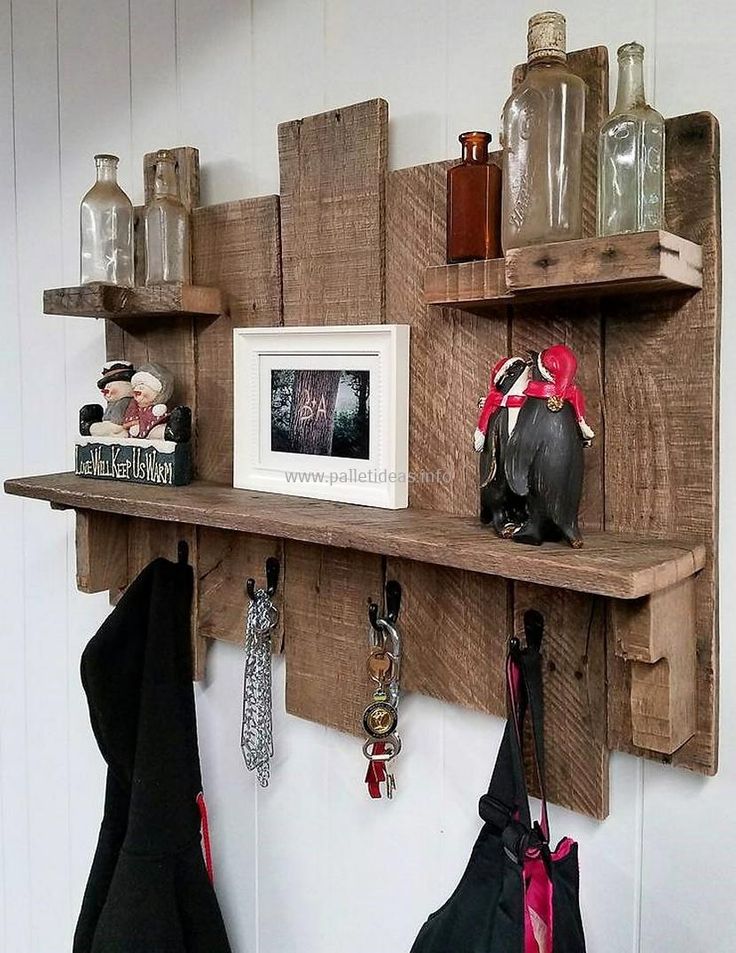
- For such a wall-hanger, a shelf will be a good addition on which you can put top hats, scarves or gloves (or just use it strictly for decorative purposes). The shelf is made from the part where the surface is combined with the bottom through the bars.
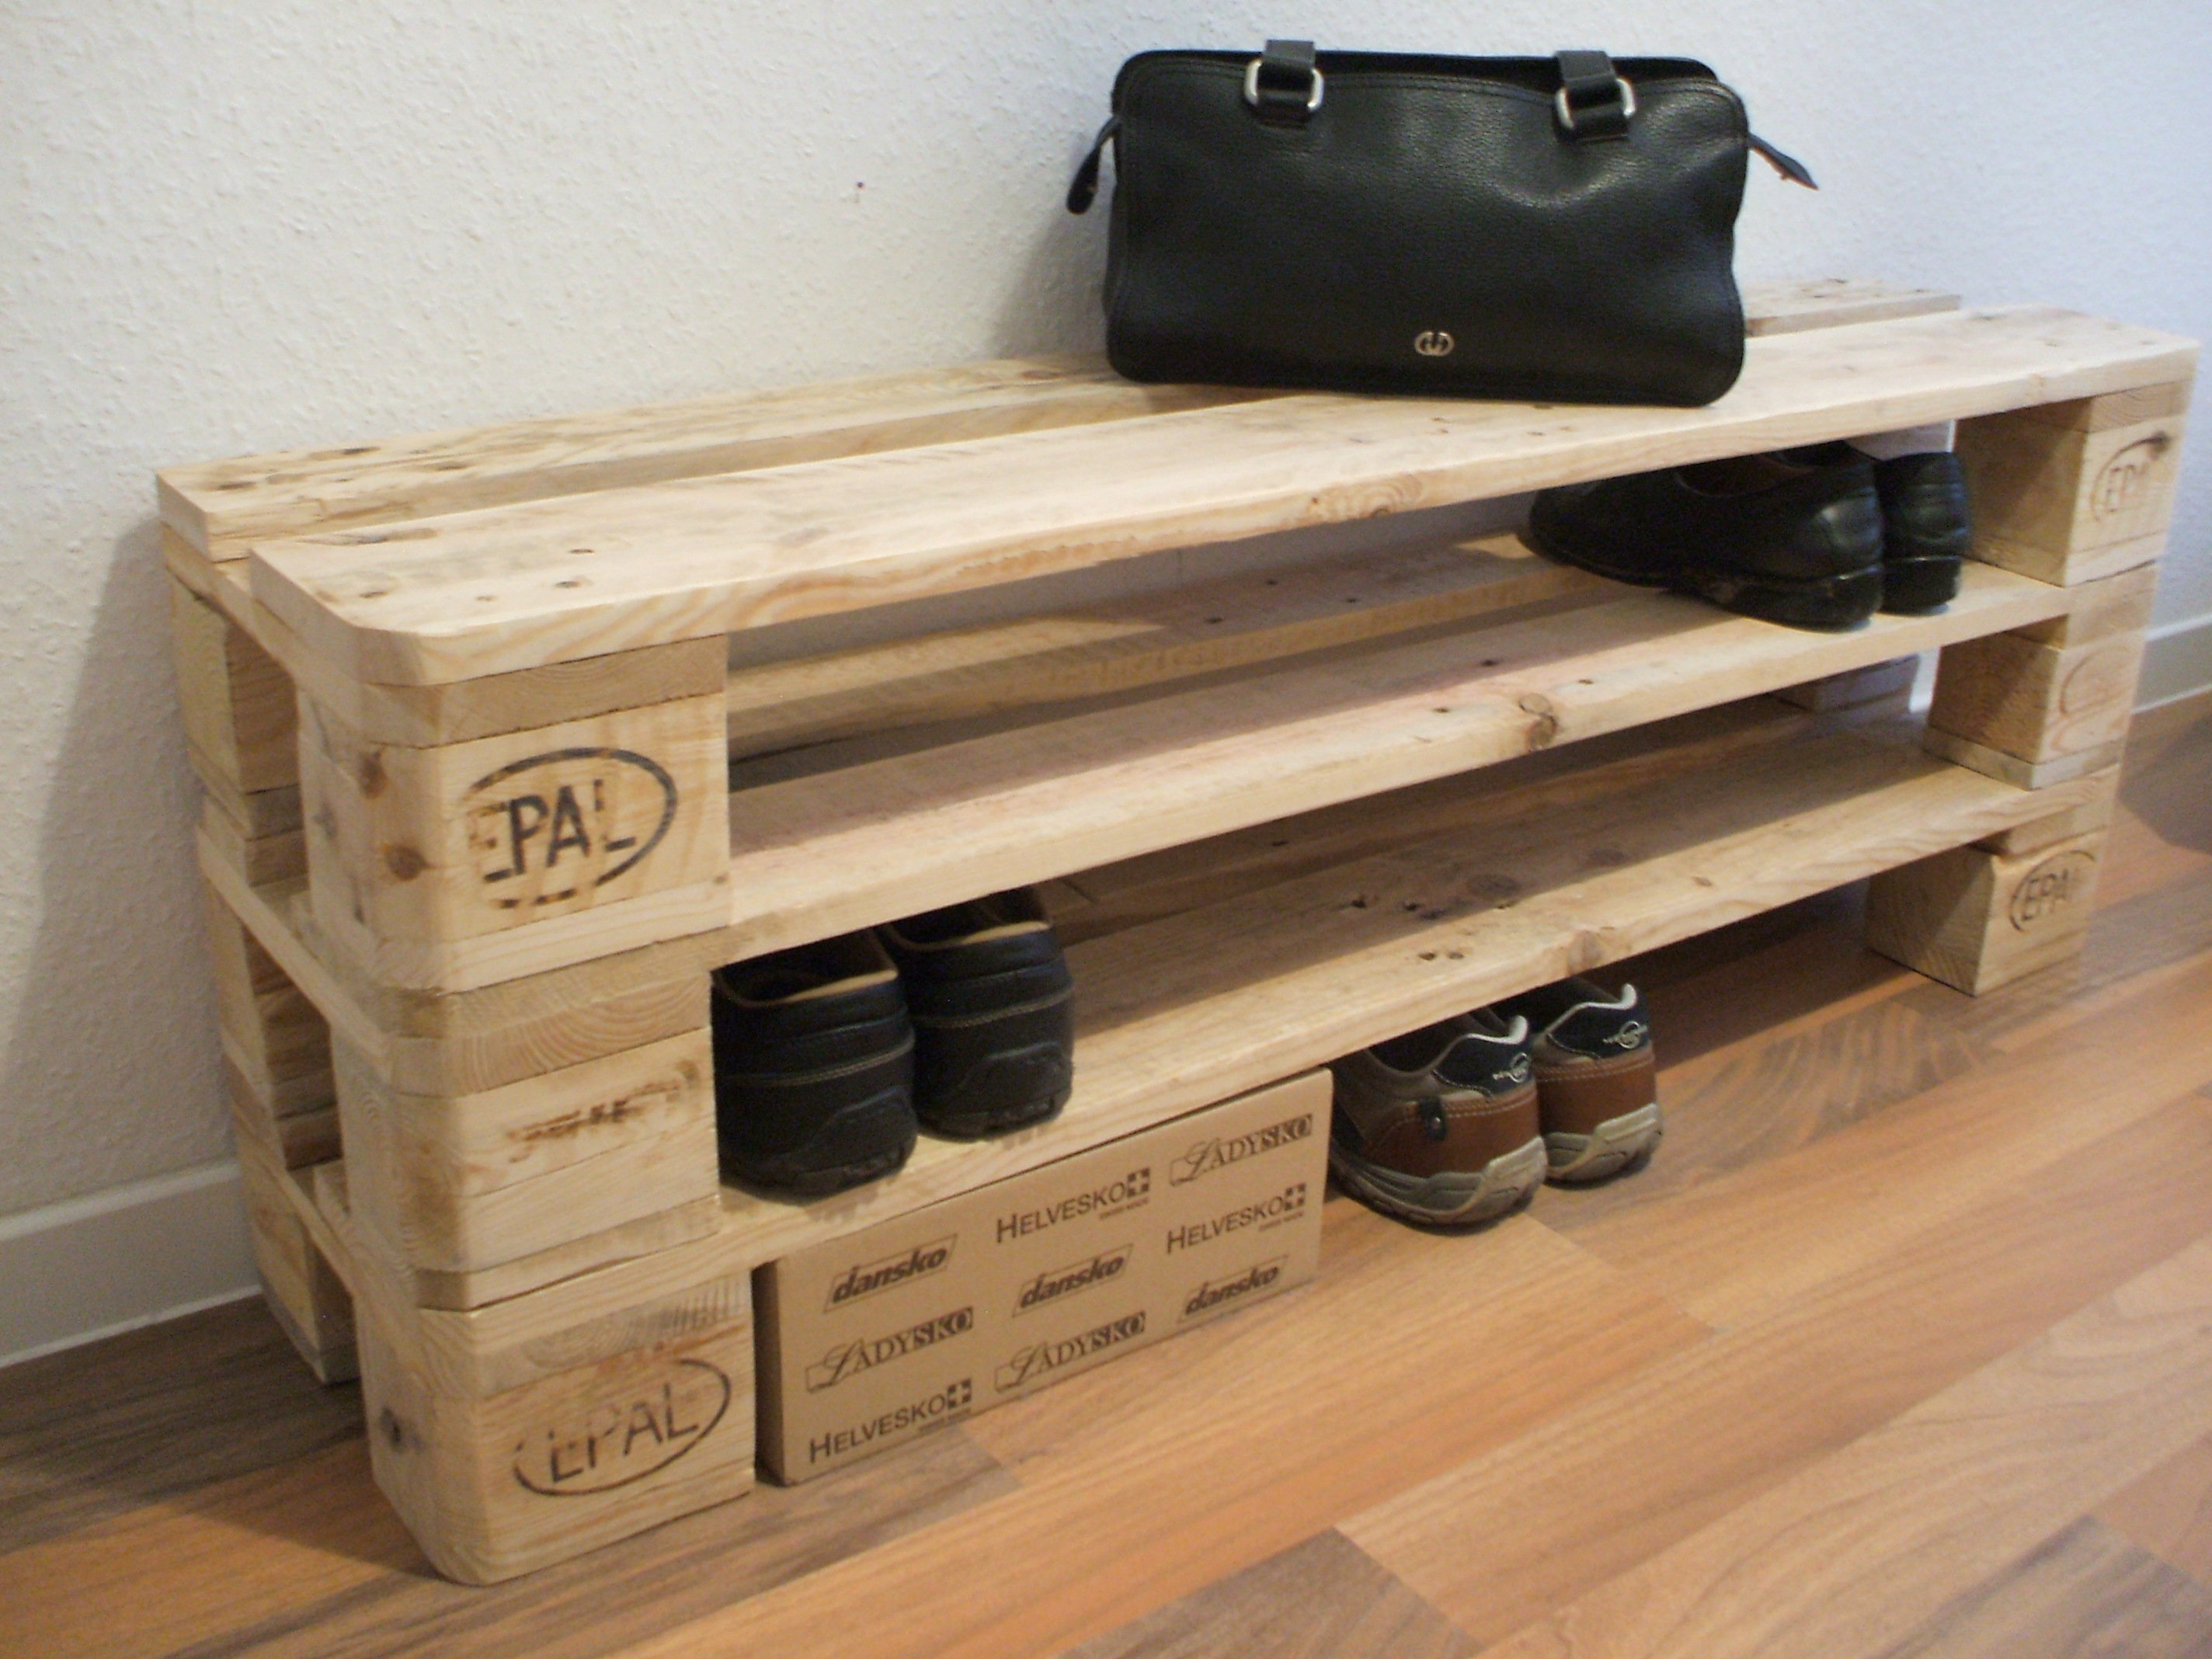
Next, you need to assemble a shelf for shoes. You need to cut off 4 pieces from the pallet, the width of which will be 2-3 boards. They will stand one on top of the other, dock in pairs at the corners. To make the structure more stable, legs are screwed to them from the pieces of the board. By the way, the same shelf can be used as a bench and designate this additional function by folding several flat seat cushions on top.
Decorating such a simple but cute kit will complete the production. Sanded pallets can be stained to give them the desired color. However, you can lacquer them or just paint them. Usually, a water emulsion is used for this, and options for chalk paints are also being considered. And with the use of a stencil on furniture, you can also make a pattern - it will be very beautiful and once again emphasize the chosen style. For example, if it is boho, geometric, not without ethnicity, the ornament will make the interior image more expressive.
Examples of hallways constructed from pallets with your own hands.
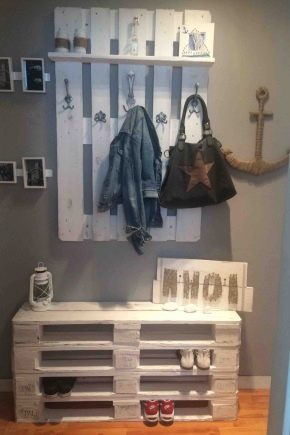
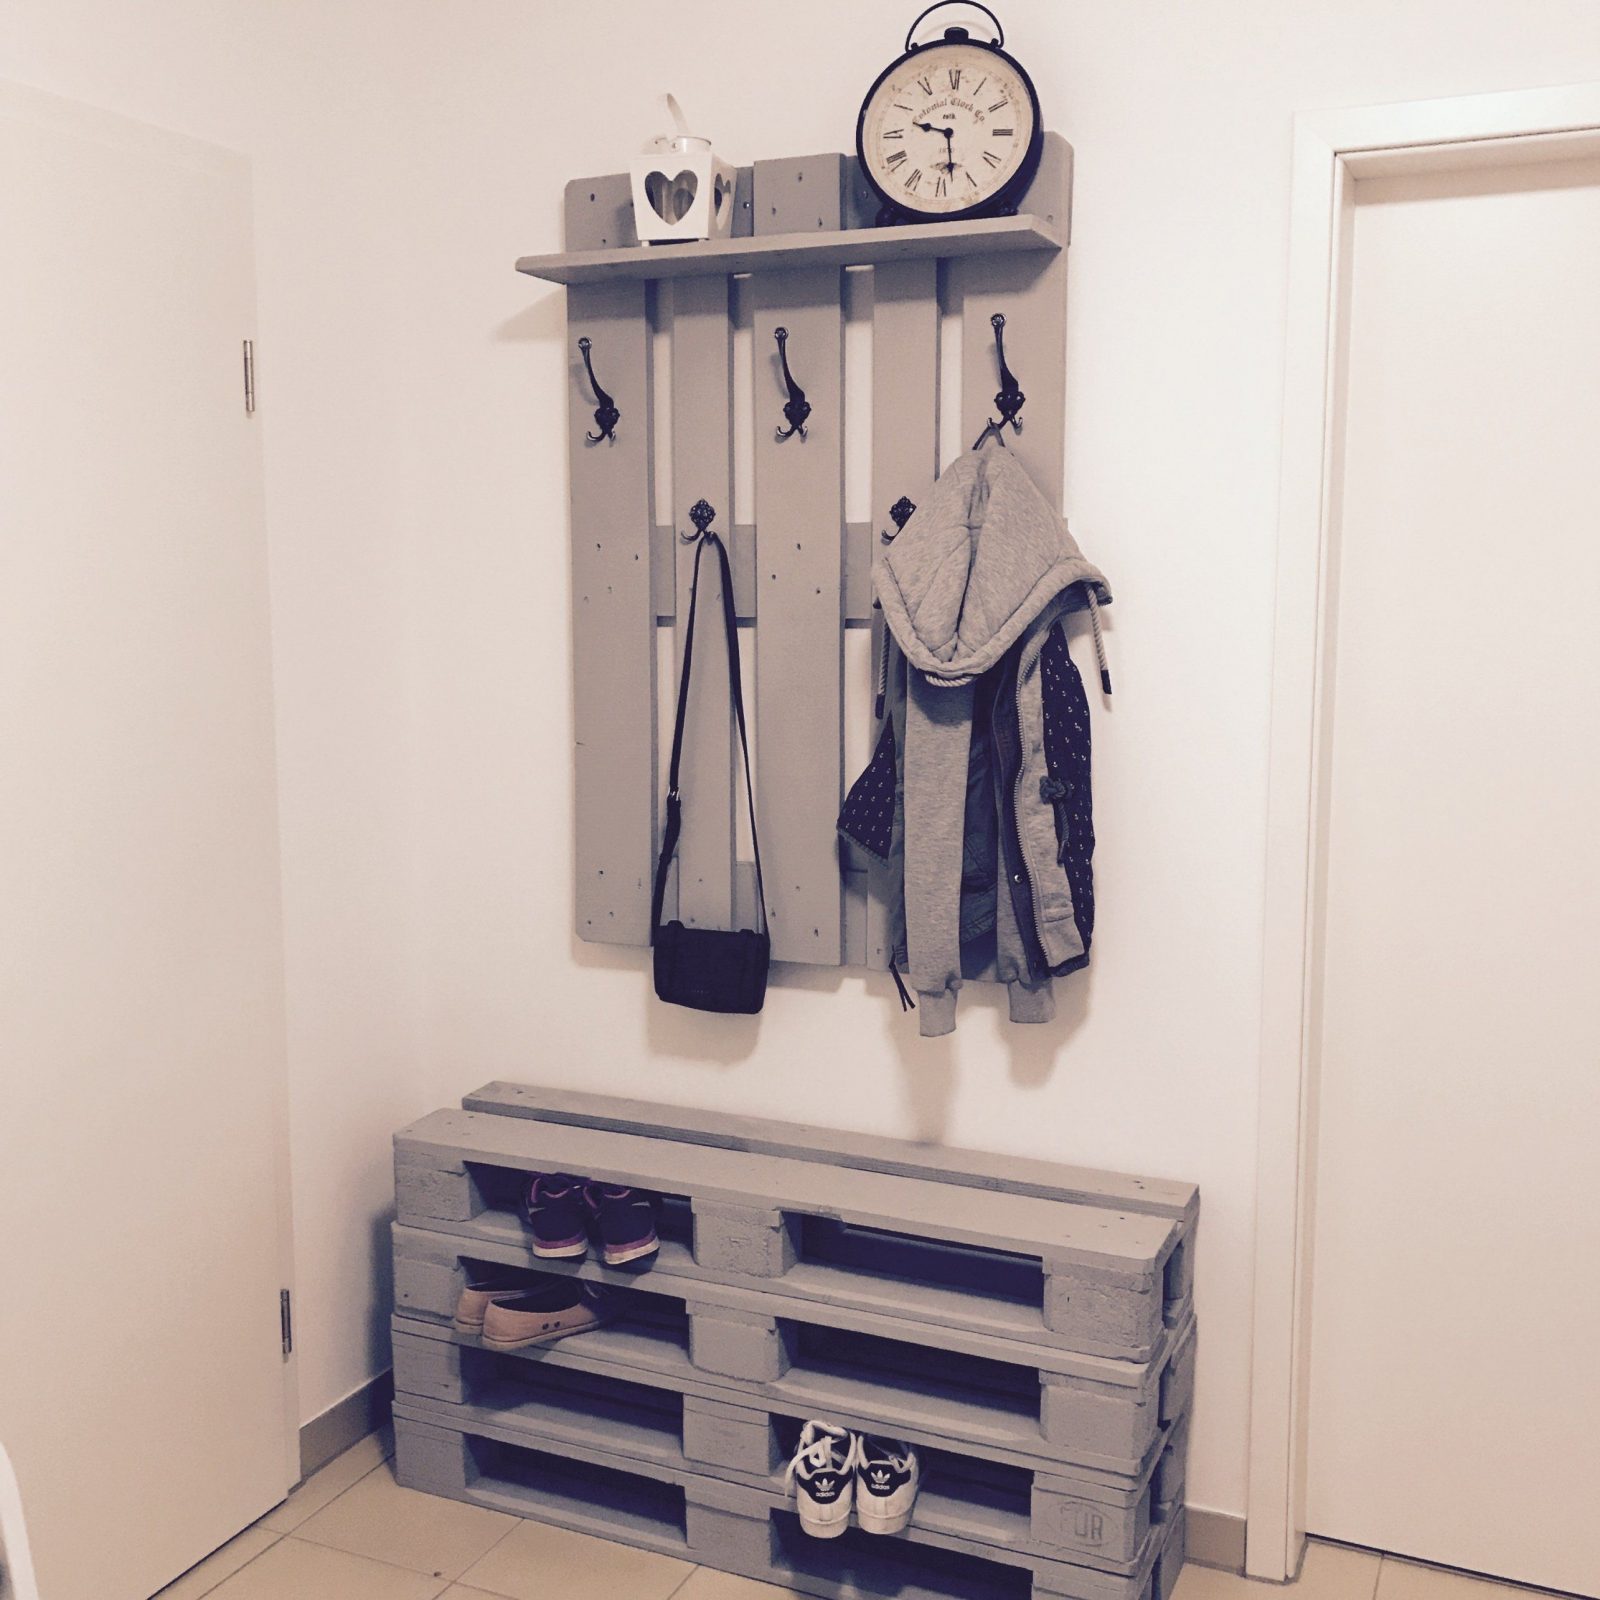
- The entrance hall consists of two parts: the upper, large enough shelf, and the lower shoe rack. There are several furniture hooks on the shelf, but this is not its main function. Mainly, the shelf is decorative, used for storing small items (keys, gloves, documents) that should be at hand. The shoe rack can also be used as a bench.
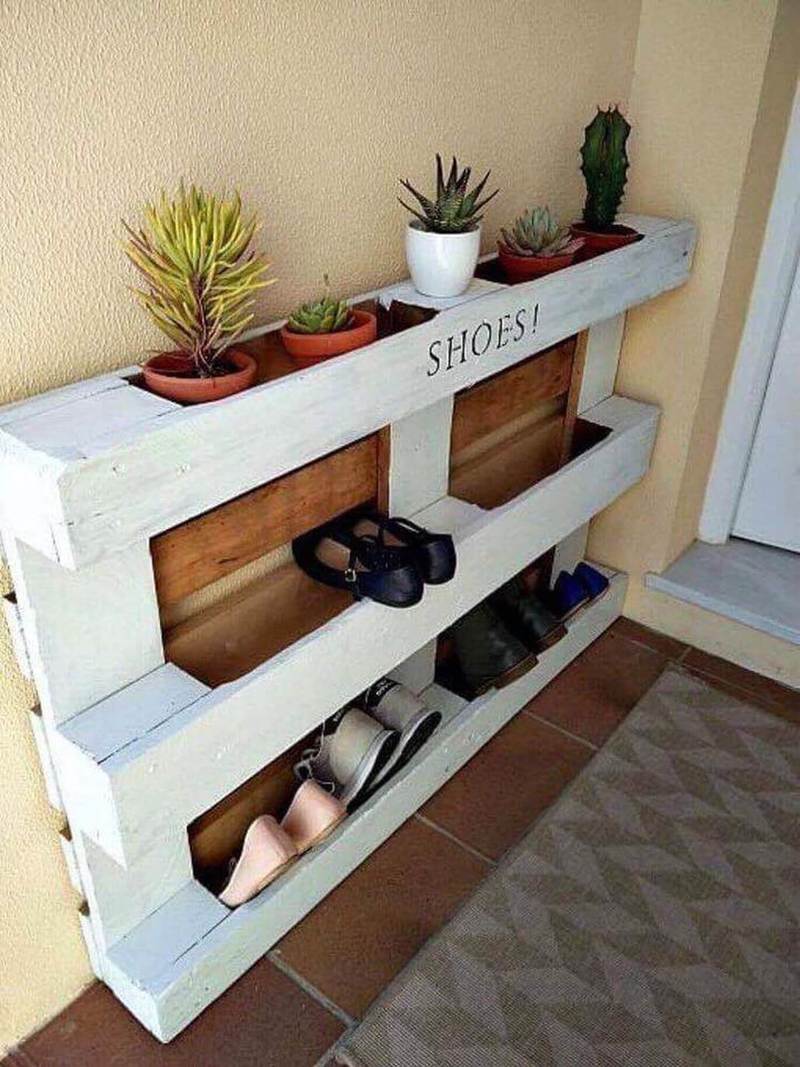
- And this is an example of how a shoe rack also becomes a place for flowerpots and pots with houseplants. Such furniture can be made in half a day, and this is together with painting.
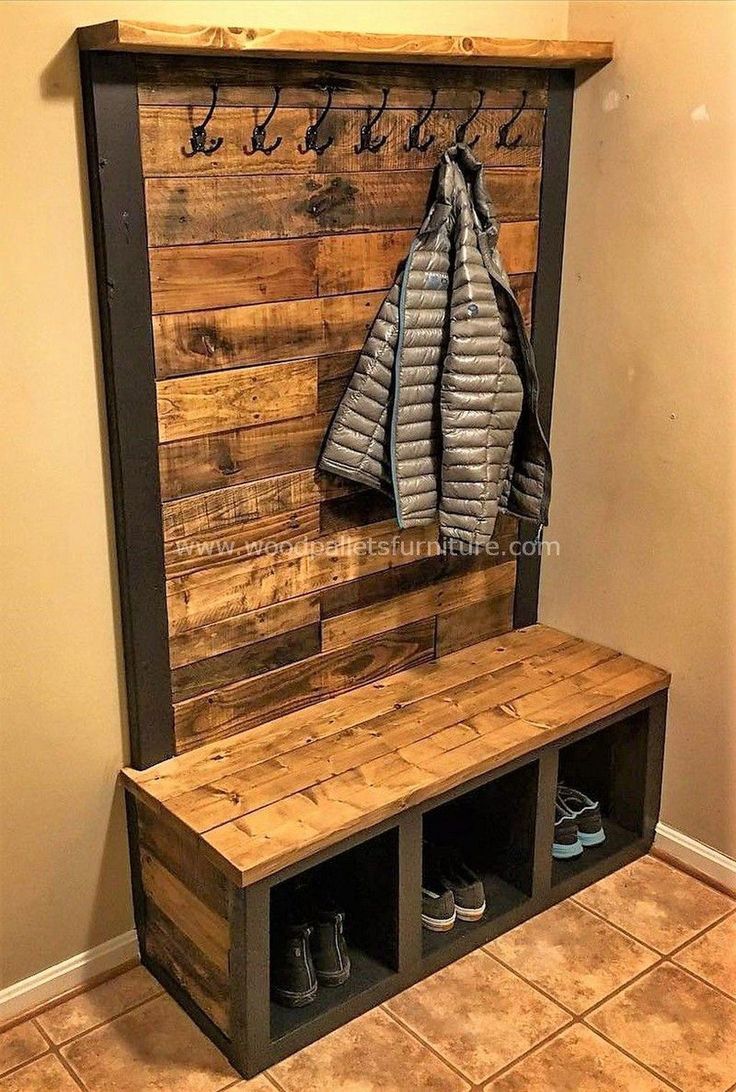
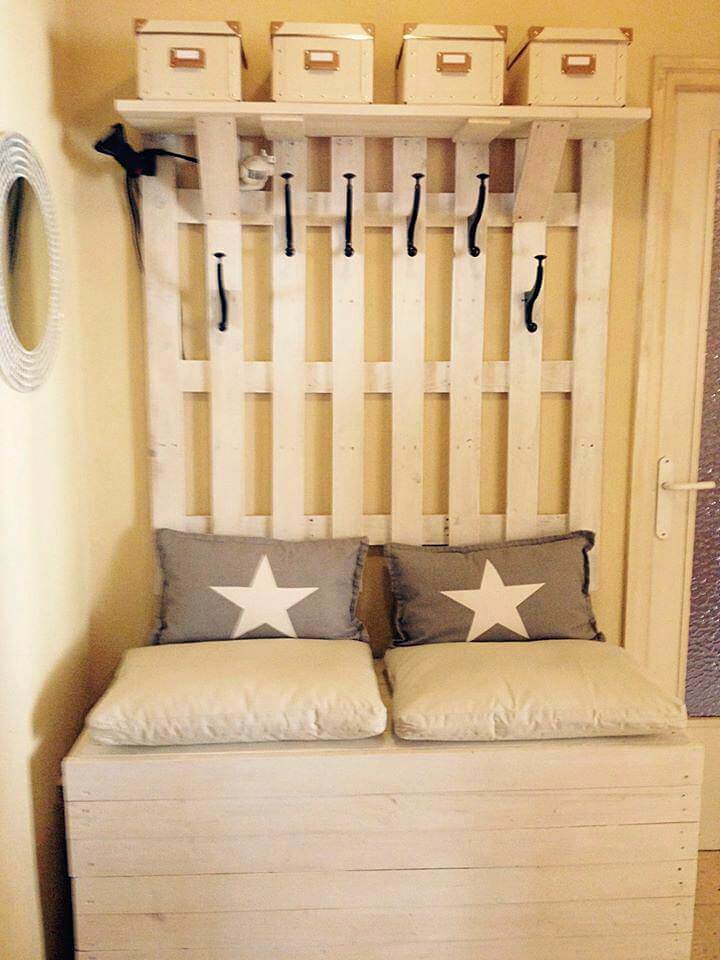
- A more standard version of the wall in the hallway, with a lot of hooks and a cozy bench, inside which - a lot of storage space (mostly irrelevant shoes). The top of the structure is crowned with a shelf on which you can put storage boxes in tune with the general mood of the space.
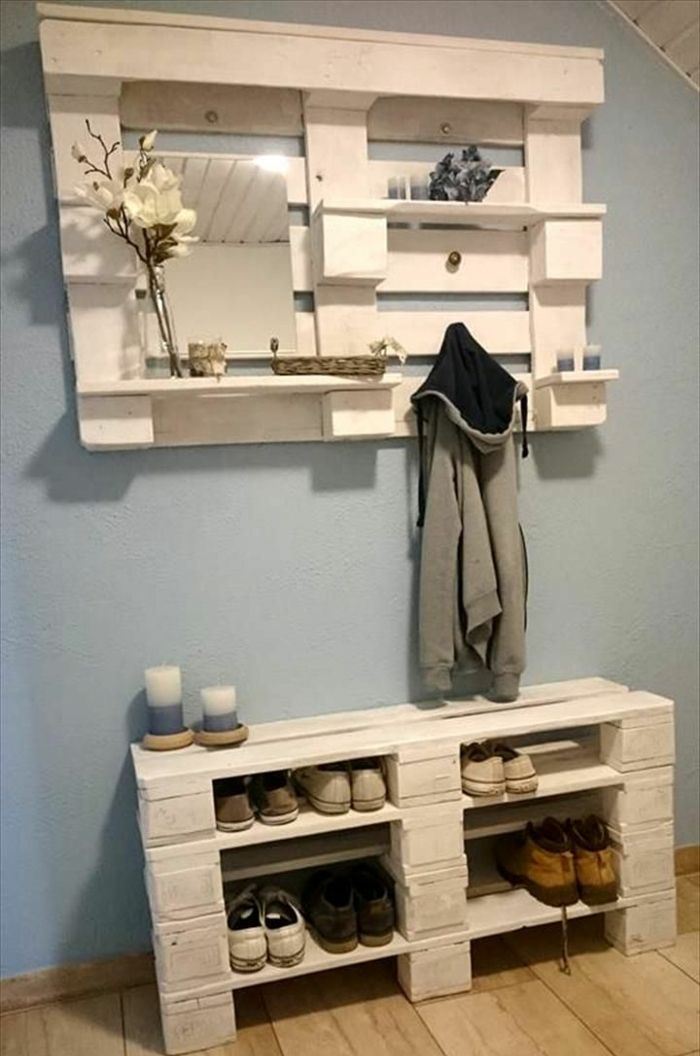
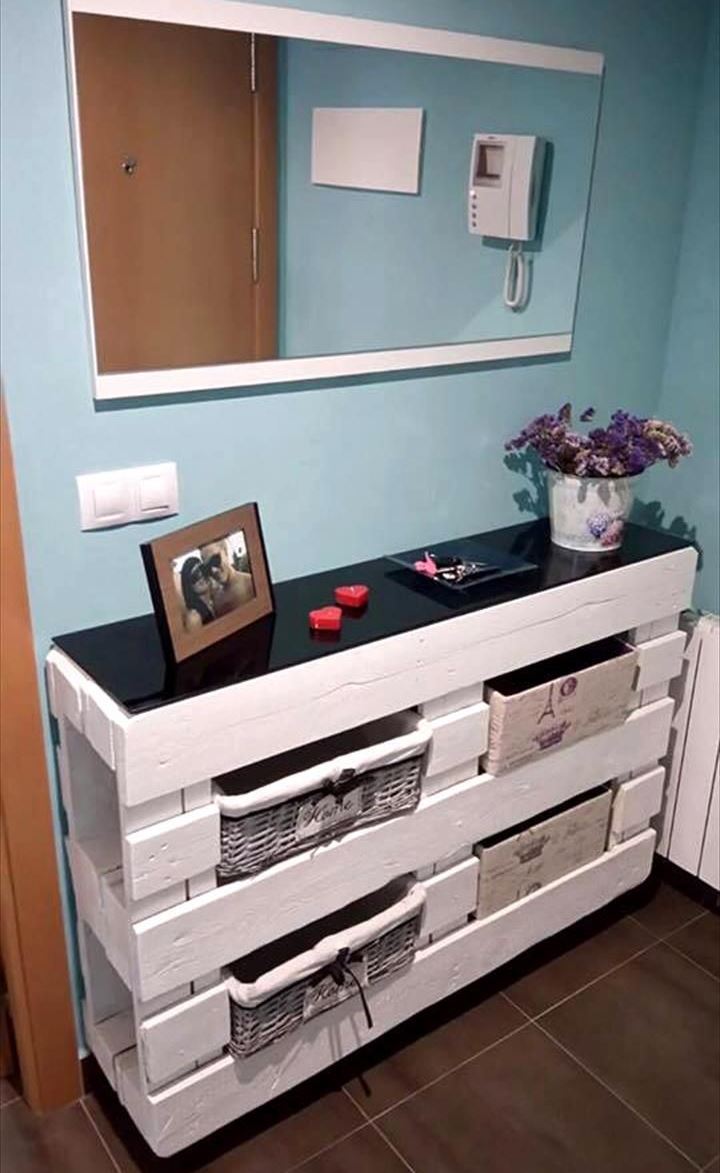
- Combination of tall unit with functional top and mirror - more than a budget, and at the same time neat, fashionable option for a square-shaped hallway. In this version of the space, the module is divided into several parts in order to occupy an area near each of the walls.
Next, see a master class on making a hallway with a do-it-yourself bench.


