All about the floors on the balcony and loggia

The balcony can be used as a storage room, or it can become almost a full-fledged room in an apartment, only small and not like the others. Whatever it is, a comfortable balcony or loggia needs a high-quality floor, and here many interesting options open up.
Species overview
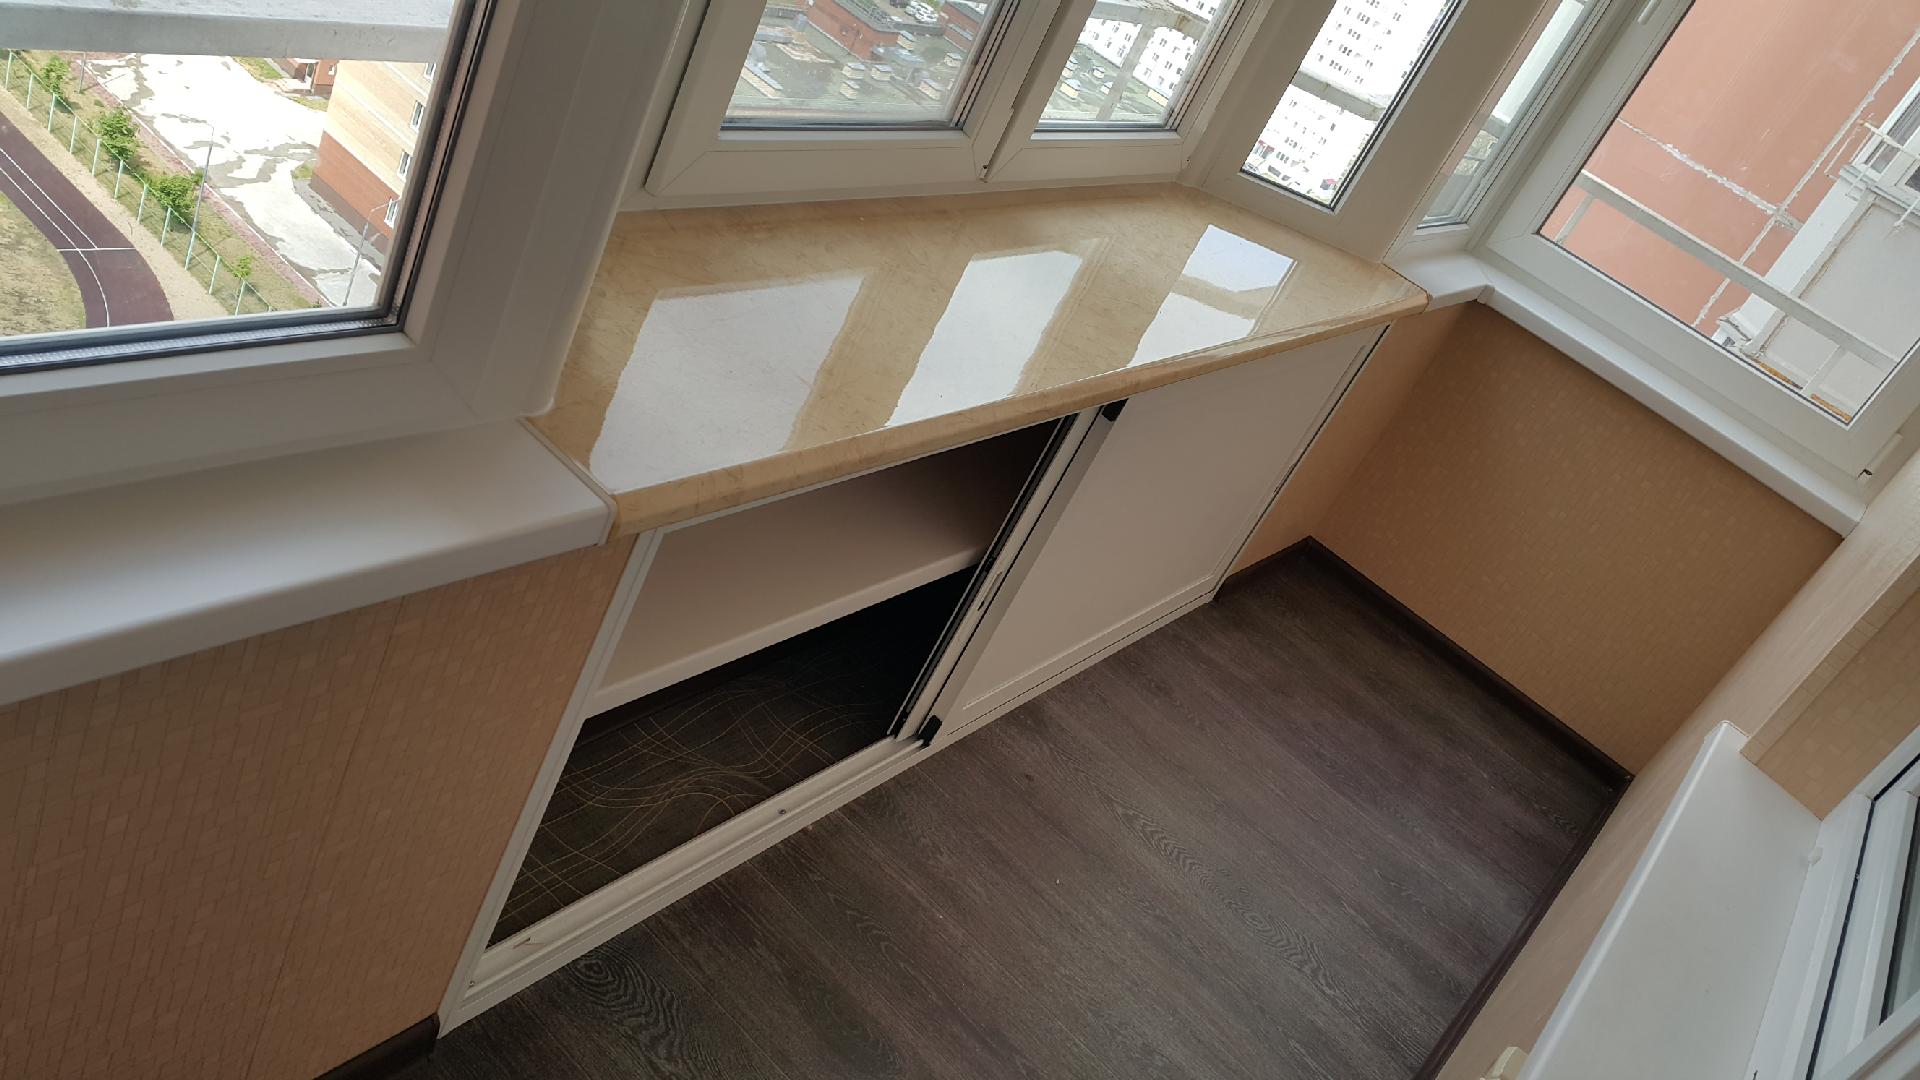
Balcony flooring is a compromise that involves aesthetics, style, price and labor. And also time as an important resource for repairs. On one of the options, all these participants converge, satisfy the request of the owners, and repairs begin. There are 3 traditional types of flooring: flooring, filling, wooden floor.
Flooring
Decking is called coverings that form the final visual range and involve the installation of different materials. It can be decking, laminate, ceramic tiles, linoleum and more.
Here's a quick overview of the different flooring options.
-
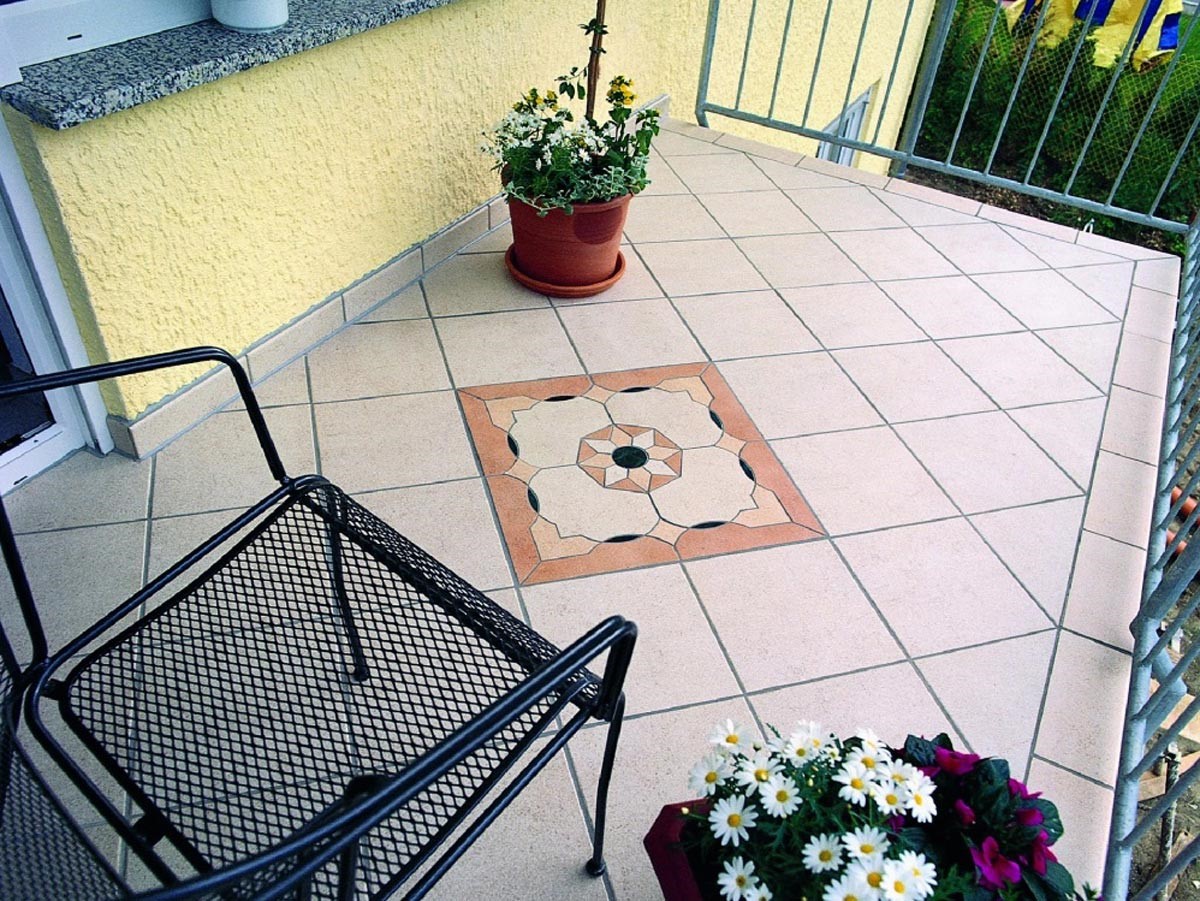
Ceramic tile. It will last a long time, it is durable and frost-resistant, environmentally friendly and non-combustible. It is easy to look after her. Among the minuses - the surface is cold to the touch, and not yet the highest sound insulation.

- Linoleum. Variations of colors are various, it is very simple to lay it, it is inexpensive, it is not afraid of water. But in terms of service life, it is not the most advantageous type of flooring, it can lose flexibility, and is also fraught with fractures under the influence of low temperatures. It can deform under mechanical stress.

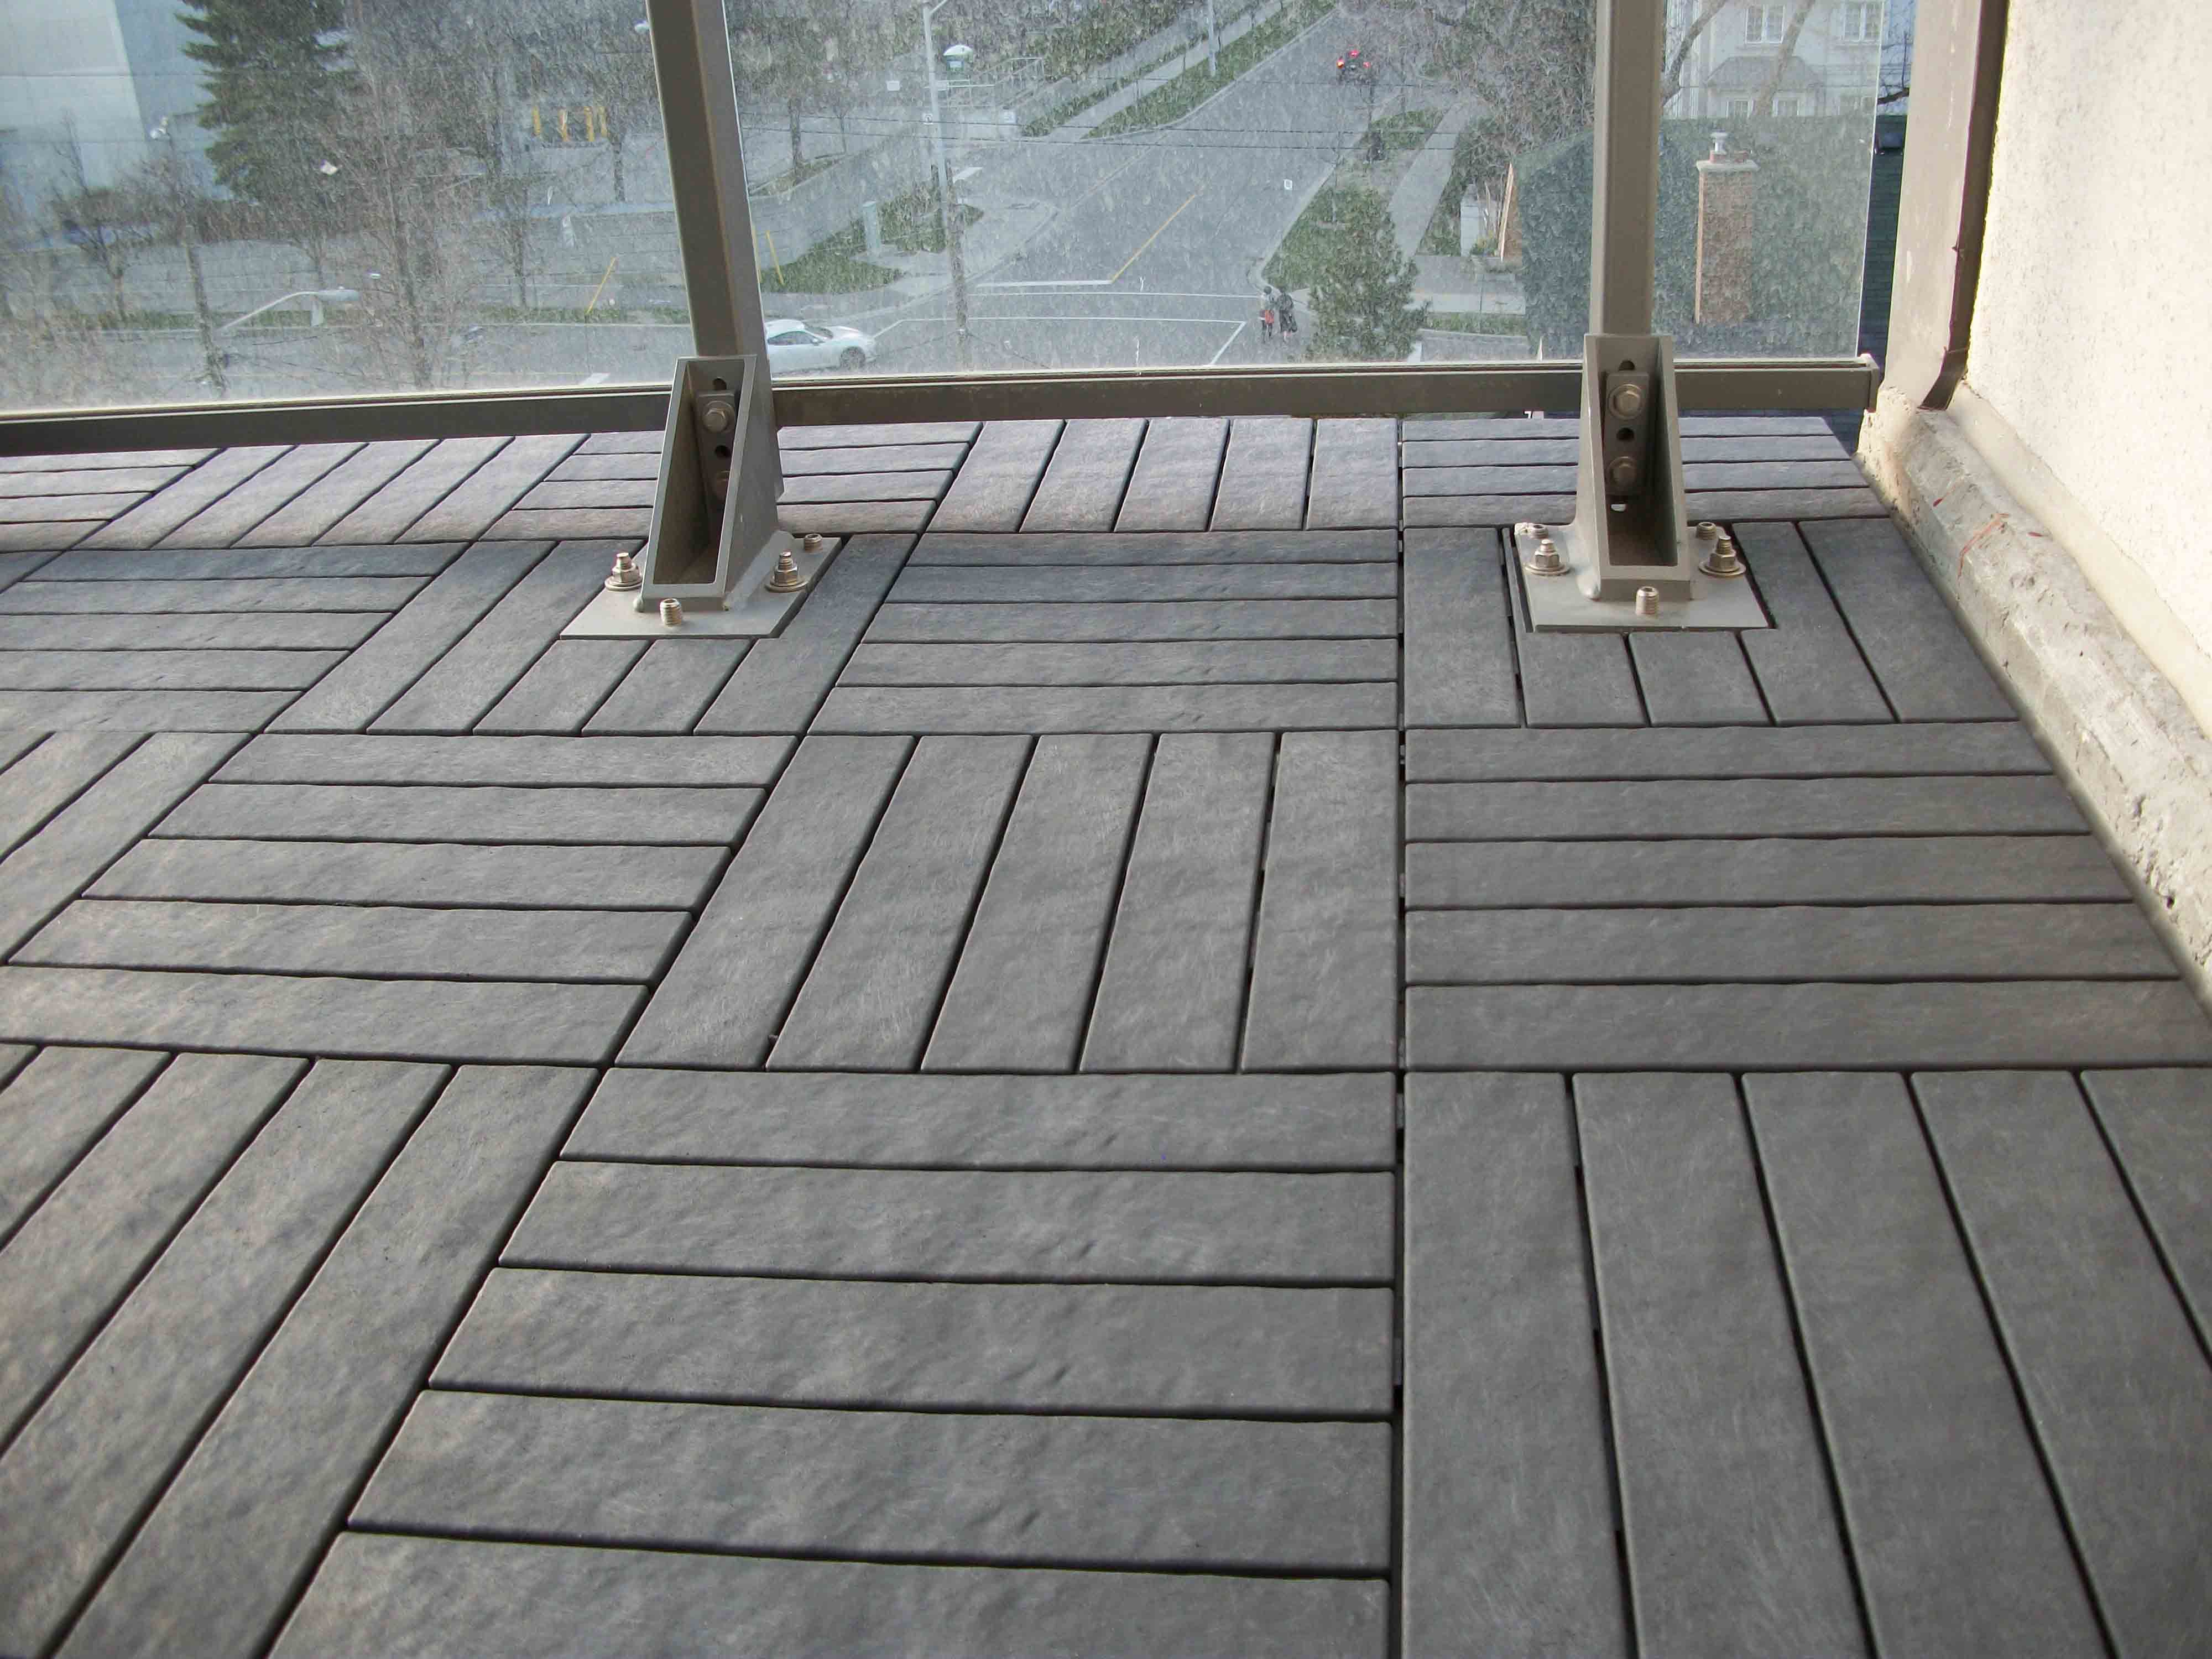
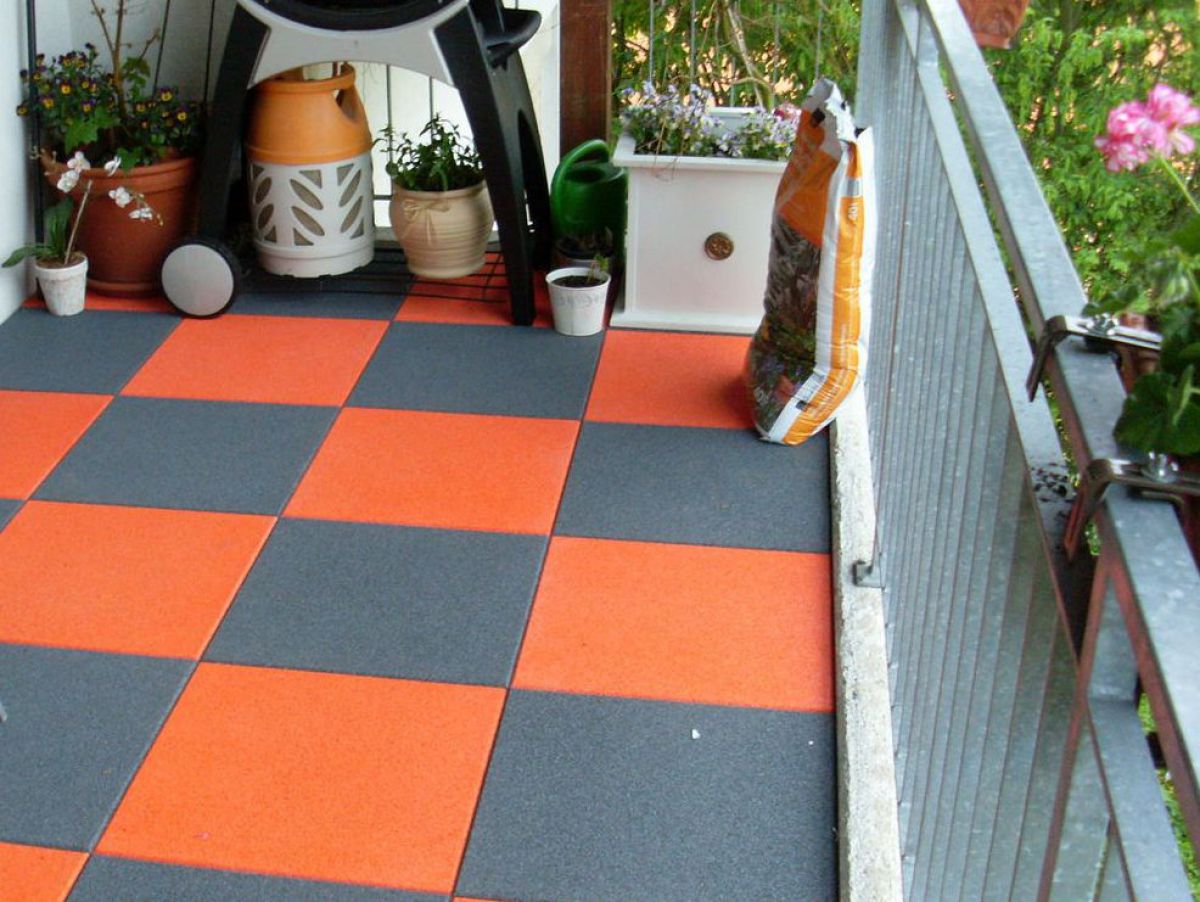
- Decking (another name is garden parquet). Lightweight material, resistant to external influences, easy to install, aesthetic appearance. But it also costs a lot.
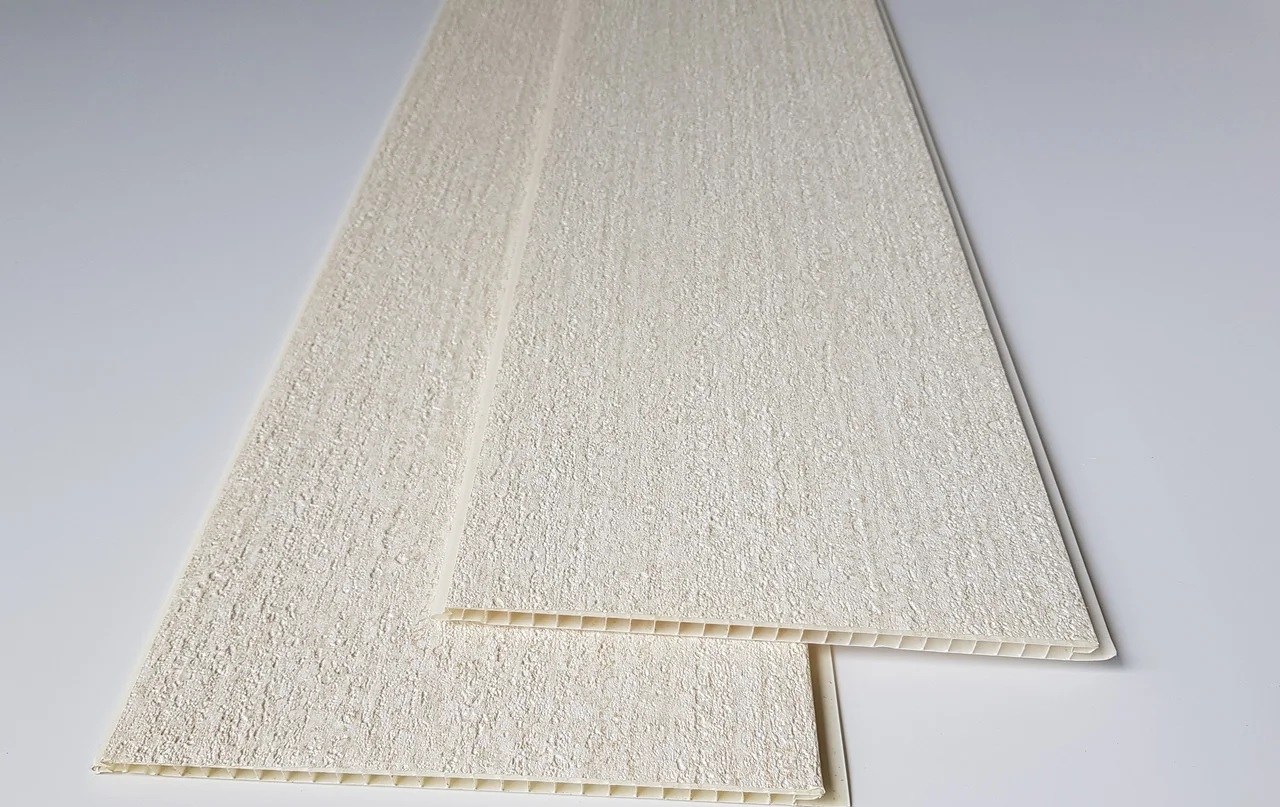
- PVC panels. They have a small thickness, are non-flammable and water-resistant, easy to install and resistant to aggressive compounds. But the material can be called relatively fragile.
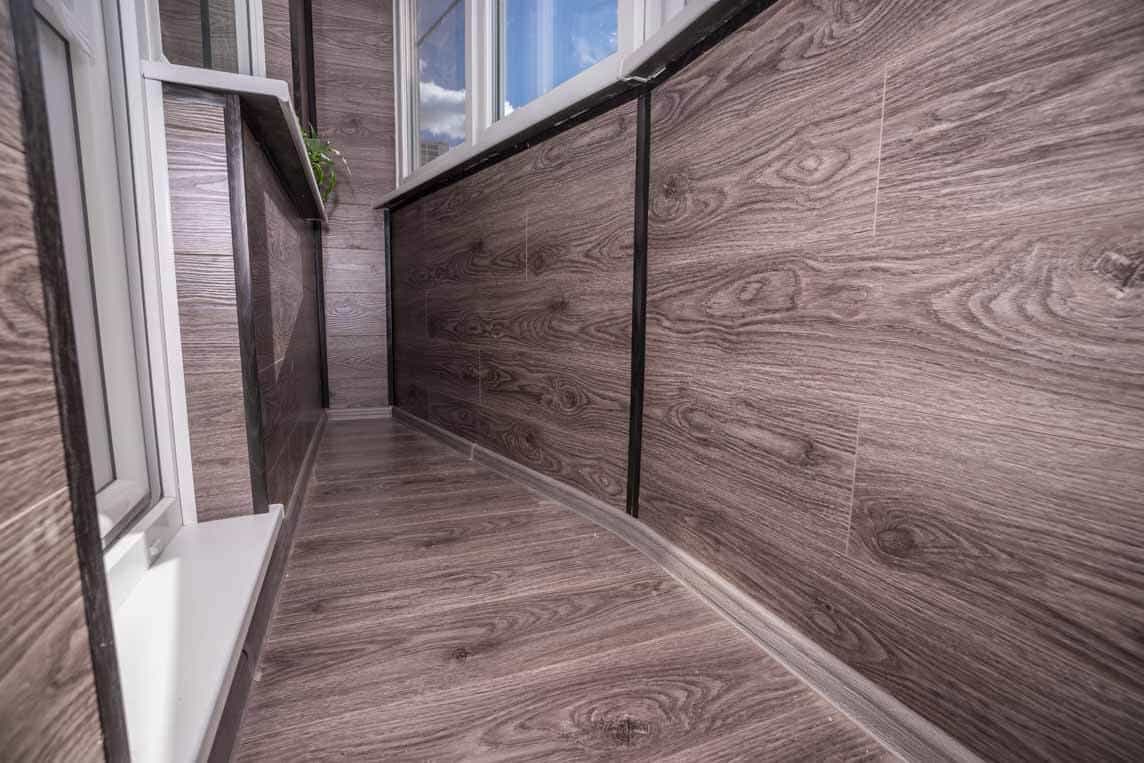
- Laminate. This type of flooring is no longer so fragile, it can withstand long-term loads. There is always a lot to choose from for ultraviolet and thermal shock, and according to colors. But the laminate is afraid of moisture, and if one panel fails, it will be difficult to replace it with another one.
In general, there are almost no questions about the flooring: all the materials used for it are known, in one degree or another in demand, well, it is not difficult to imagine how it will all look.
Fill
A self-leveling floor is a multi-stage process that includes calculating the area of a balcony or loggia, preparing a working space, waterproofing, defining boundaries, setting guide beacons, preparing a solution and directly pouring a screed. This seems to be an especially difficult way of shaping the floor, since inexperienced people rarely engage in pouring - the cost of mistakes is too high.

A completely mixed solution is poured from the farthest corner between the beacons. Thus, the area of the entire balcony is poured, gradually the solution moves towards the door, the surface is made even and smooth. At the end of the work, the master calmly enters the house. The surface remains dry.
Within three days, the pouring surface must be moistened, otherwise there is a risk of cracking. You can also sprinkle it with sand, even use sawdust, then this construction waste will be removed from the floor without problems.

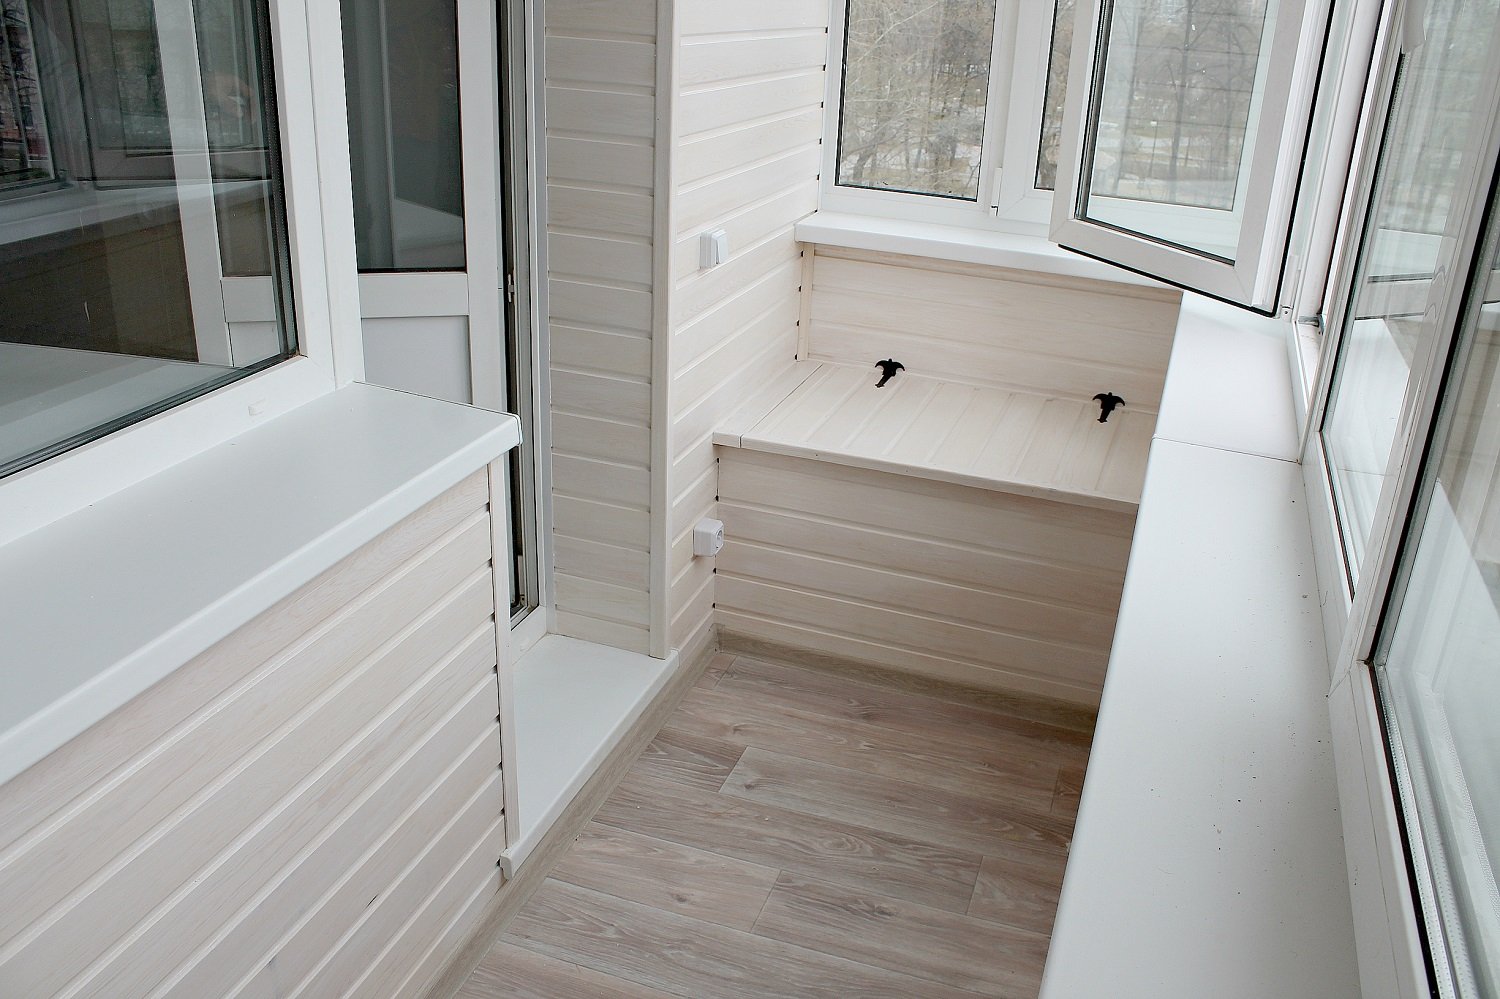
Wood
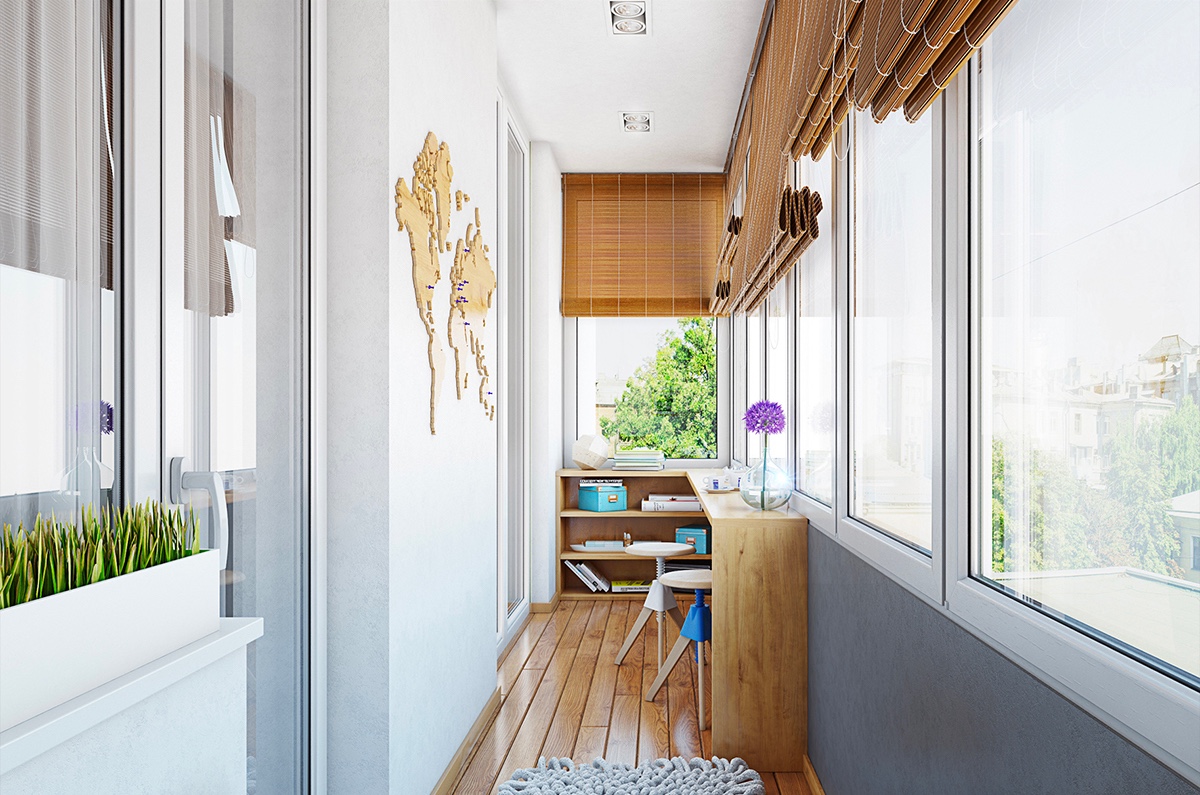
Wood is the most common natural material used in human dwellings. The main advantage of wood is its low thermal conductivity. And this property allows you to equip warm floors that are pleasant to the touch.They are aesthetic, environmentally friendly and durable. The tree is incredibly pliable in processing, so not very experienced owners can cope with the arrangement of a wooden floor on the balcony.
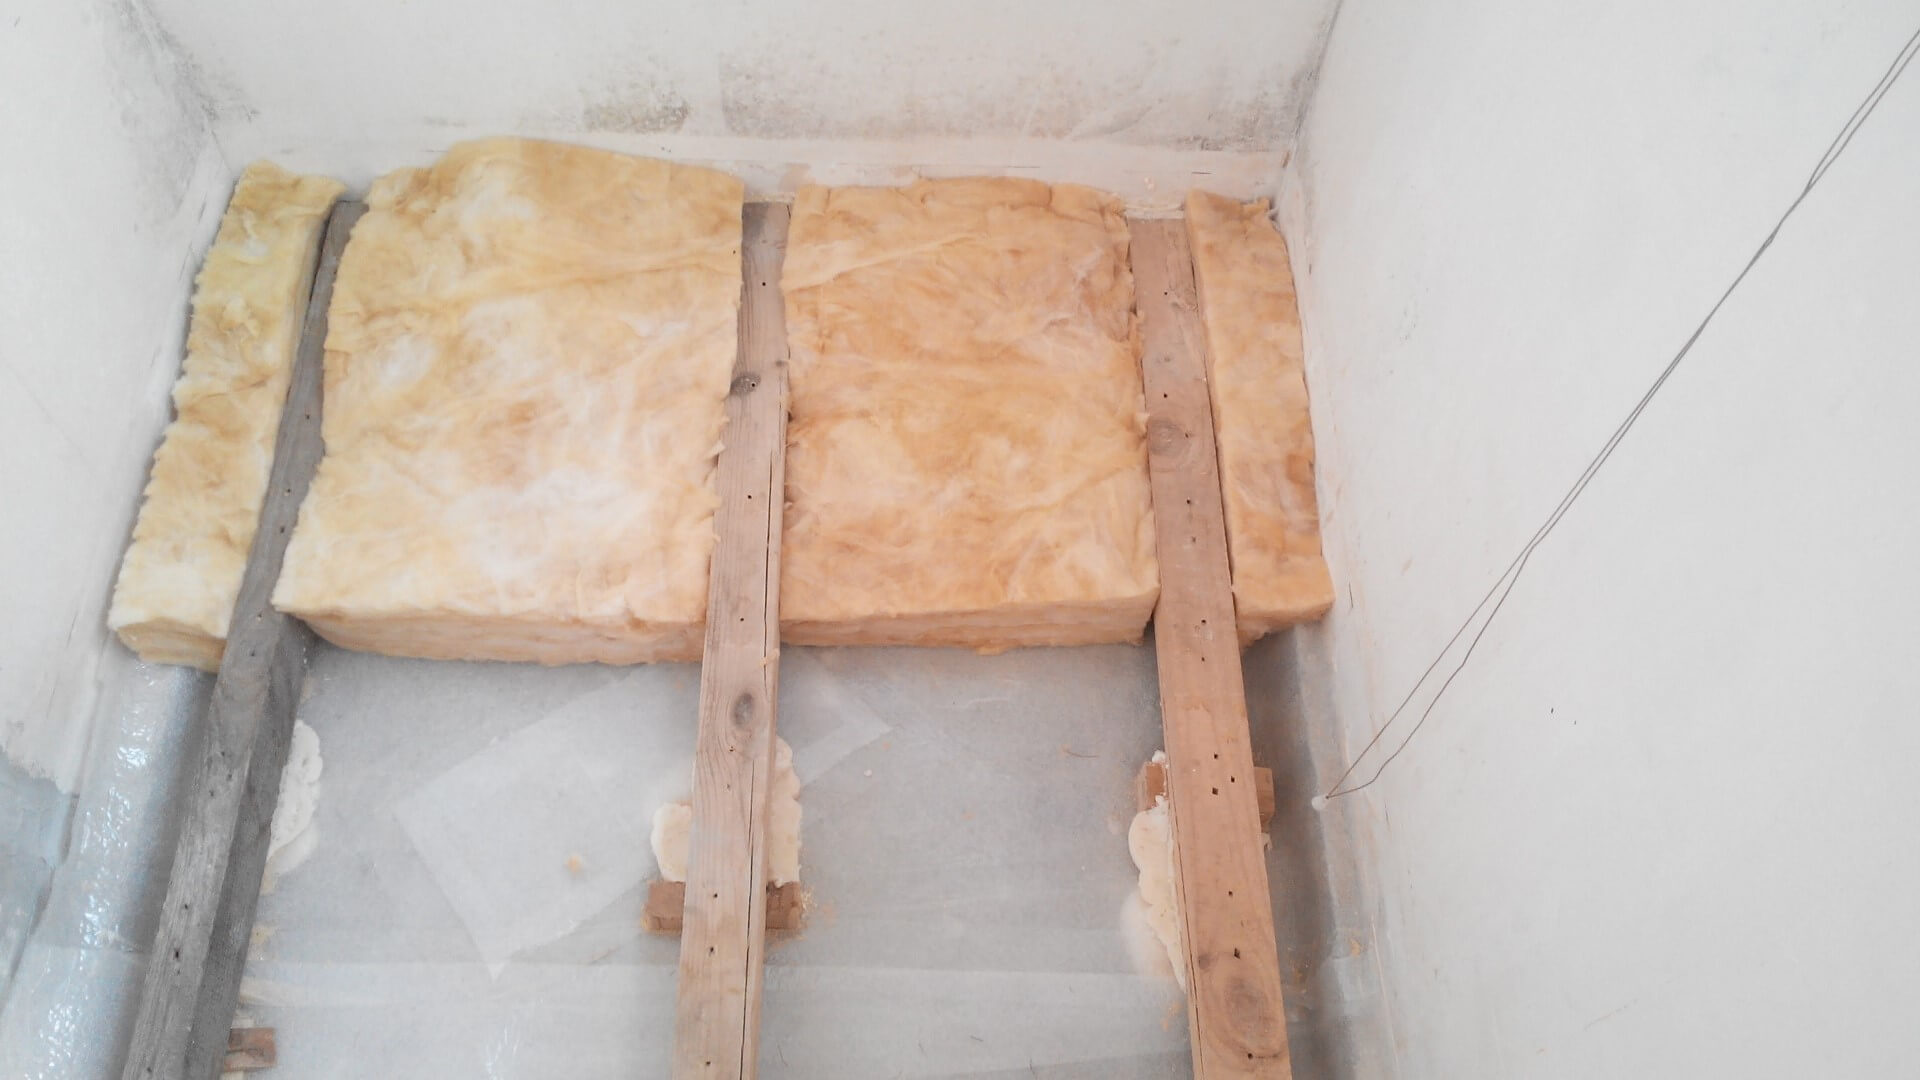
It may be necessary to make logs for the wooden floor. For the lathing, in this case, a dried, high-quality timber is taken. Its section should be equal to the height to which the floor rises, minus the thickness of the board to be laid. And also the floor with logs may have to be insulated. Glass wool or basalt wool, slag wool, as well as extruded polystyrene foam are used as a heat insulator.
Finally, flooring is taken as the final flooring - this is the most acceptable material. It is made with locks on the edges so that the fit during installation is of high quality and hassle-free. Since the wood is soft, it is easily abraded, therefore, you cannot do without a finishing composition. It can be varnish (especially topical) or paint. If boards of different sizes are used for flooring, heterogeneous, a layer of paint will mask this.
Choice of flooring
Balconies are open, glazed and unheated. And depending on the type, the type of flooring will also be selected.
-
An open balcony is exposed to external conditions like no other. That is why it is equipped according to special criteria: the floor covering must withstand frosts, rains and active summer ultraviolet light. It would be nice if the coating also has anti-slip properties, as rain and snow can get on the floor. Ceramic tiles, stone, porcelain stoneware, as well as special coloring compositions will adapt to such requirements.
Everything else on the cold balcony will be of little use.
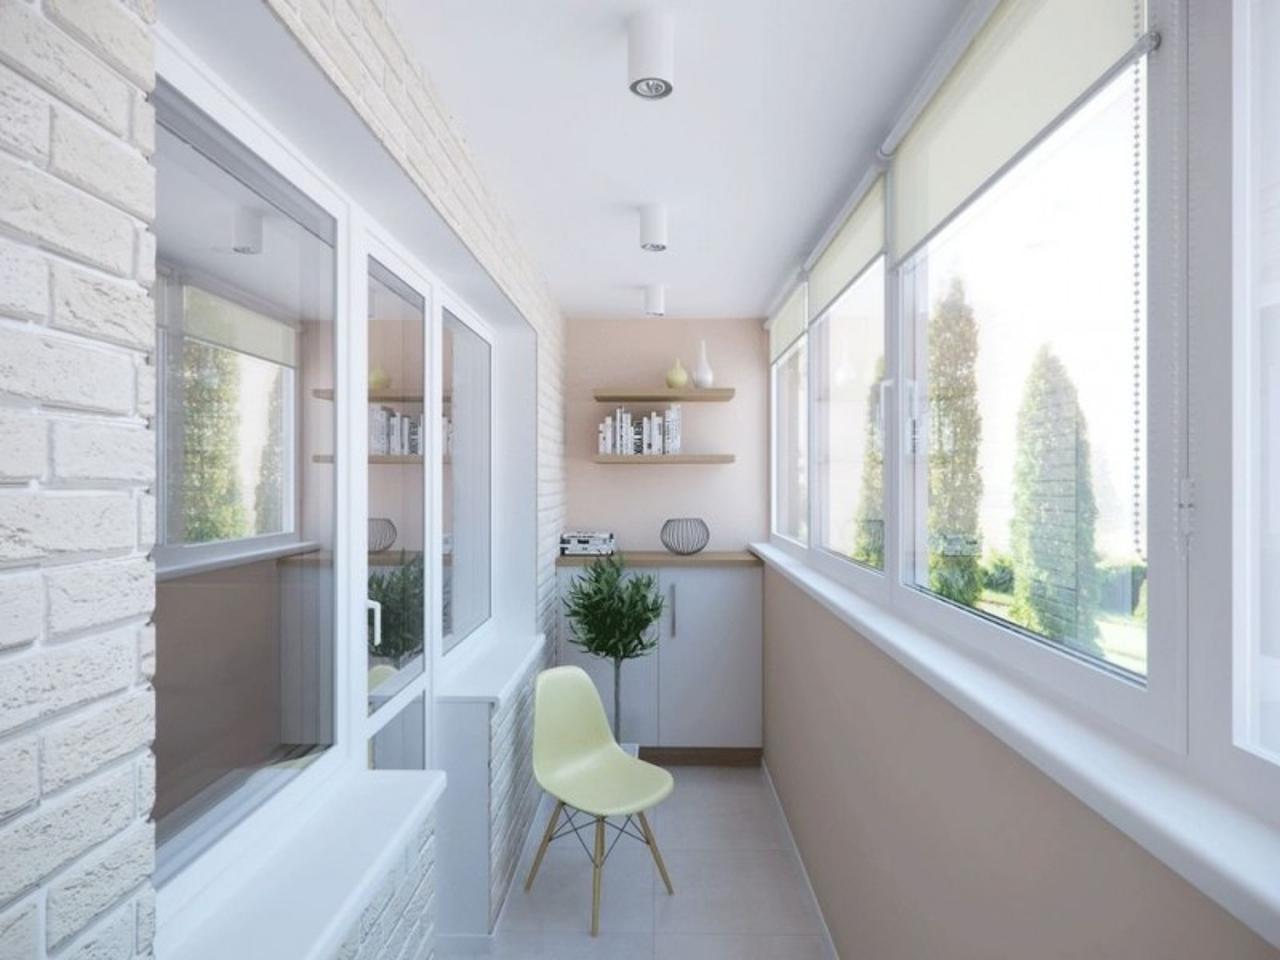
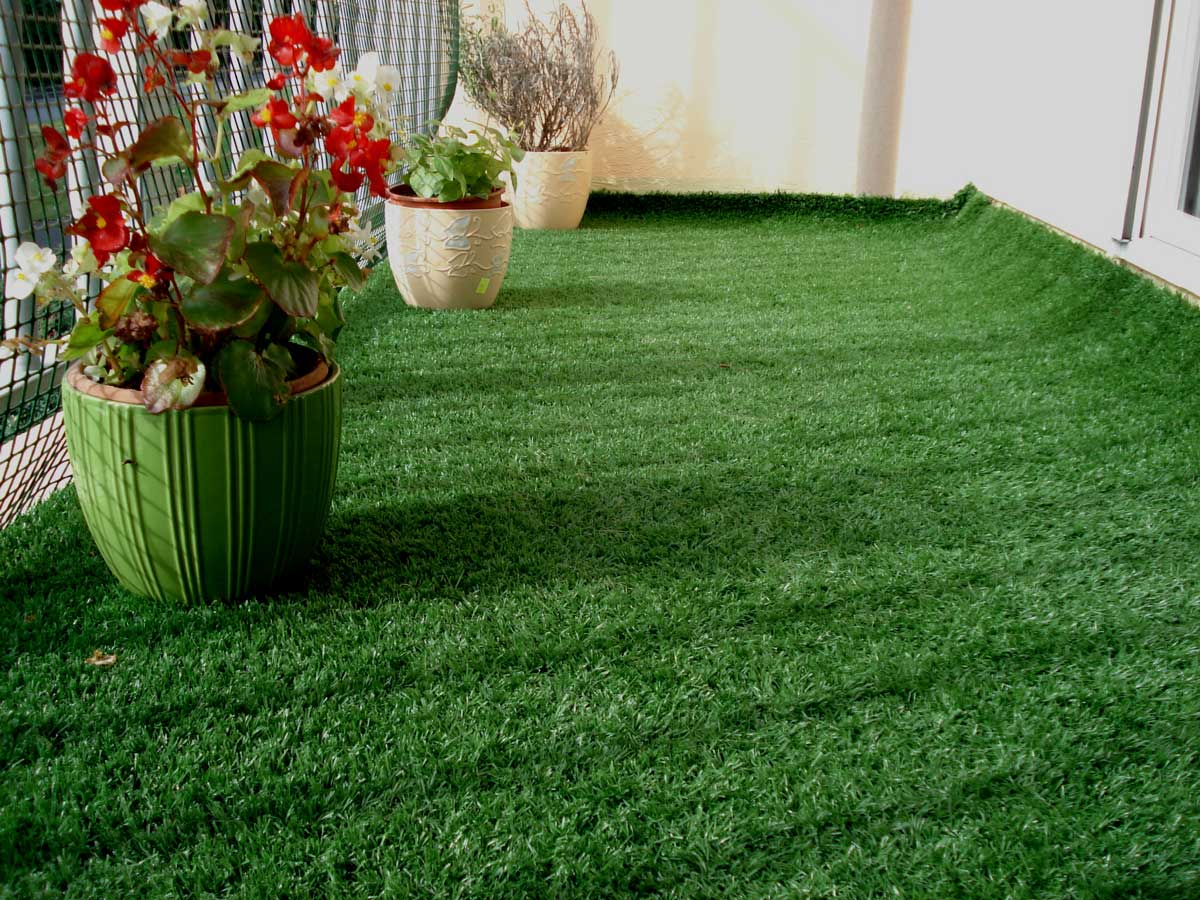
- The glazed balcony no longer makes such harsh demands. That is, the same tree can already be laid on it. Carpet (and this is also an option for covering) and laminate cause slight concerns. Due to condensation, the carpet can saturate itself with moisture, and the laminate deforms under temperature.

- An unheated balcony requires floor insulation. Often the option of plywood covering on the logs is chosen, which raises the floor and serves as additional space for thermal insulation. The same coating organizes a horizontal optimally flat surface for cladding. You can put both lining and linoleum on it. But the now popular cork for an unheated balcony will not work, it is too hygroscopic, the condensate will quickly turn the cork cover into rotten material.

What is better is up to the owners to decide, taking into account the initial capabilities of the balcony or loggia, as well as possible changes. Of course, a lot depends on the budget, on the size of the balcony (it is one thing to repair a small balcony in the "Khrushchev", another - a spacious loggia in a new building).
Preparation
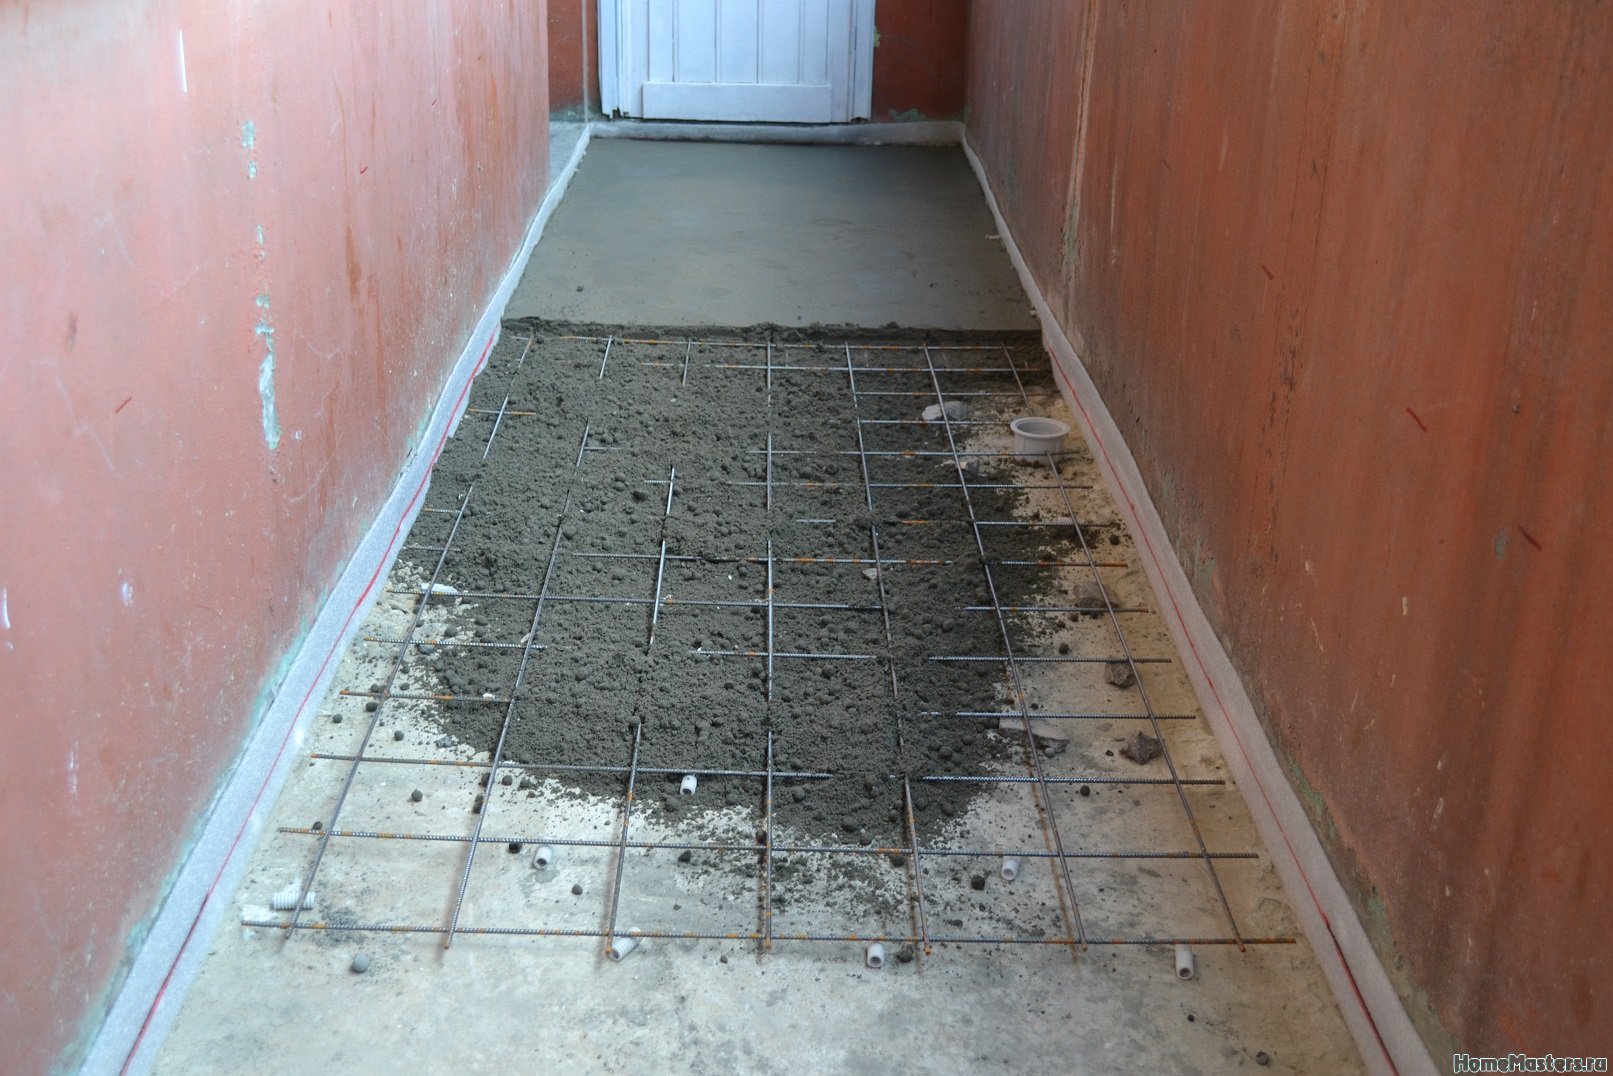
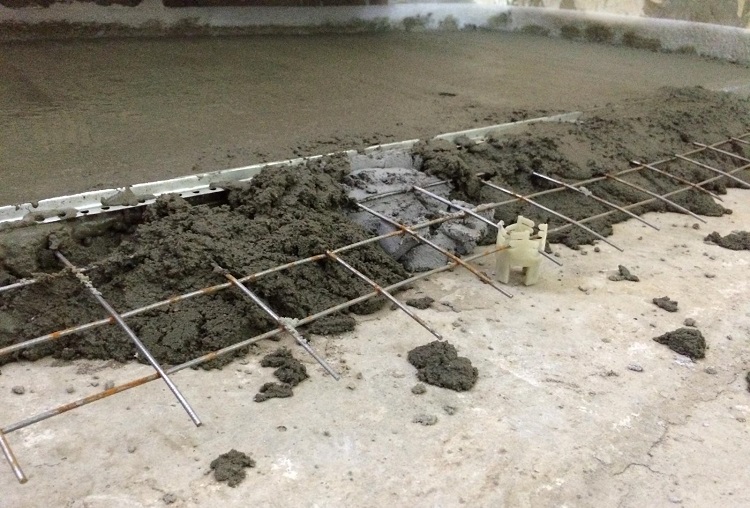
The surface must first be cleaned and leveled. Leveling the floor on an open balcony is not the same as on a closed one. A reinforcing mesh is placed on the cleaned slab. If the screed is performed on an open balcony, formwork is installed around the perimeter, but on a closed balcony there is no such need. 2-3 beacons are placed on the surface. Next is the pouring of the screed solution. And already on the dried concrete floor, a heat insulator is laid, and then another layer of mortar. This surface must be allowed to dry thoroughly, for a week. If the choice is stopped on a self-leveling screed, it will harden faster.
When it is not recommended to make the balcony structure heavier, the sub-floor is laid on a wooden frame. And the floor will be a three-layer structure - lathing, insulation and the flooring itself. This is how the floor preparation looks like before the main part of the repair.

How and from what to make a rough floor with your own hands?
And yet, you should dwell on the arrangement of the subfloor in more detail, because often the work is stalled at this stage.
Cement strainer
It must be understood that a conventional screed increases the load on the concrete slab. Even if the thickness of the concrete layer is minimal, this is already a certain risk. There are other methods of leveling, and if in doubt about the screed, it is better to consider them.
- The layer of cement screed cannot be more than 5 cm, but better than 3 cm. However, if you do it even less, it is already fraught with cracks.
- The surface of the floor is cleaned, then beacons are made, something solid is placed on the beacons (a fragment of ceramic tiles, for example). Further, at the building level, the lighthouses are exposed in the same plane, and they dry for a day. After drying, they are connected with a mortar - a trowel is used - the mortar is aligned horizontally using a rule.
- The formed beacon lines should dry for another day. Then the solution is distributed between the lines, the surface is again leveled with the rule.
- If the solution has already hardened, but it did not work out evenly enough, the surface in this place can be moistened with water for better alignment. On the third day, using a spatula, you can carefully pull out the pieces of the lighthouses, and seal the grooves with a solution.
- And again the alignment, and again the trowel and the rules.
Well, after complete drying, you can start finishing the balcony floor.
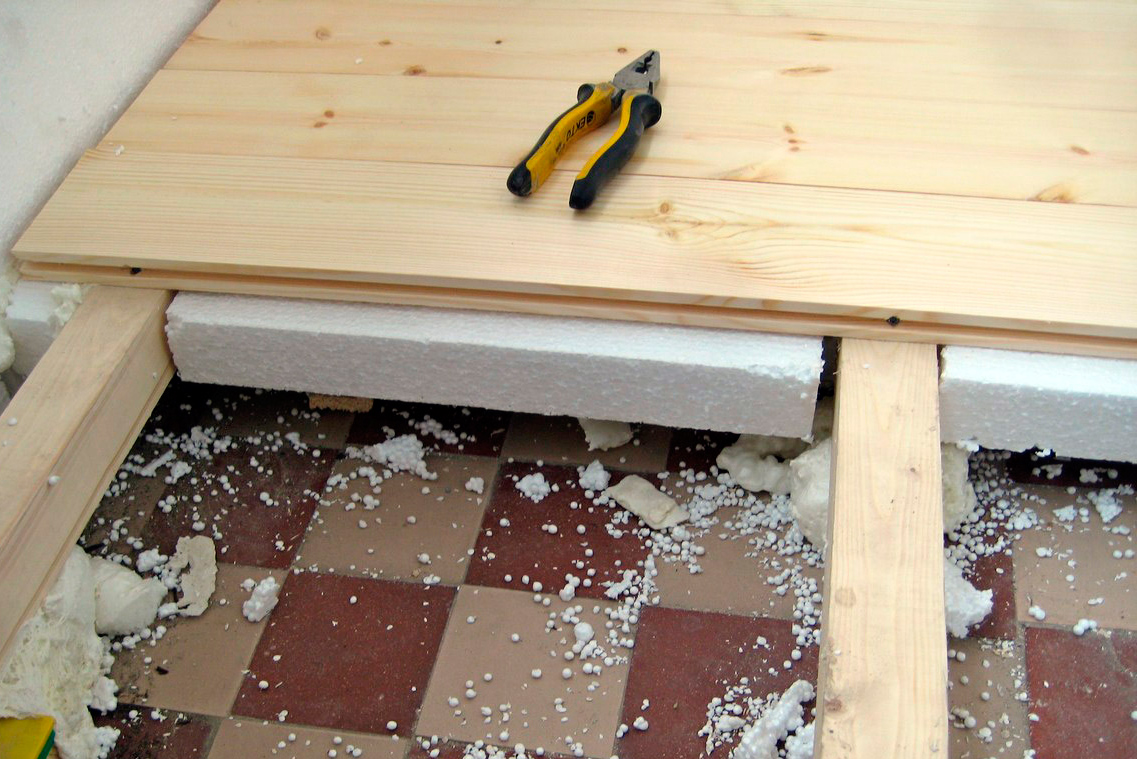
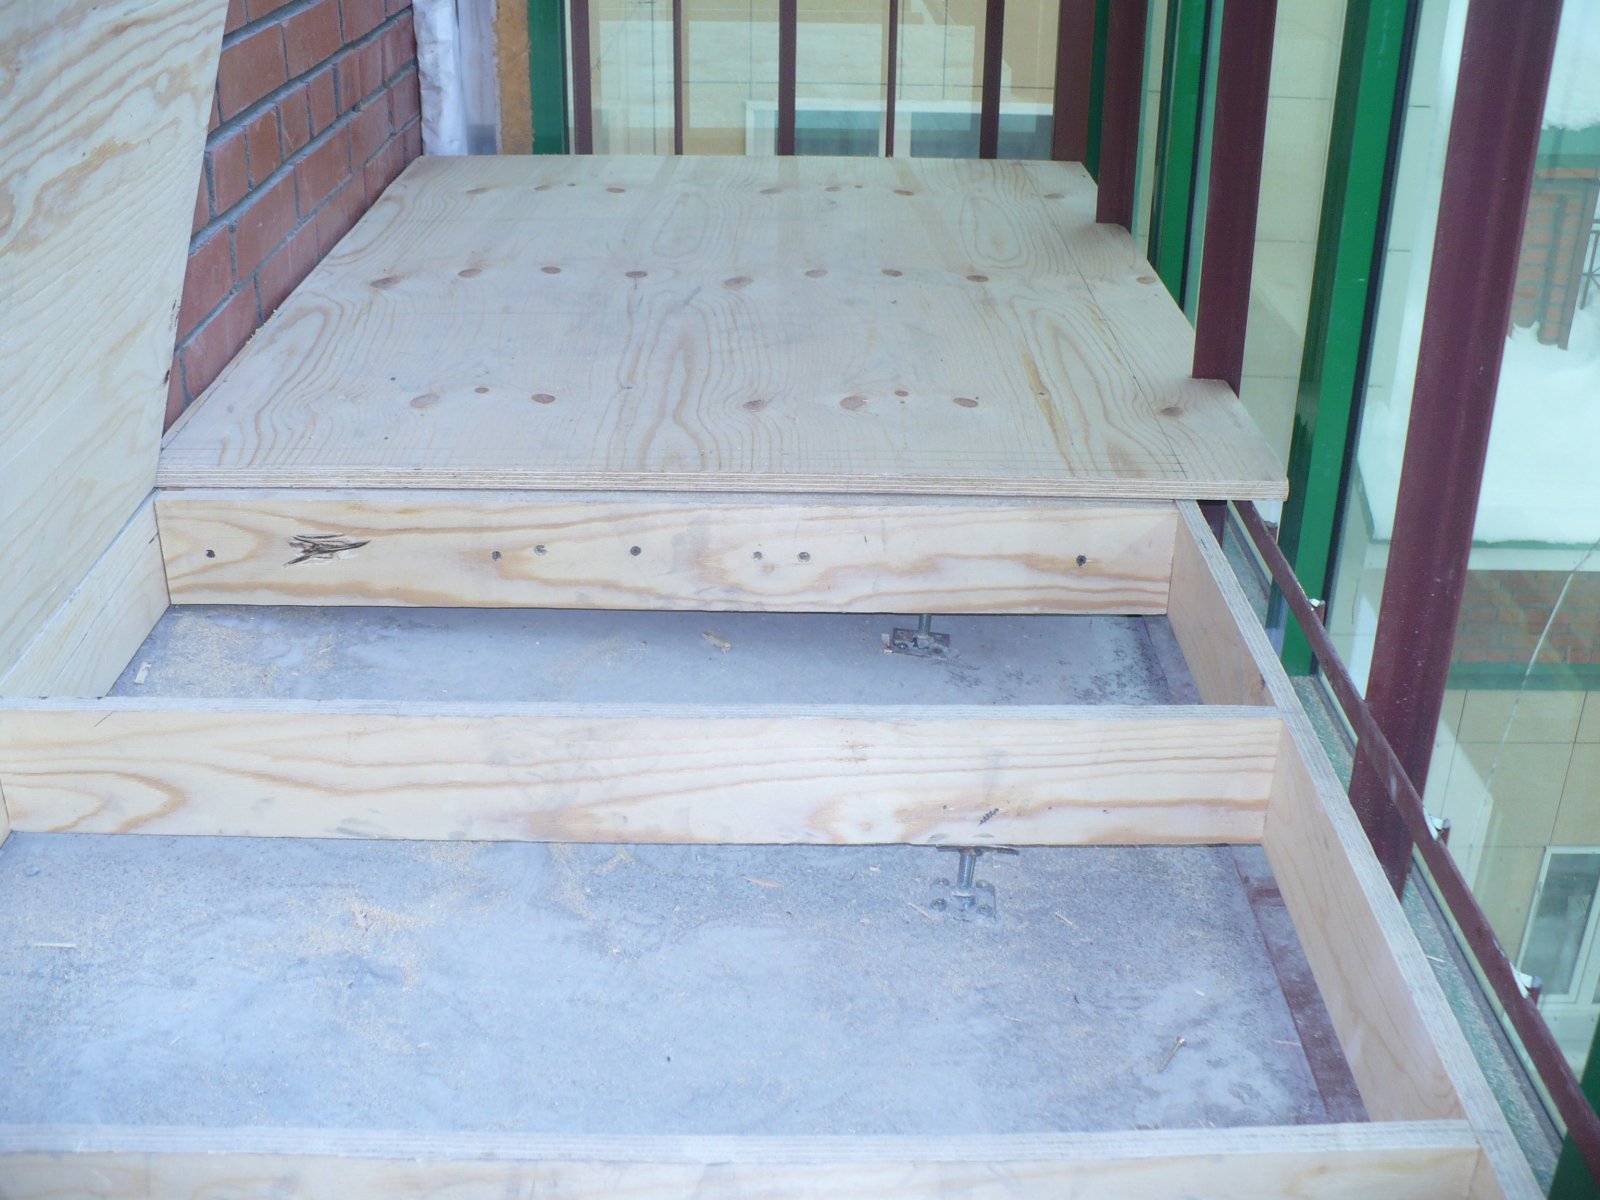
On the lags
First, the height to which the floor will be raised is determined. And this is taking into account the fact that insulation is usually placed under the logs.
There is nothing super complicated in the instructions:
- the timber is cut exactly to the width of the balcony;
- the cut fragments are laid out on the floor so that the distance between the crossbars is at least 40 cm (but not more than 60);
- on each beam, 2 holes of attachment points are made (the hole penetrates halfway into the depth of the beam);
- the distance between the holes is maintained at least 80 cm;
- after the diameters have been drilled, concrete is drilled through the timber;
- then anchors are inserted into the holes and tightened, the depth of the hole formed must exceed the length of the fastener by 2 or even 3 cm, otherwise the fasteners cannot be completely inserted;
- then the longitudinal logs are laid on the fixed diameters, the distance between the logs is about 40-45 cm, that is, 2-3 logs are enough for a standard balcony or loggia;
- then you need to find the highest point, from which the fastening of the log to the diameters starts;
- the space between the crate and the floor can be filled with a heat insulator, for example, mineral wool;
- when the insulator is laid, everything is covered with plywood or chipboard;
- the contour of the subfloor is closed with polyurethane foam.
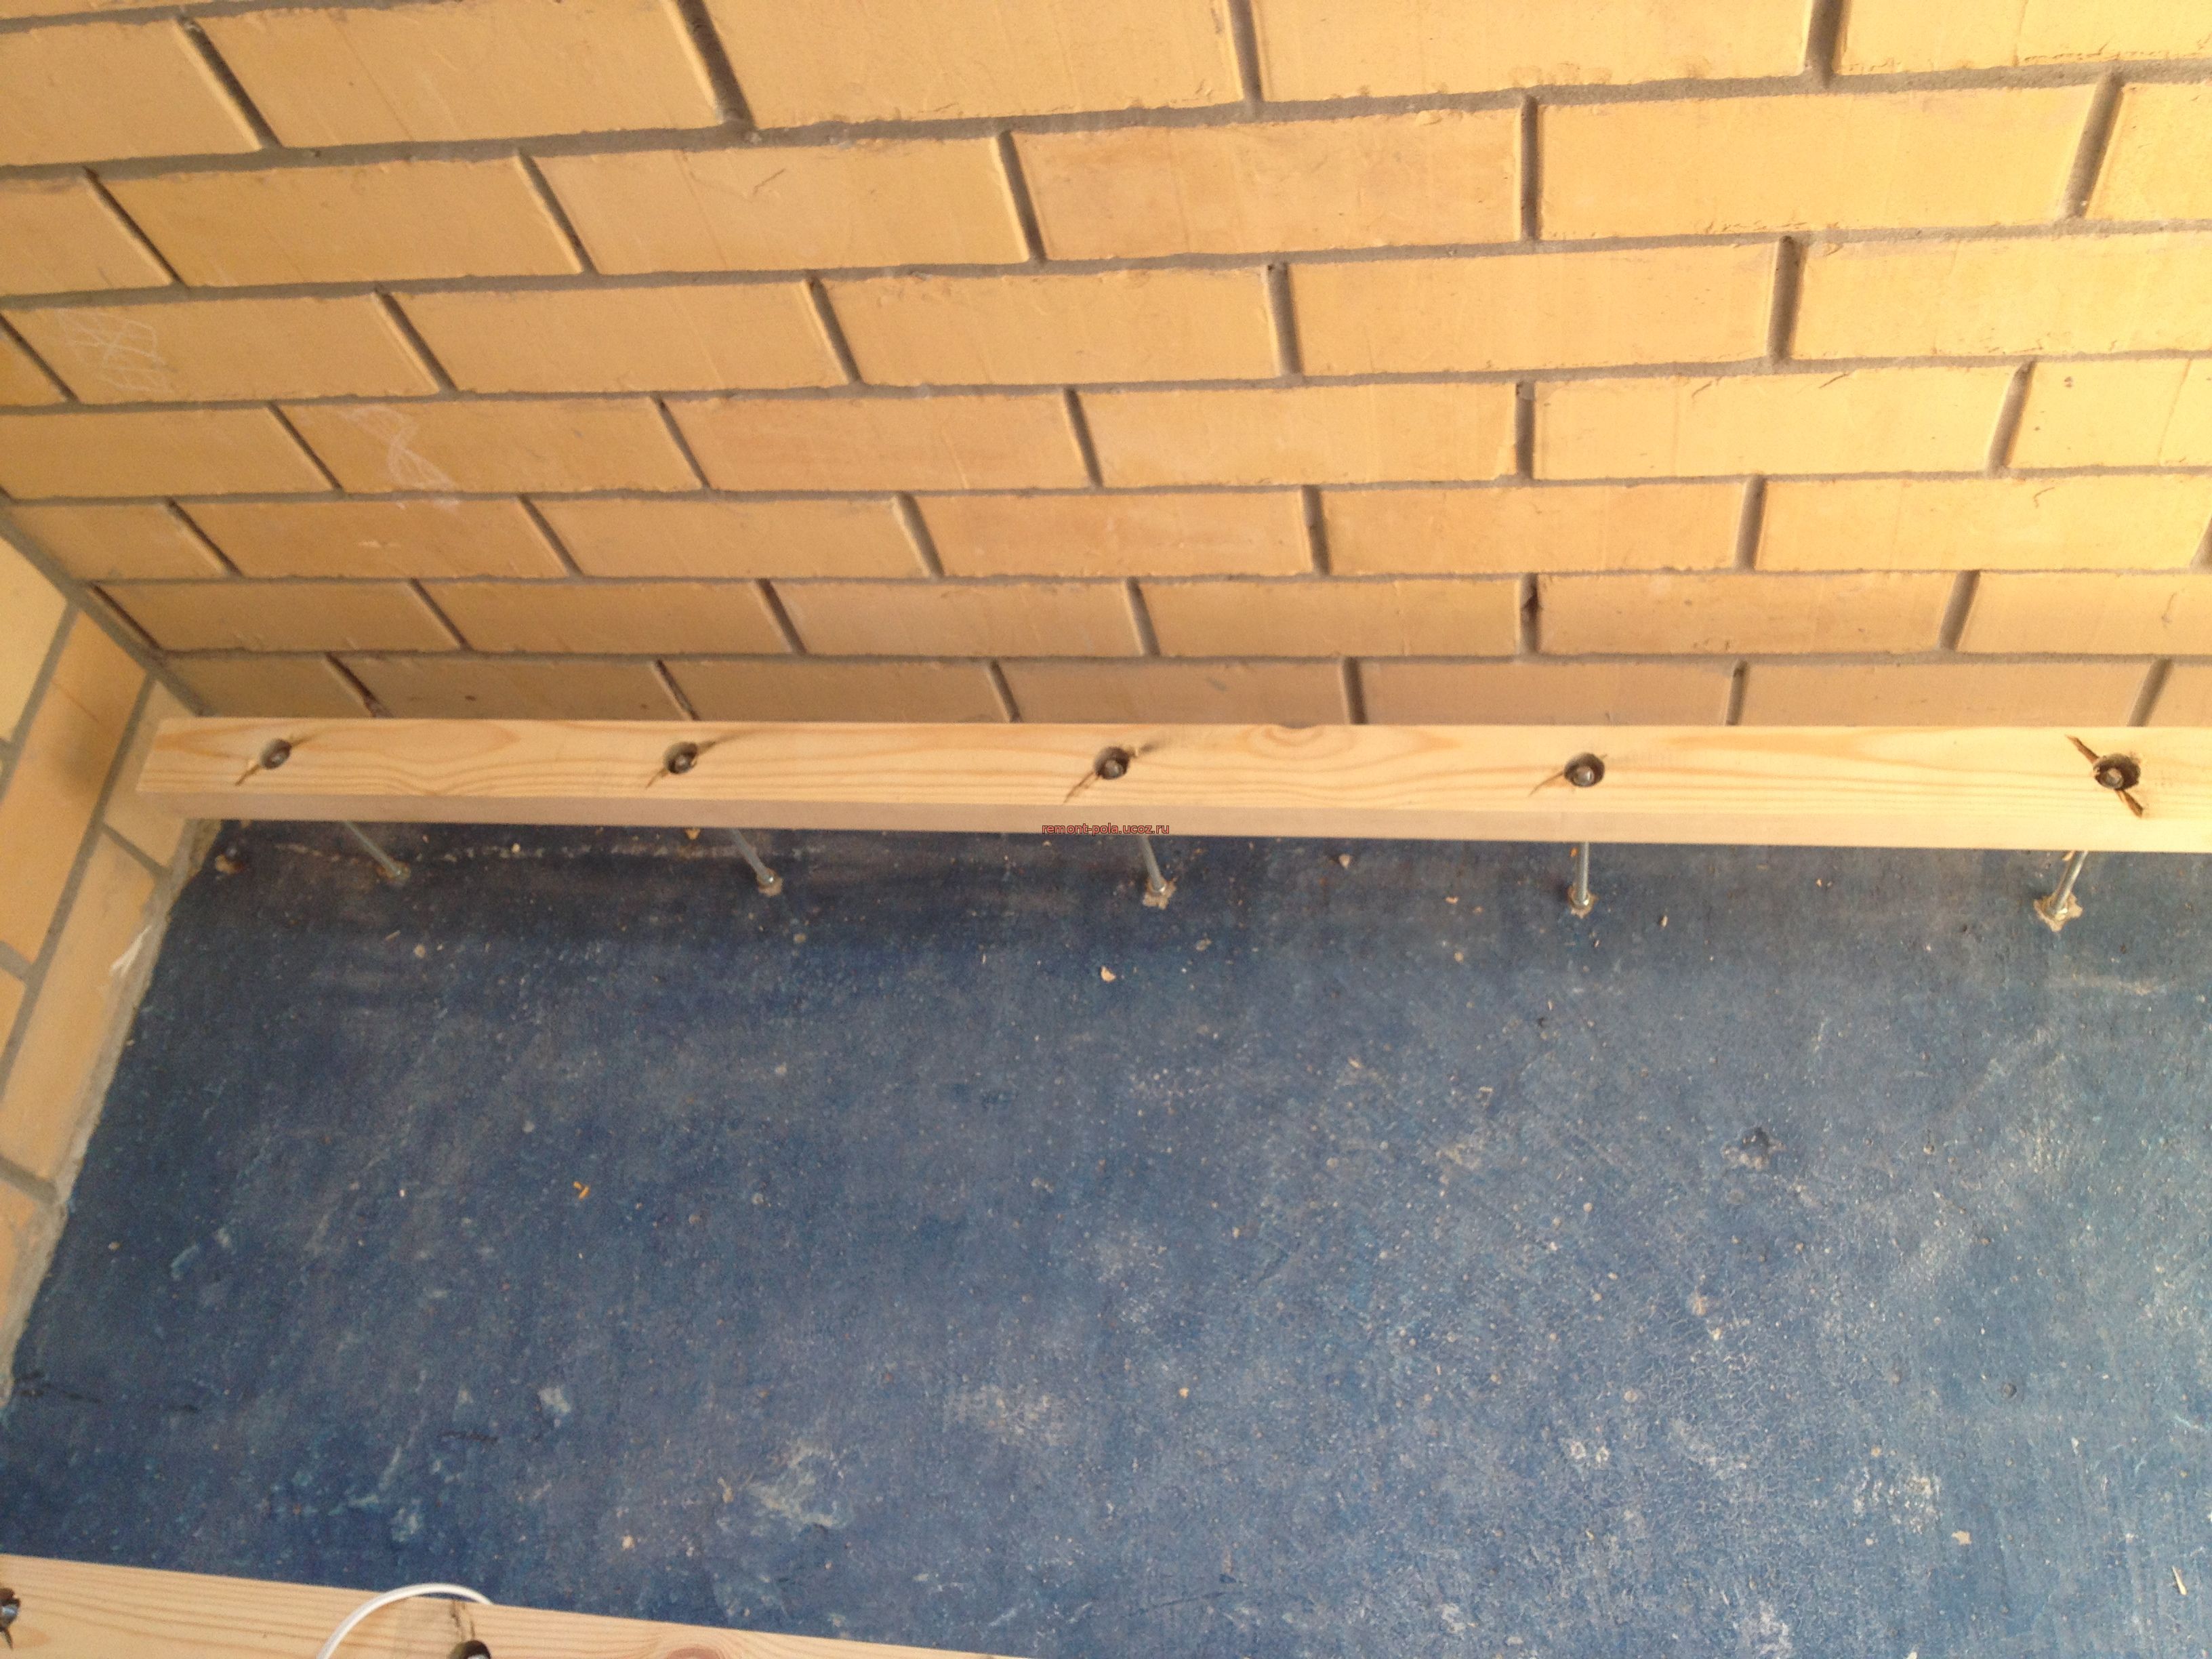
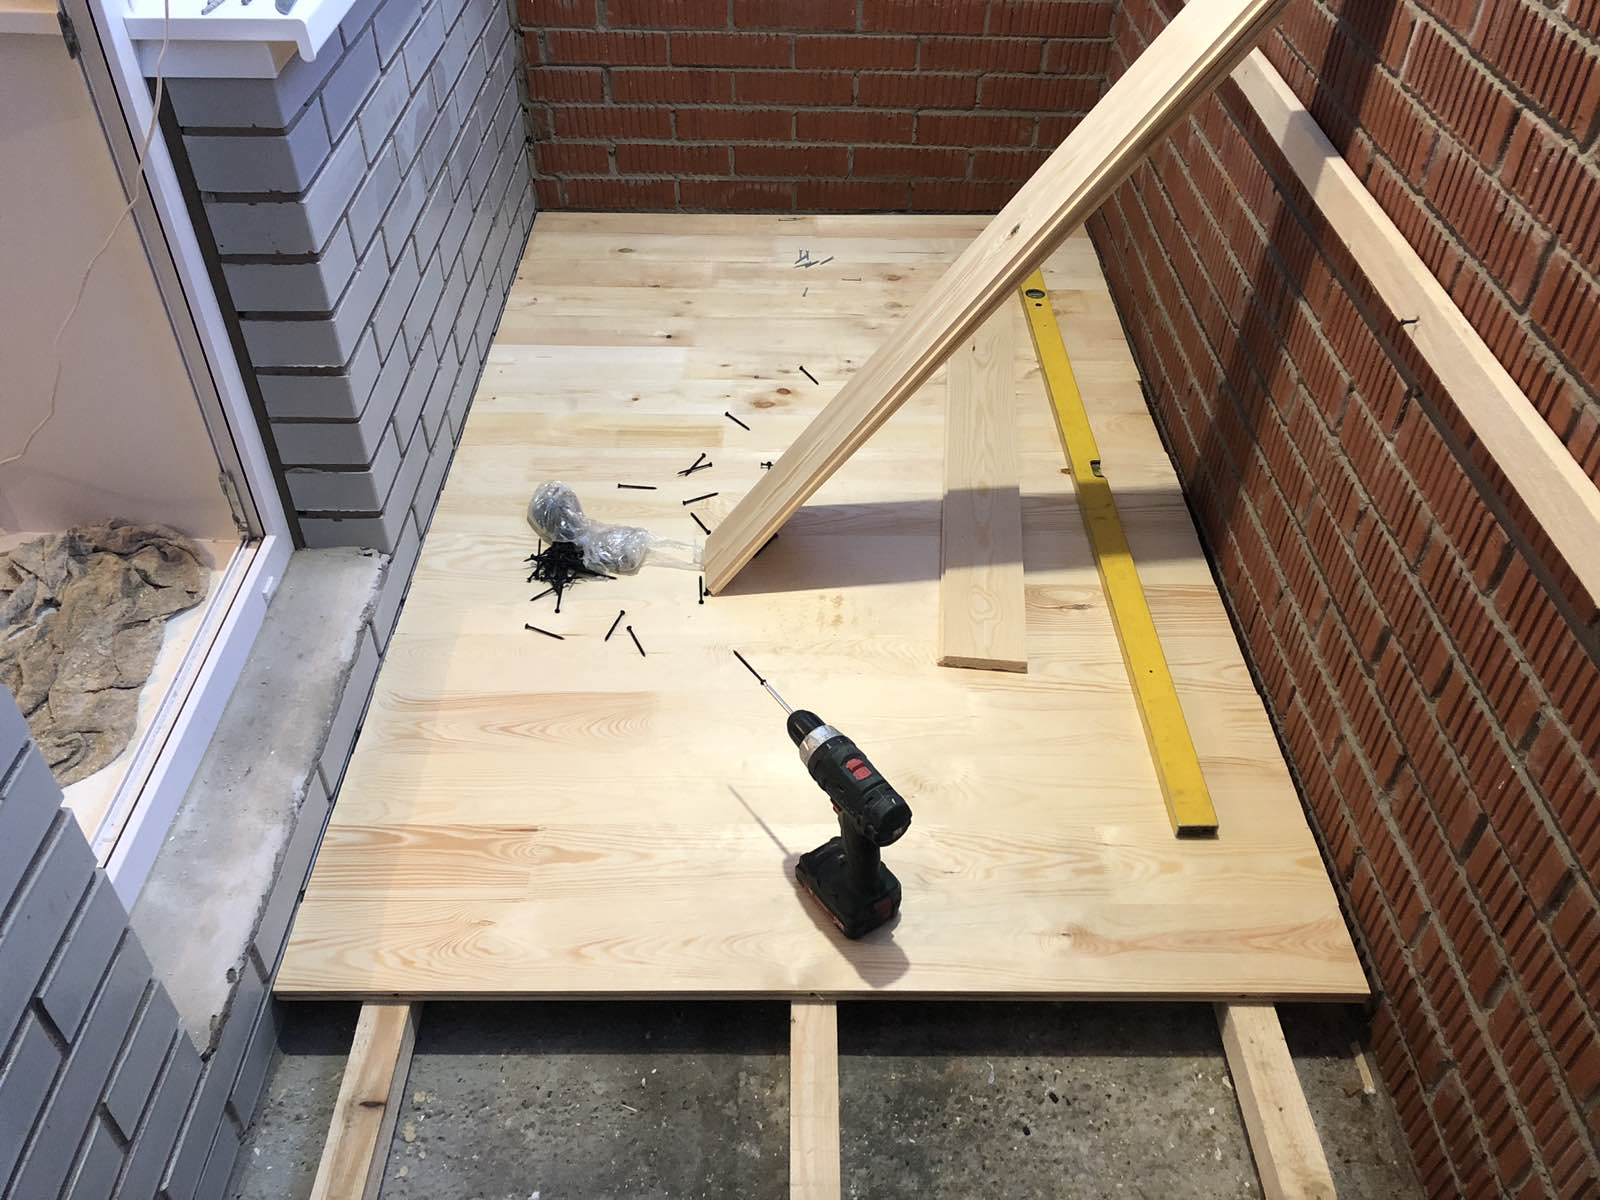
This completes the production of the sub-floor on the logs.
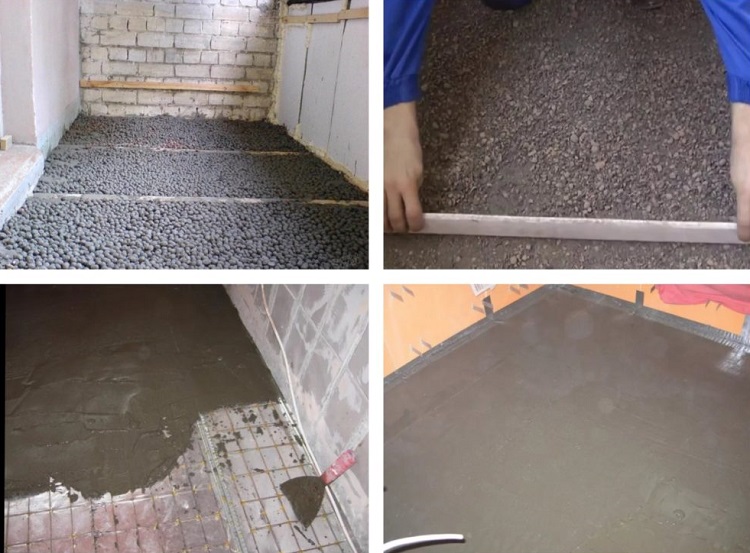
Dry
The floor is cleaned of debris, the cracks are sealed with polyurethane foam. So that the sound from the walls does not go to the floor, a gap is left between the dry screed and the wall. A soundproof tape made of special foamed polyethylene is laid along the perimeter of the balcony. And this not only protects against sound, but also prevents the finished floor from deforming due to expansion.
What's next:
- waterproofing - a film with a thickness of 80 microns or more is put, the edges of the film must be fixed with masking tape;
- laying of expanded clay layer - better than 2 layers of expanded clay, and between them GSP;
- installation of guides along long walls, the surface between the guides is aligned with the rule;
- the guides are removed, the irregularities are smoothed out, and this is how the first layer of expanded clay is made;
- followed by an intermediate layer of GSP, and again a layer of expanded clay - the same as the first;
- the screed is closed, the elements from the GSP are cut out, the joints are glued, and the joints are screwed in with self-tapping screws every 7 cm.


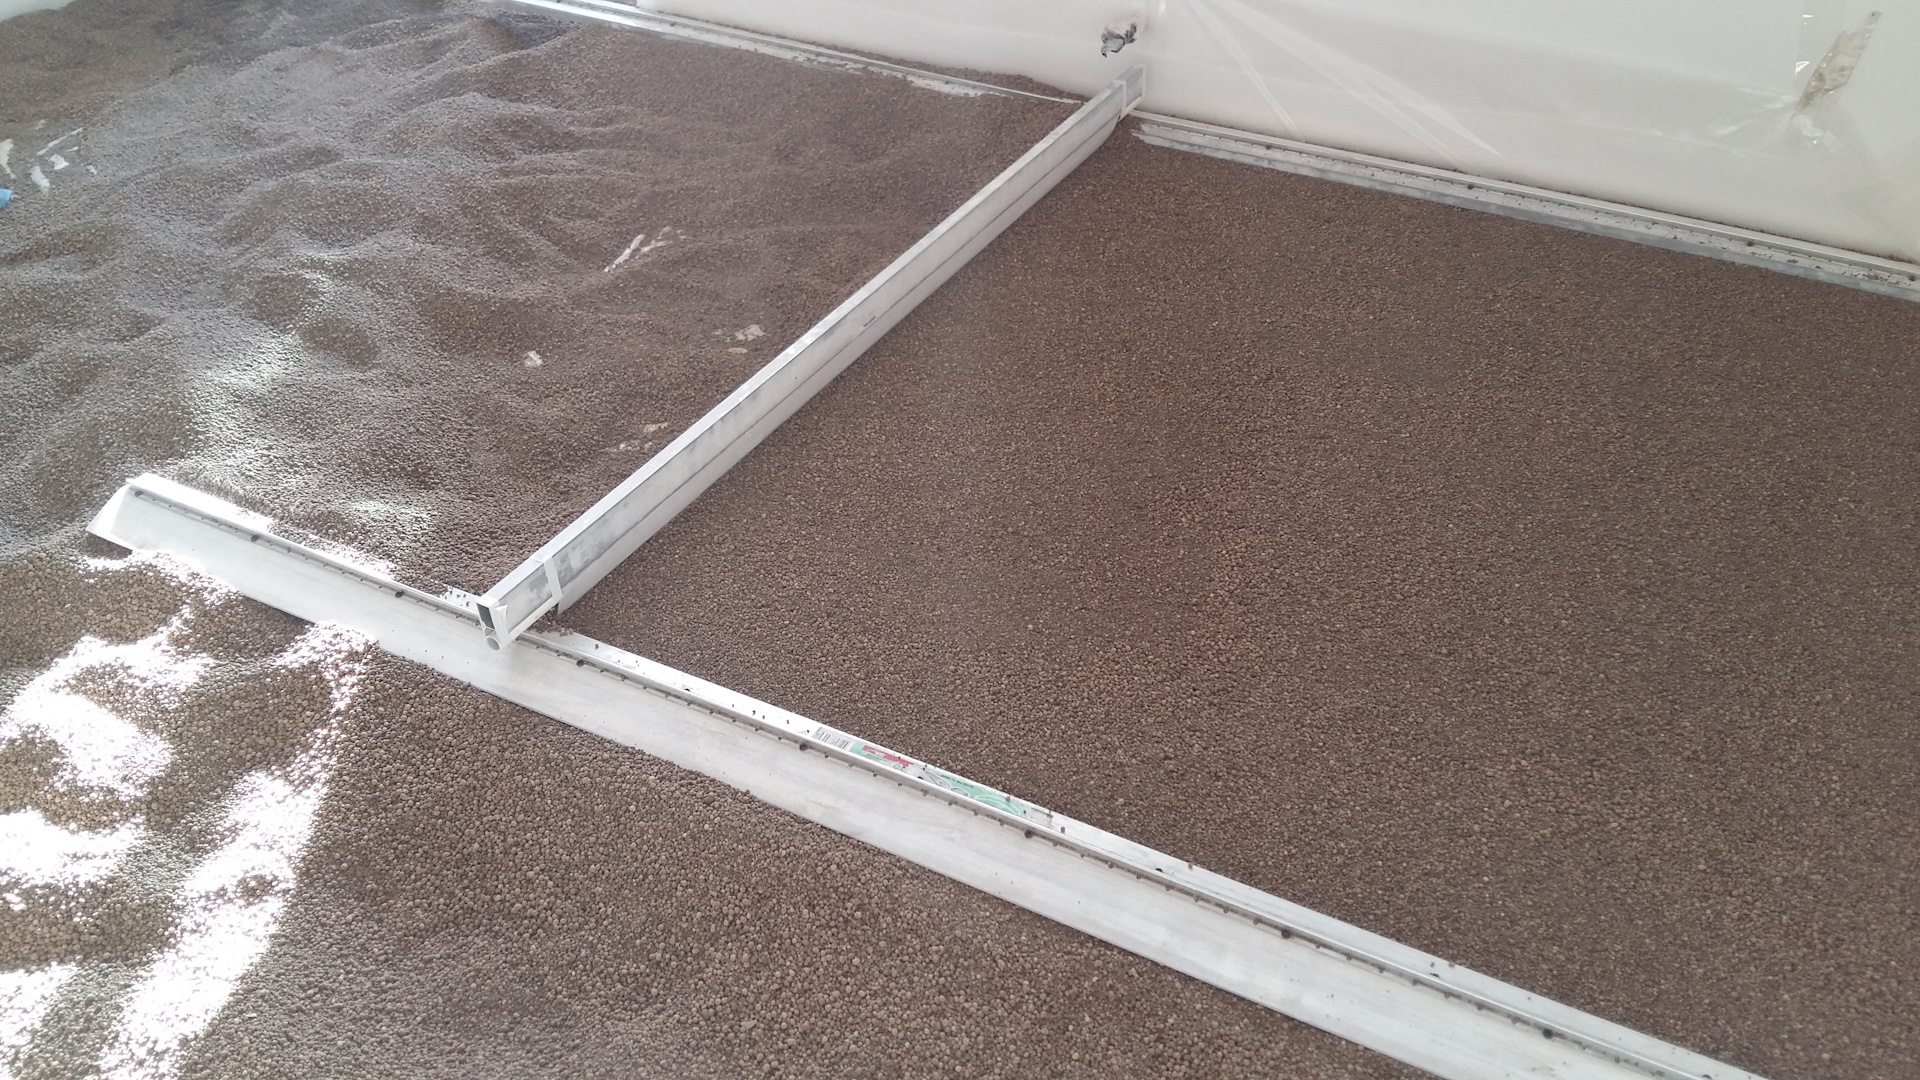
On such a floor, you can lay linoleum, carpet, whatever.
Bulk
And again, beacons are installed on the surface of the concrete slab. These can be self-tapping screws, which are connected to each other by a cord, along which pouring is performed. When the mixture was poured, the beacons are removed. A polyethylene tape is laid along the perimeter of the walls, it does not allow the coating to expand and form cracks on it. Then you need to prepare the mixture, strictly following the instructions on the package. If the mixture is too thick, it will not spread as it should, but very liquid, on the contrary, will separate into components.
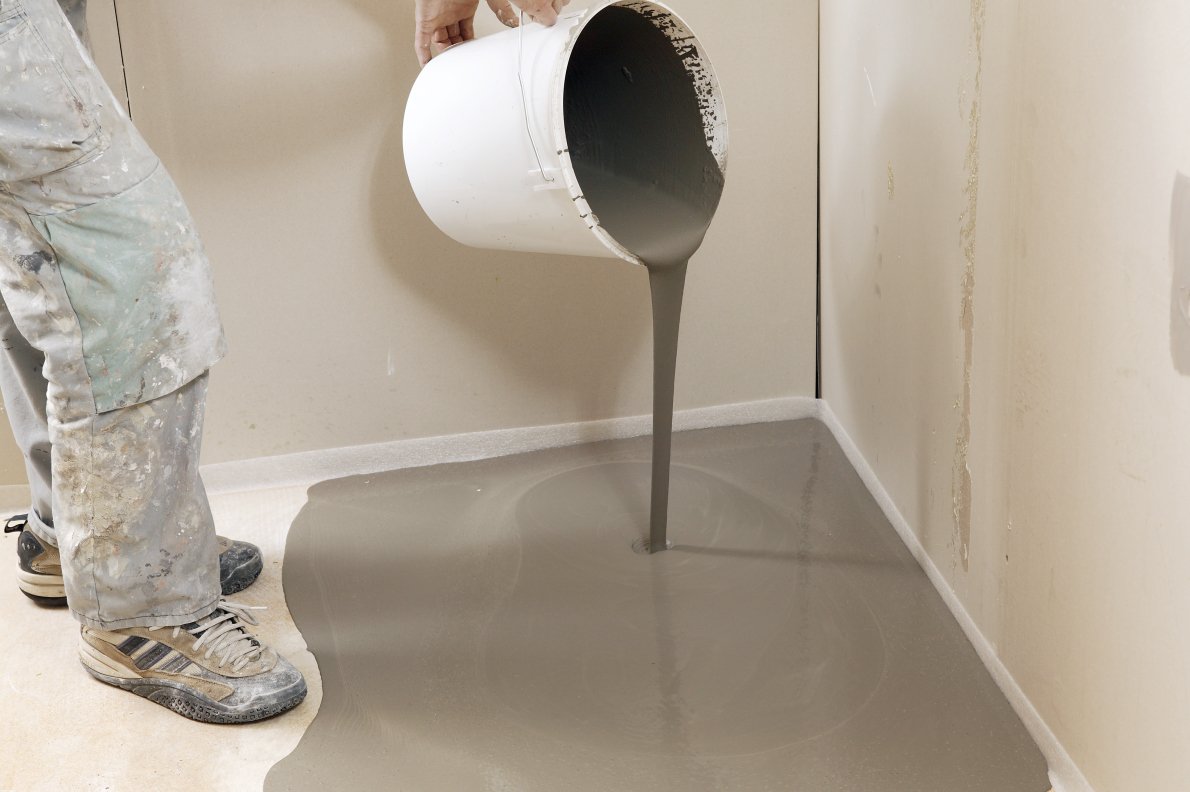
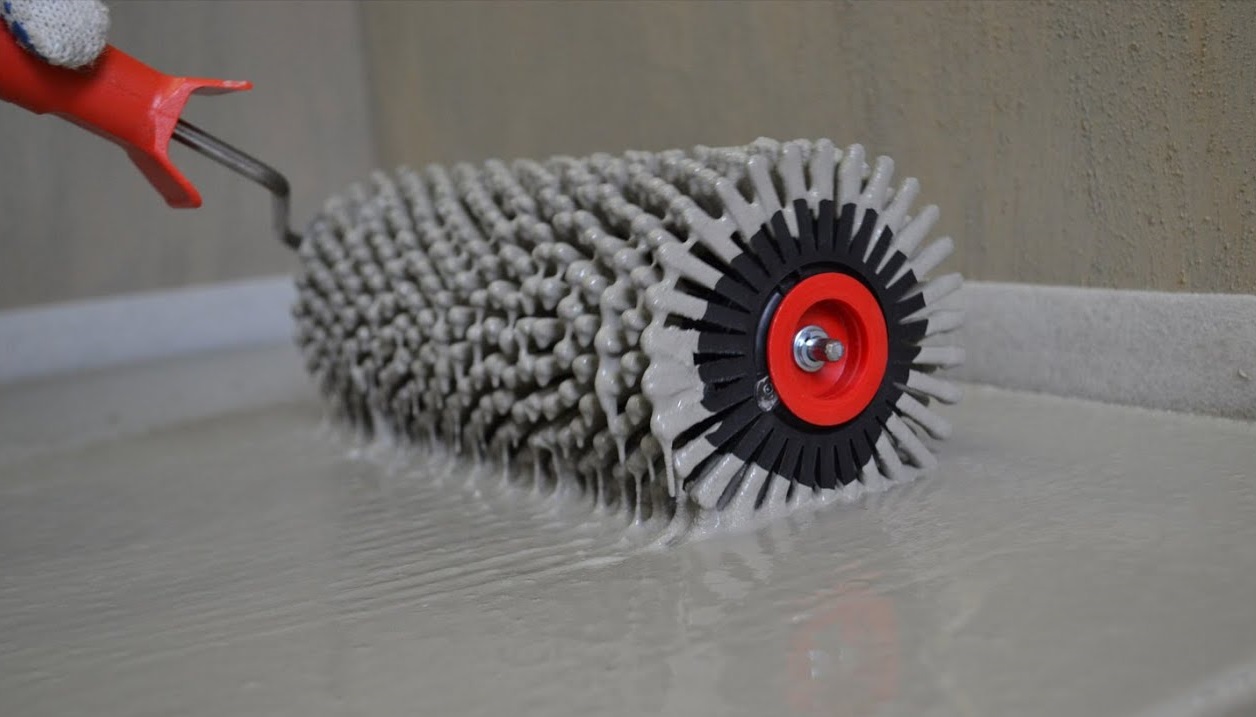
From the wall that is opposite the entrance, the pouring goes in small portions. The thickness of the layer is regulated by a building rule or a spatula, the best option is 3 mm. The air bubbles will be removed by the needle roller. On a fresh self-leveling floor, by the way, you can walk in shoes with needles on the soles, it is not difficult to find it in the building market. The self-leveling floor will dry up to three days.
Step-by-step finishing instructions
The subfloor is ready, it's time to lay the topcoat. You can do almost everything yourself.
Ceramic tiles
Laying goes along the parapet starting from the far corner of the room.
Let's analyze the installation of tiles in stages.
- The surface is thoroughly cleaned.
- The adhesive composition is mixed according to the instructions, a perforator + mixer nozzle is used.
- The glue is applied to the selected area, a layer of no more than 3 mm. No more than one square at a time, otherwise the glue will dry out. The surface is leveled, the excess is removed by a notched trowel.
- This is followed by the installation of tiles. Glue is applied on the reverse side, and again leveling with the same spatula. Thickness - 5 mm.
- The tiles are laid, pressed down, everything is controlled by the level.
- And so - all the following tiles, do not forget to insert plastic crosses between them so that the seams do not bend. If the tiles are made of porcelain stoneware, the installation will be seamless.
- For a day, everything is left to dry, after which the seams can be treated with grout.


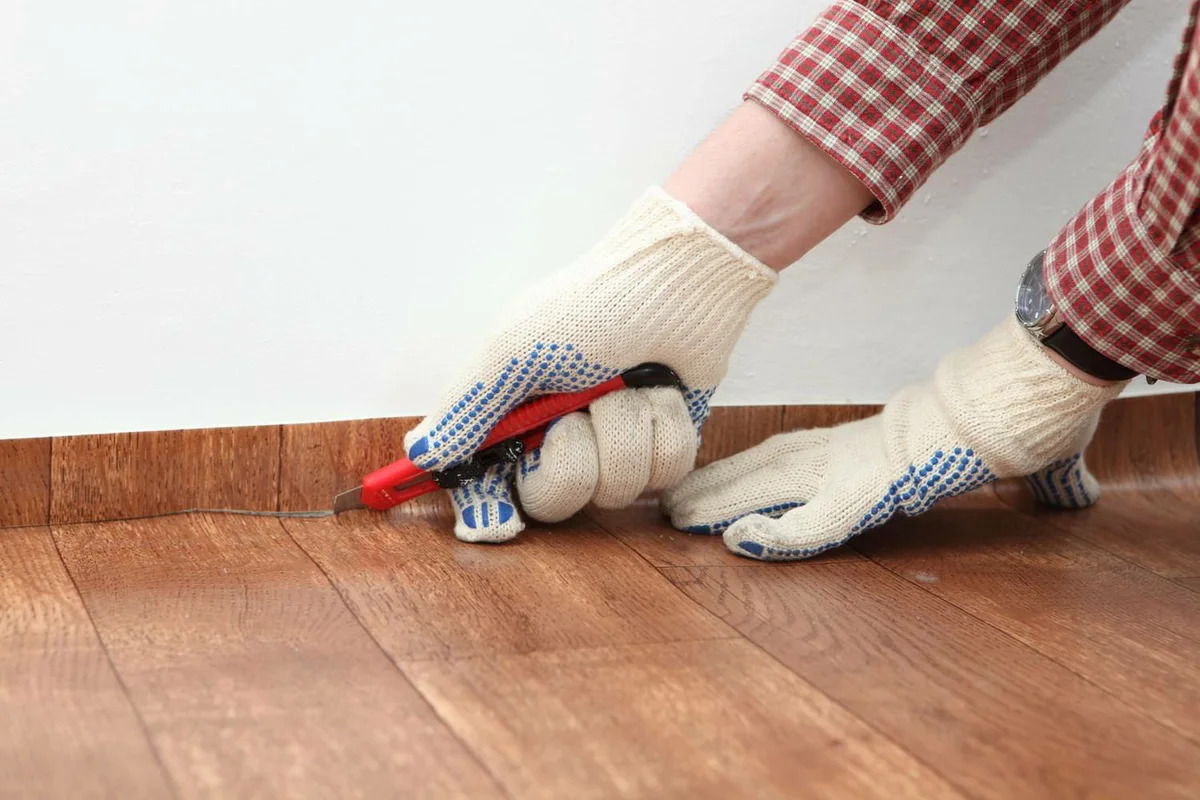
Linoleum
First, the material is brought onto the balcony, it must adapt to the room.
What to do next:
- the material is tightly spread on the subfloor so that its edges come out onto the walls, and so the linoleum lies for another day;
- then the material will have to be cut to form a gap between it and the wall in a centimeter, this distance will then be closed with a plinth;
- the plinth is applied to the wall, fixing holes are made with a puncher;
- dowels are inserted into the holes, then a screw or self-tapping screw is used;
- a strip is put in place, covering the cable channel.

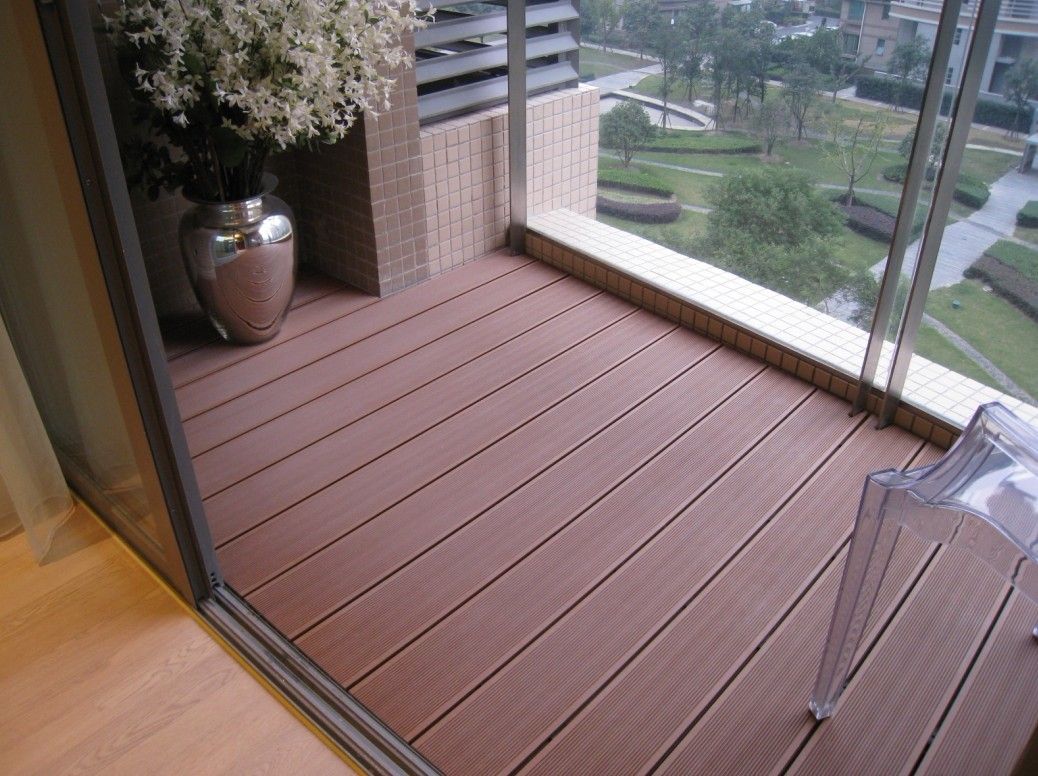
Decking
Installation of a terrace board requires preliminary installation of the lathing according to the standard scenario.
Here's what to do next.
- The first element is placed along the wall, a self-tapping screw fixes it in the countersunk holes.
- A hidden fastener is mounted, which is fixed on the bar in the groove of the board. It is fixed with a self-tapping screw. Other panels are also attached.
- Docking the ends requires finding the joints on the logs, fixation is due to mounting clips.
- The outer board is mounted on self-tapping screws, like the starting board.

It is correct to leave a gap between the wall and the floor covering - the decking is made of wood (larch, for example), the sheathing will begin to expand, which will entail deformation.
Cork
Adhesive cork floors are the best option if the floor design is so exotic.
How to cork a subfloor:
- withstand cork slabs on the balcony for adaptation;
- markup;
- apply glue to one plate, then to another;
- glue the far end of the tile;
- push the plate;
- apply a finishing coat of varnish.
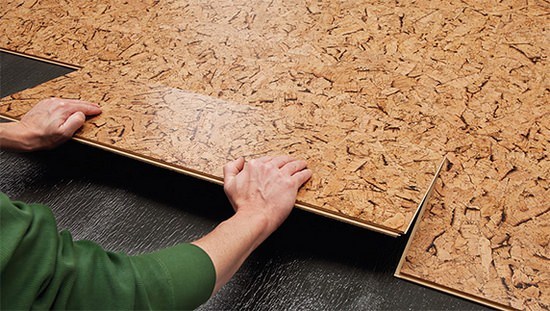

In fact, everything is just that simple. Varnish is required, and it is better if it is 3 layers. Each previous layer is sanded before applying the next one.
Laminate
First, all the necessary measurements are performed, then the laminate is cut with a jigsaw. Cut at a high speed to avoid chipping.
Let's consider how to finish the floor with laminate.
- A substrate is laid on the rough surface, the floor must be cleaned.
- The substrate will be fixed with a construction stapler or simple double-sided tape.
- After that, the first laminate board is laid. Longitudinally, diagonally, herringbone, squares - there are many ways of laying.
- If the fixing method is a snap-in lock, subsequent parts will close with the previous ones without problems.
- But in the area of the threshold, difficulties may begin: the lamella will have to be cut to deepen.
- The last element must be laid after cutting, the cut is carried out along. If it turned out not quite smoothly, it's okay, this section will still cover the plinth.


Those who laid the laminate should not experience difficulties in decorating the balcony floor with this material.
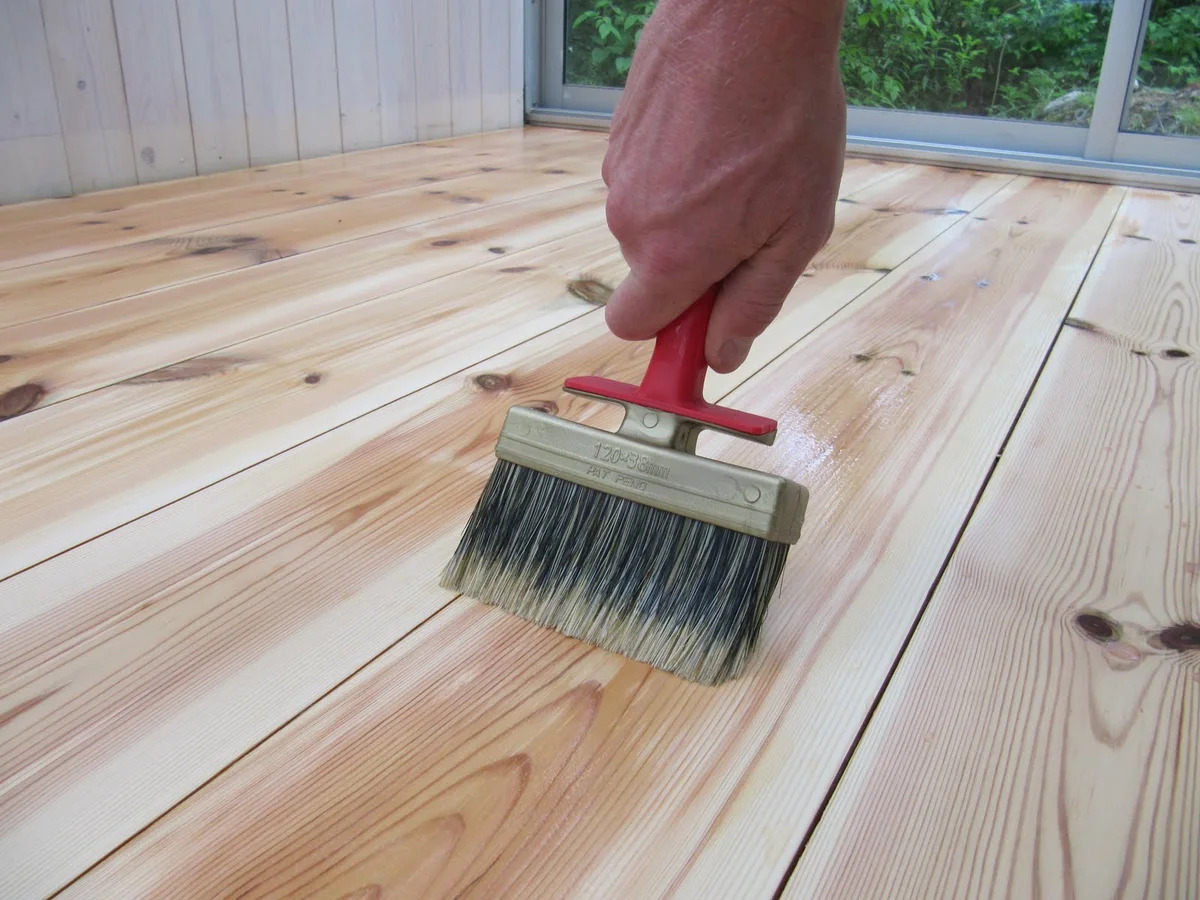
Paint
You can use a special paint for concrete, which contains multifunctional polymers: they protect against thermal shock, high humidity, and erosion. The coloring composition will not fade in the sun, it is also represented by a sufficient number of shades.
Paints can be acrylic, epoxy, polyurethane. Well, everyone probably knows how to paint: the surface is cleaned, dust-free, a person applies paint to the floor with a roller or brush in a certain direction and fills the surface with a uniform layer.

Painting begins from the far corner towards the entrance. On an open balcony, this method of floor decoration is not uncommon: it is not always possible (and even necessary) to cover the floor, or make it self-leveling, equip it with heating. But concrete can be painted almost always.

Master Tips
And in conclusion, a few tips that the masters do not get tired of repeating to those who decided to do with self-repair (which is always a little risky).
Repair recommendations without the involvement of specialists:
- small irregularities and imperfections in the floor are eliminated by a self-leveling mixture, but with noticeable differences it does not save - only a crate is needed;
- if ceramic tiles are chosen as the topcoat, a dry, semi-dry or cement screed will become the subfloor;
- if you want to focus specifically on fashion, trends, then it's better not to come up with a wooden floor - aesthetic, eco-friendly and warm, and even budgetary, and no one will reproach for being old-fashioned;
- for an open balcony, a terrace board would be an excellent solution;
- if you choose a laminate for a loggia or balcony, it is desirable that it be 32 classes;
- if linoleum is laid, let it be a solid piece of material, and not a "double" floor, that is, a couple of fragments next to each other;
- the self-leveling floor is good for everyone, but the surface can turn out to be quite slippery, you will have to use rugs;
- the carpet is convincing if the loggia or balcony becomes an extension of the living room;
- the floor made of OSB slabs (this is cheap) is also laid on the balcony, after which they are painted, after priming.

There are many options, there is always one that will satisfy the needs of the owners. And before self-repair, understanding the subject will not hurt - that is, studying the installation instructions, as well as watching a couple of master classes in video format.
Good luck!
How to insulate and fix the floor on the balcony, see the video.


