All about roofs on the balcony
Almost every apartment in a multi-storey building has a balcony, but not all balconies are equipped with a roof. The absence of this structural element can lead to a negative impact of atmospheric precipitation on the walls and, as a result, their destruction. To prevent this situation, experts recommend building roofs over loggias with the help of craftsmen or with your own hands.
Primary requirements
The roof on the top floor balcony is an important part of it, and it is recommended to equip it to solve the following tasks:
- protection from sunlight, dust, ice formation;
- preventing the formation of dirty stains on the surface of the walls;
- protection from conflicting neighbors.
In the absence of a good roof repair, the owners of apartments located on the top floor will have to constantly endure cold and dampness. To make your life more comfortable, experts recommend glazing loggias and ennobling them with roofs. The latter must meet certain requirements and have specific characteristics.
- High safety margin. The consumer must be sure that in the event of a strong gust of wind, rain or snow, the structure will be able to withstand the load.
- Lightness that should not affect strength.
- Waterproofing. The roof on the balcony must retain moisture and cold air masses.
- Correct slant angle. Thanks to this moment, precipitation will not be able to linger on the device and will roll off.
Description of views by frame type
The roof of the loggia is of several types. When installing this structure, several types of material can be used.
- Wood. This option is currently not in demand, since despite the special processing, the wood is deformed and destroyed under the influence of high humidity.

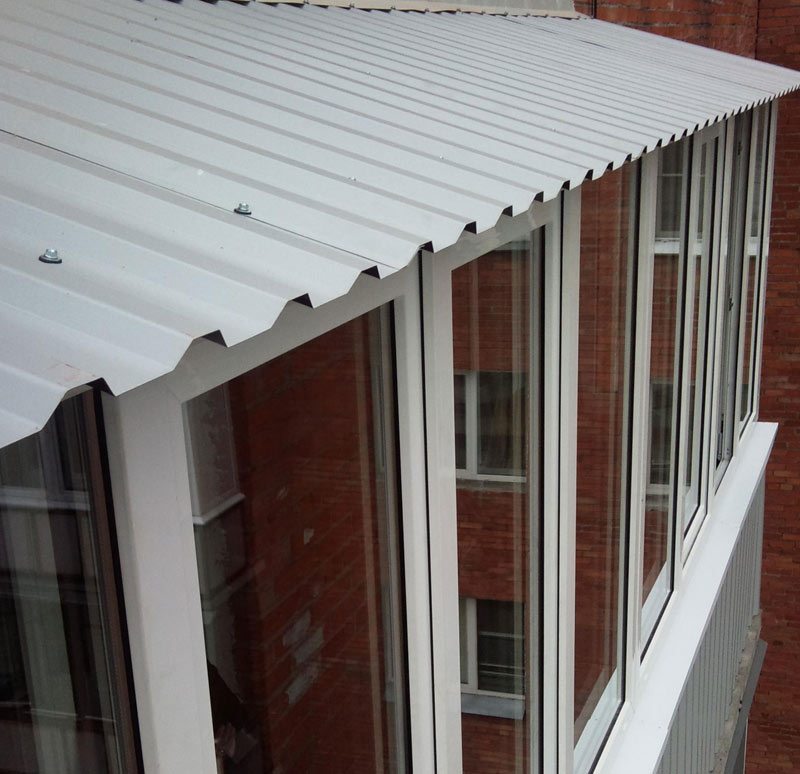
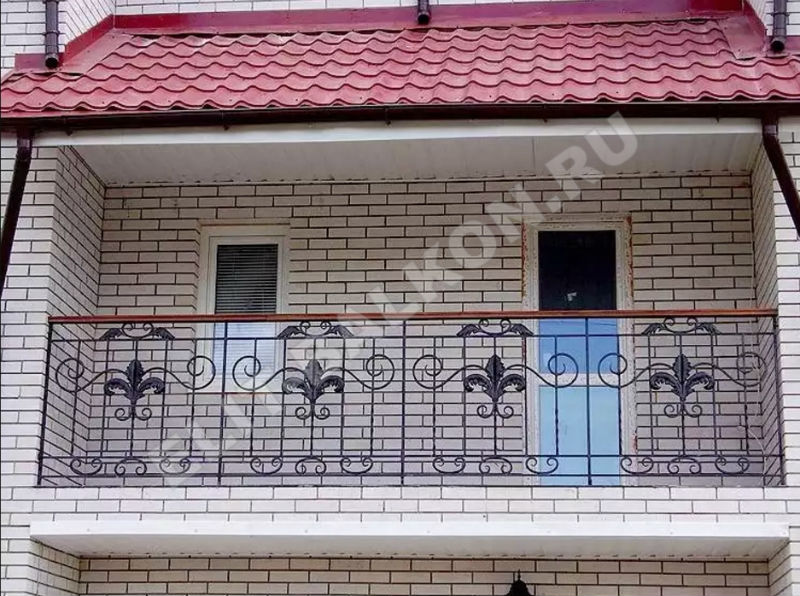
- Metal. The metal structure is an inexpensive, yet lightweight and durable option for roofing. However, it will be necessary to equip sound and heat insulation. Some apartment owners prefer wrought-iron awnings, which are not only practical, but also original in appearance.
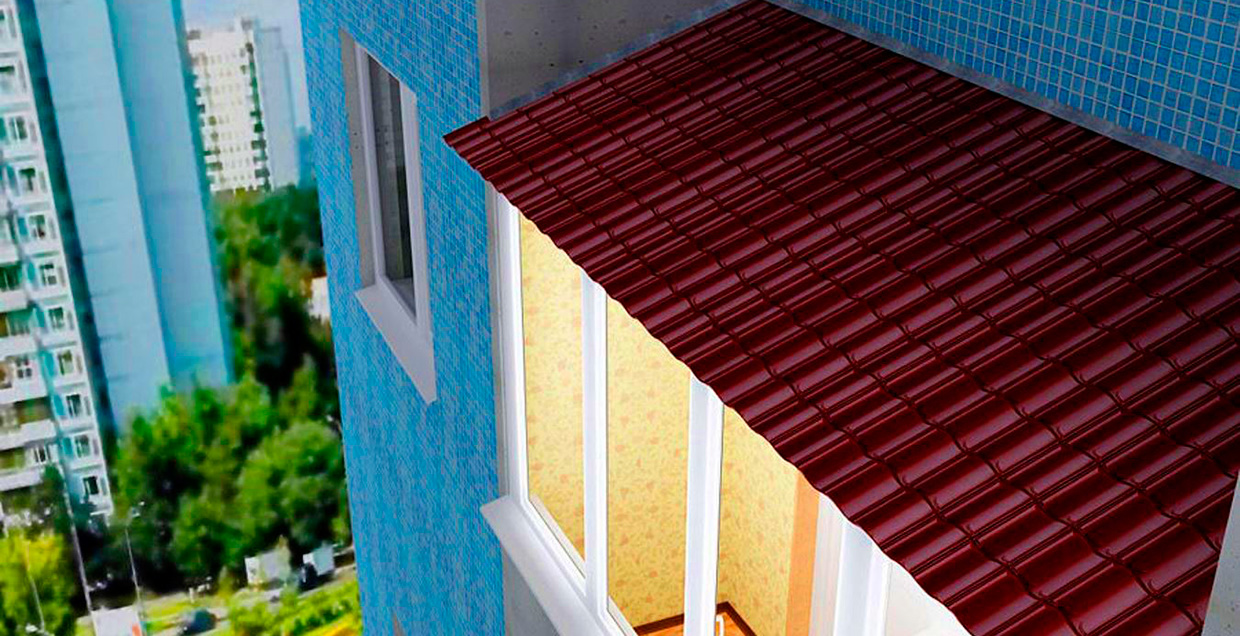
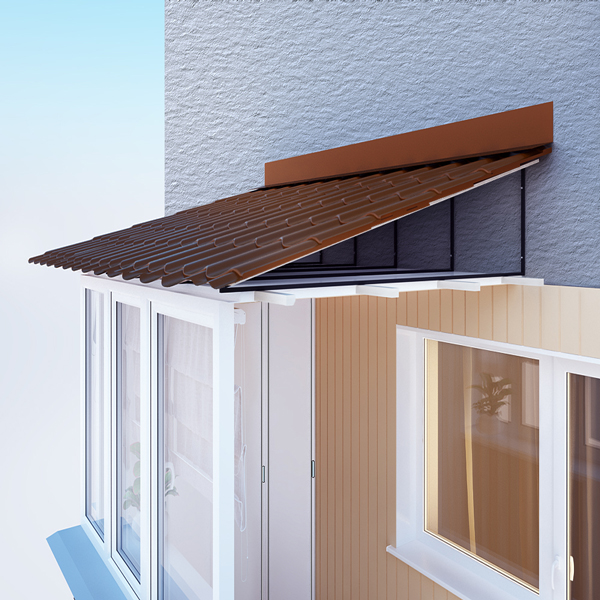
- Metal tiles. This is a good, but rather expensive solution, which is often used by owners of private houses.
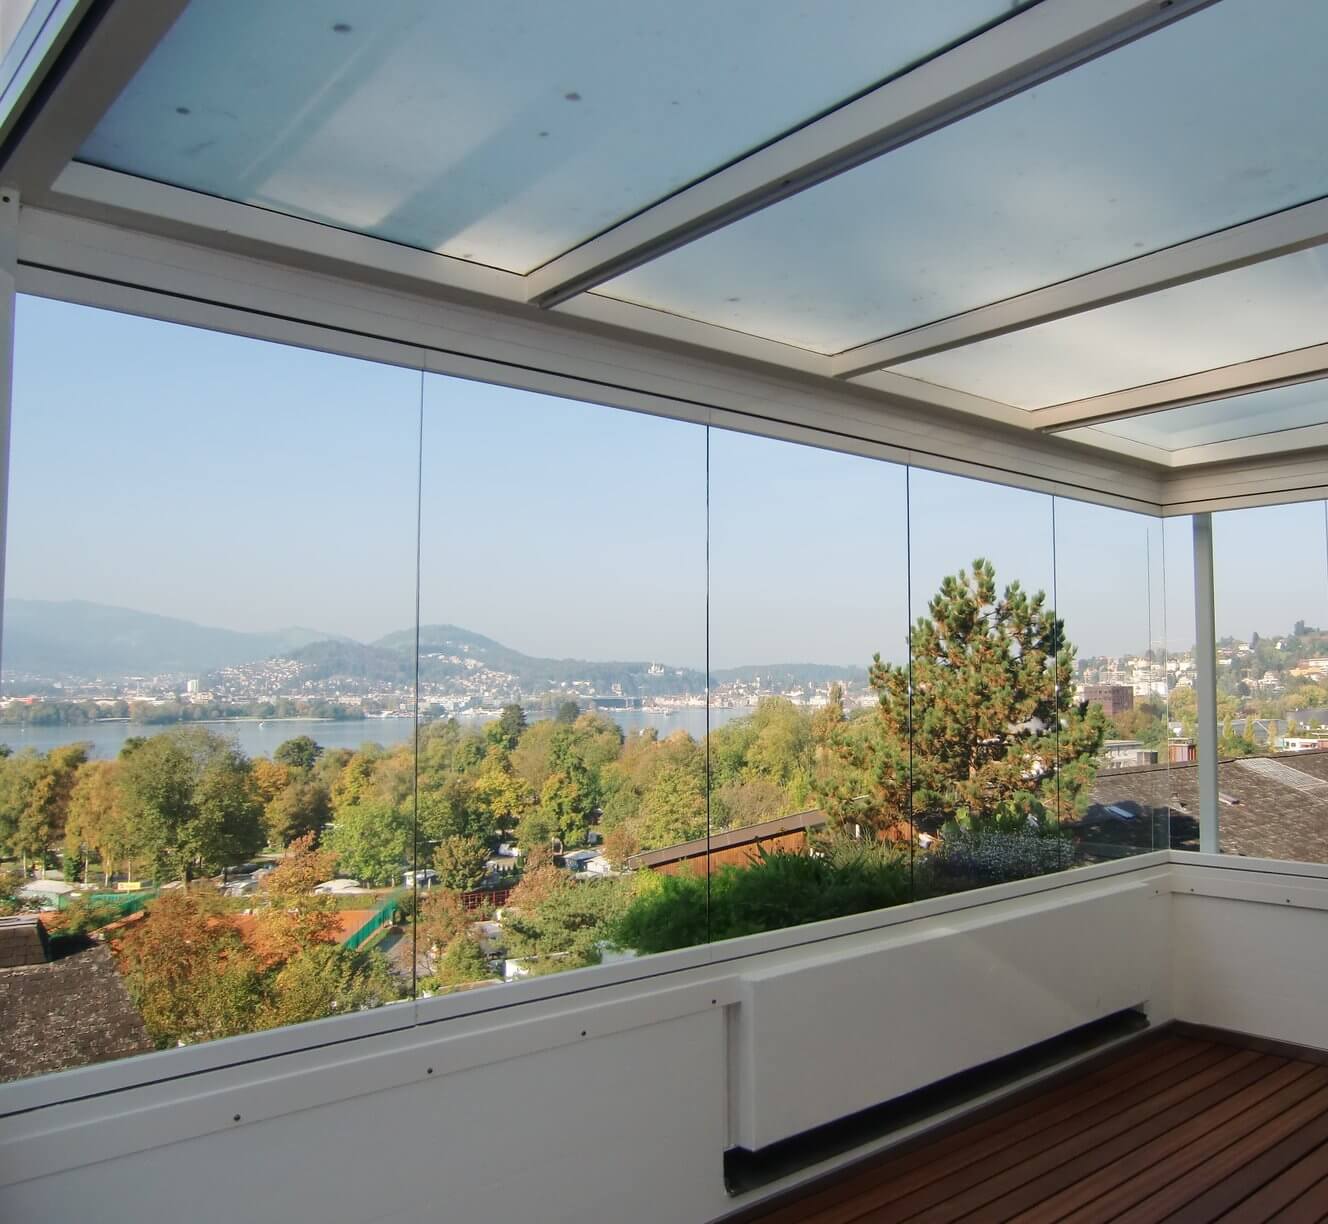
- Double-glazed windows. The transparent glass unit is characterized by high strength. Quite often, the roof is formed from tempered glass, which can withstand a large load. Double-glazed balcony roofs create the illusion of an open space and contribute to good lighting of the room.
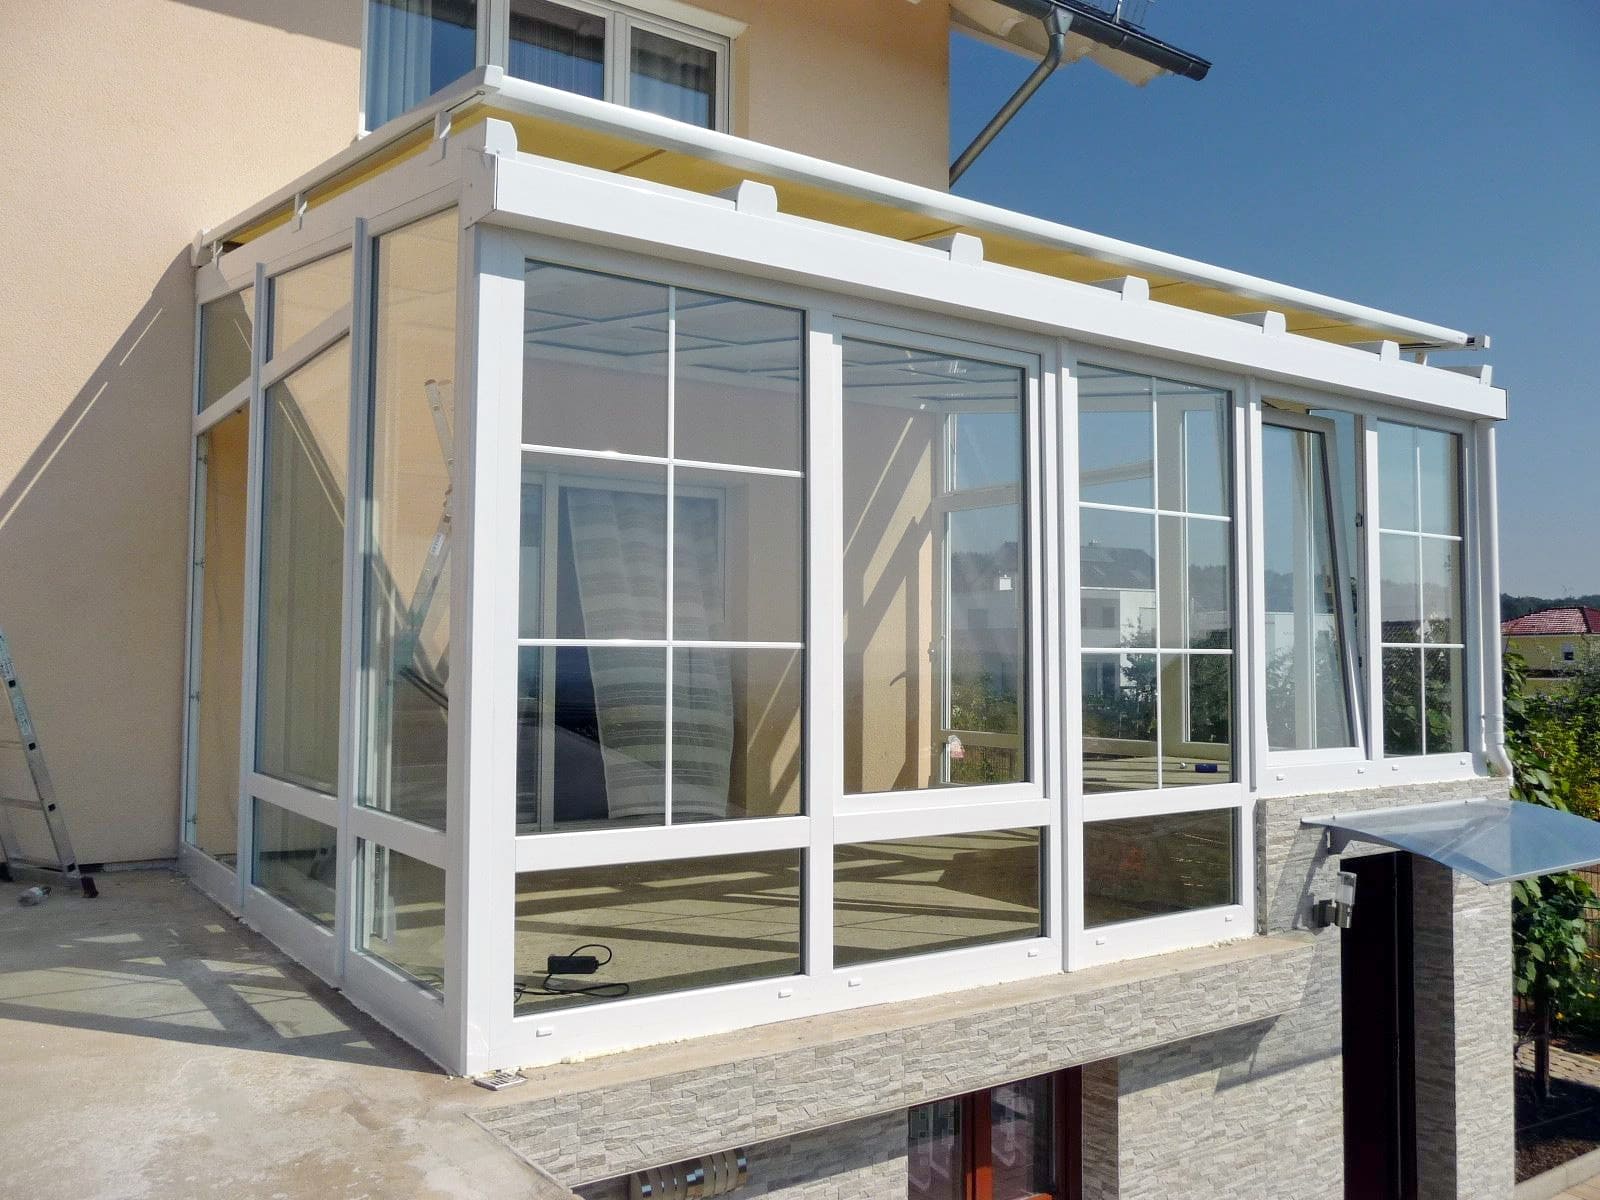
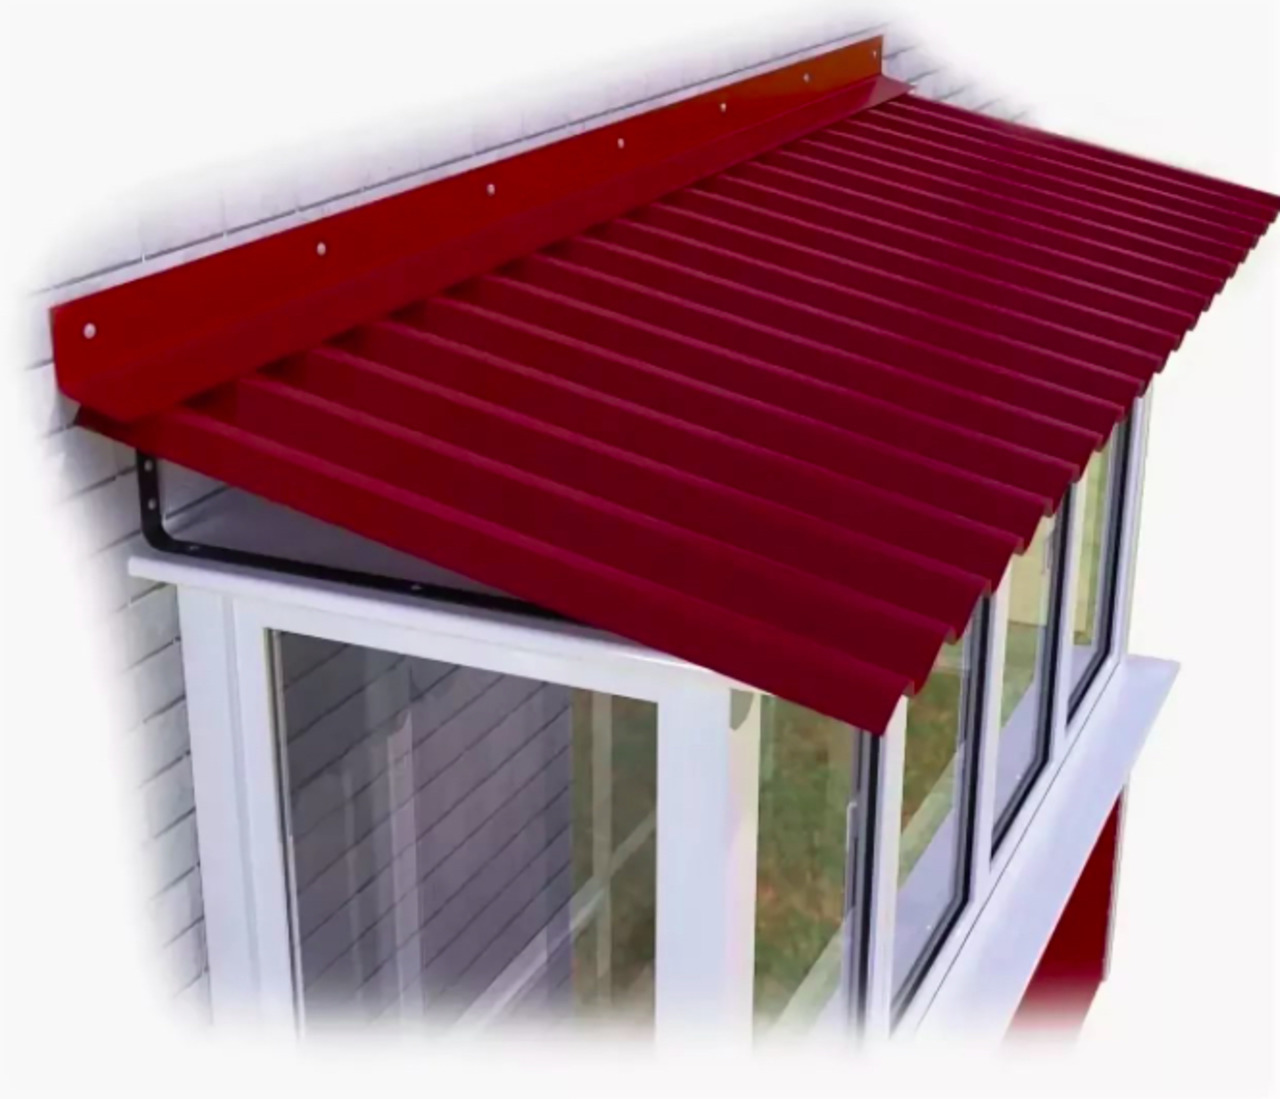
- Polycarbonate - this is the best choice of material for creating a roof over a loggia. It has good performance and is affordable. Thanks to the variety of colors, each consumer can choose his own option to form an individual exterior.

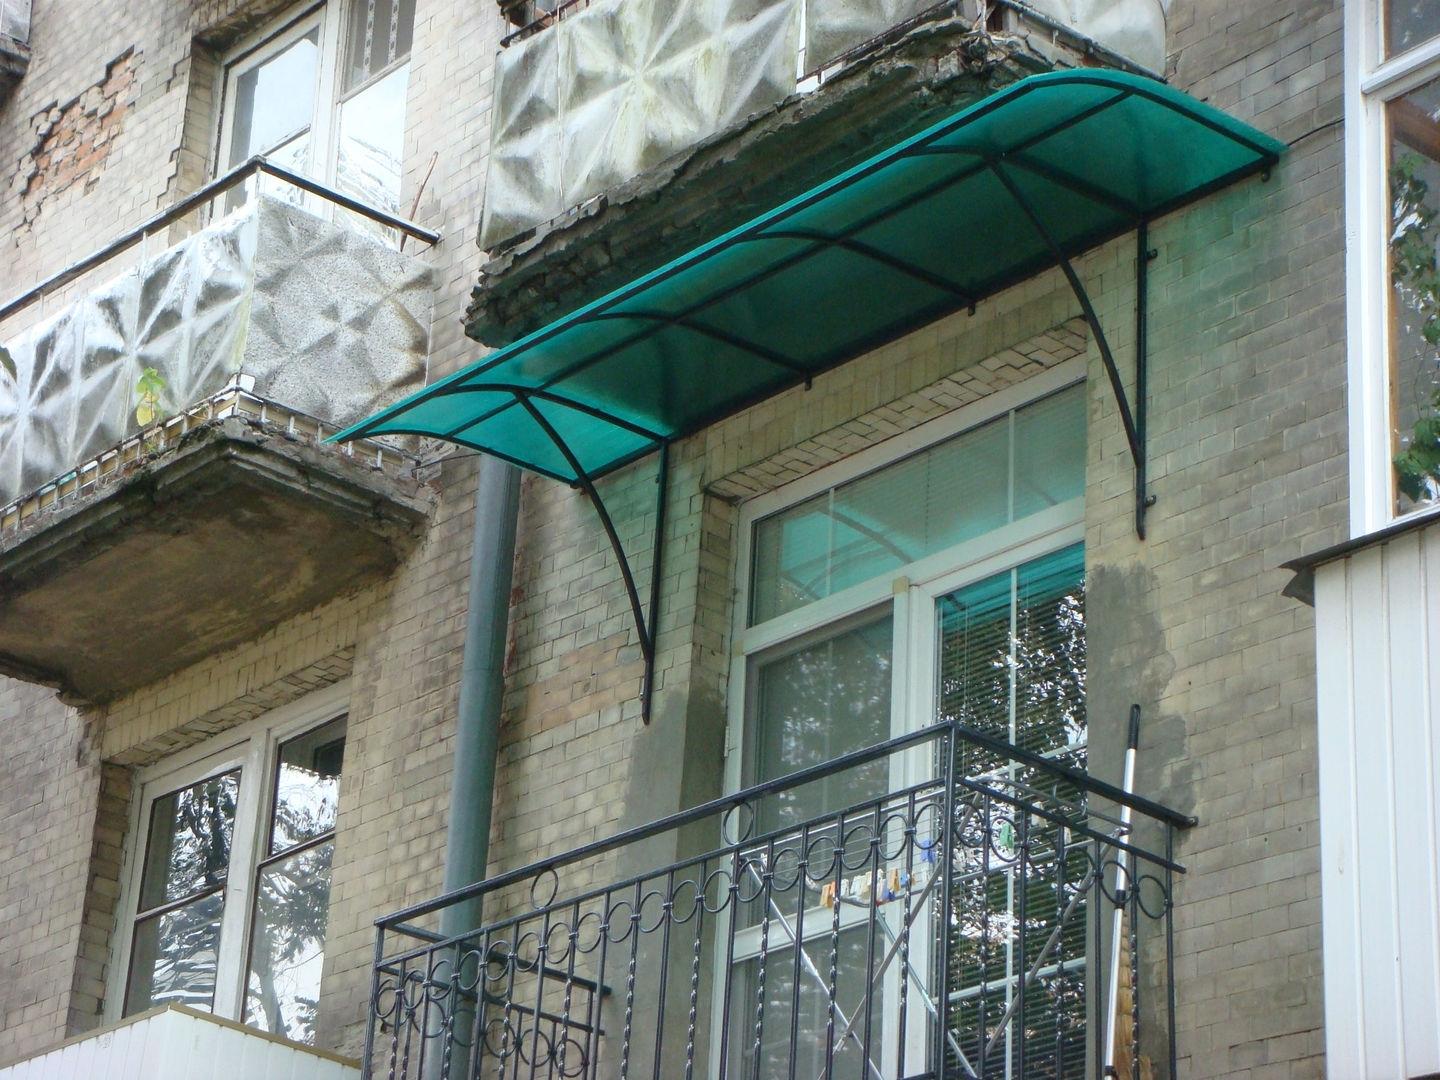
With respect to the angle of inclination, the structure can be steep and shallow. Also, the master needs to choose the best option for the shape of the roof. It can be straight, semicircular and arched. You can make a straight line with your own hands, but the rest of the options will need to be ordered ready-made. Roofs differ in the type of frame.
With addict
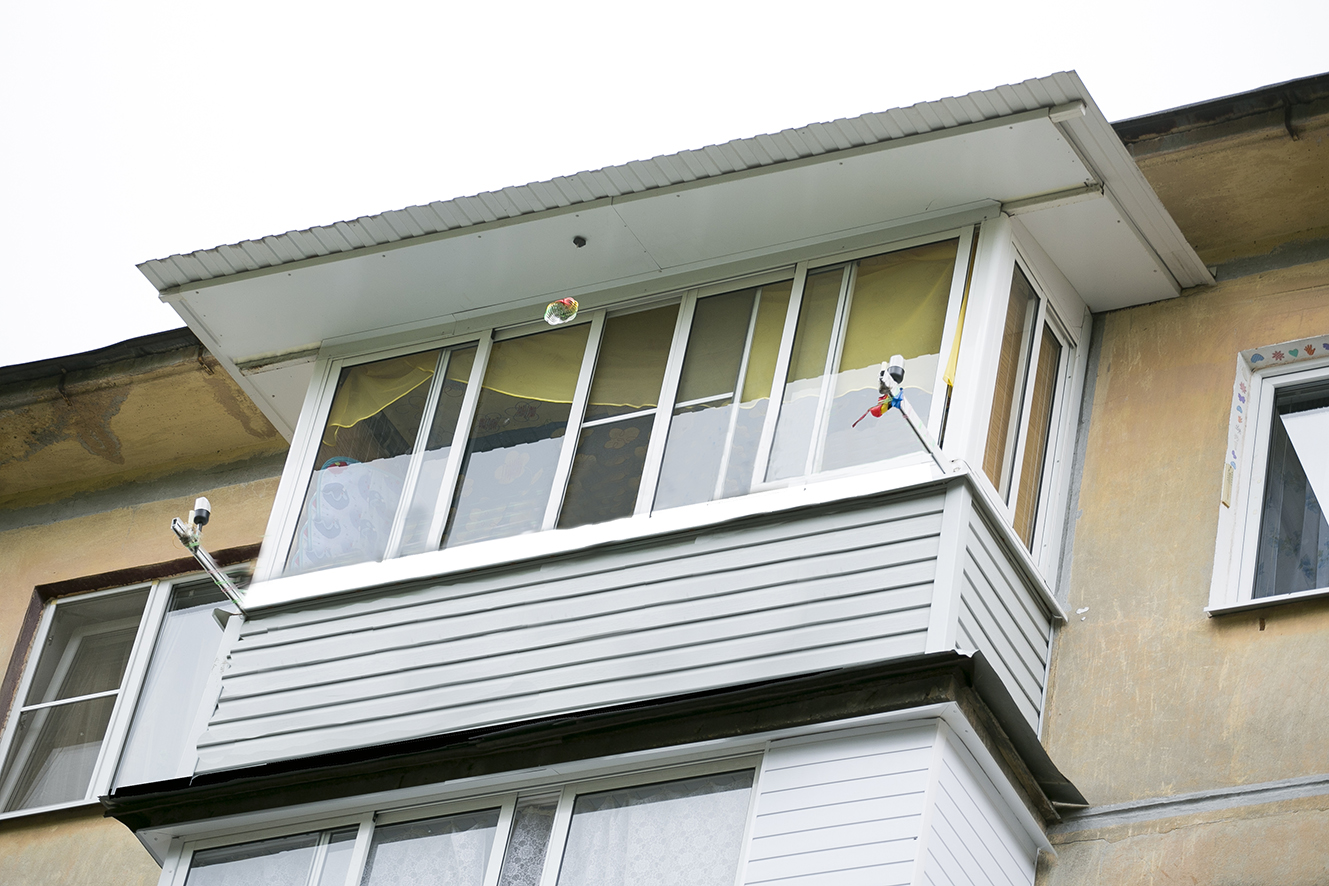
To prevent precipitation from falling inside the loggia, they equip a dependent roof. It is represented by a structure that attaches to the top of the wall. The device also rests on vertical posts, frames and glazing. A dependent roof has its advantages:
- thanks to the peculiarities of the installation of the structure, it is possible, if necessary, to easily insulate the balcony;
- for the installation of this type of roof, the dimensions of the loggia are not important;
- reliability and strength of the structure, which can be glazed or covered with roofing material.
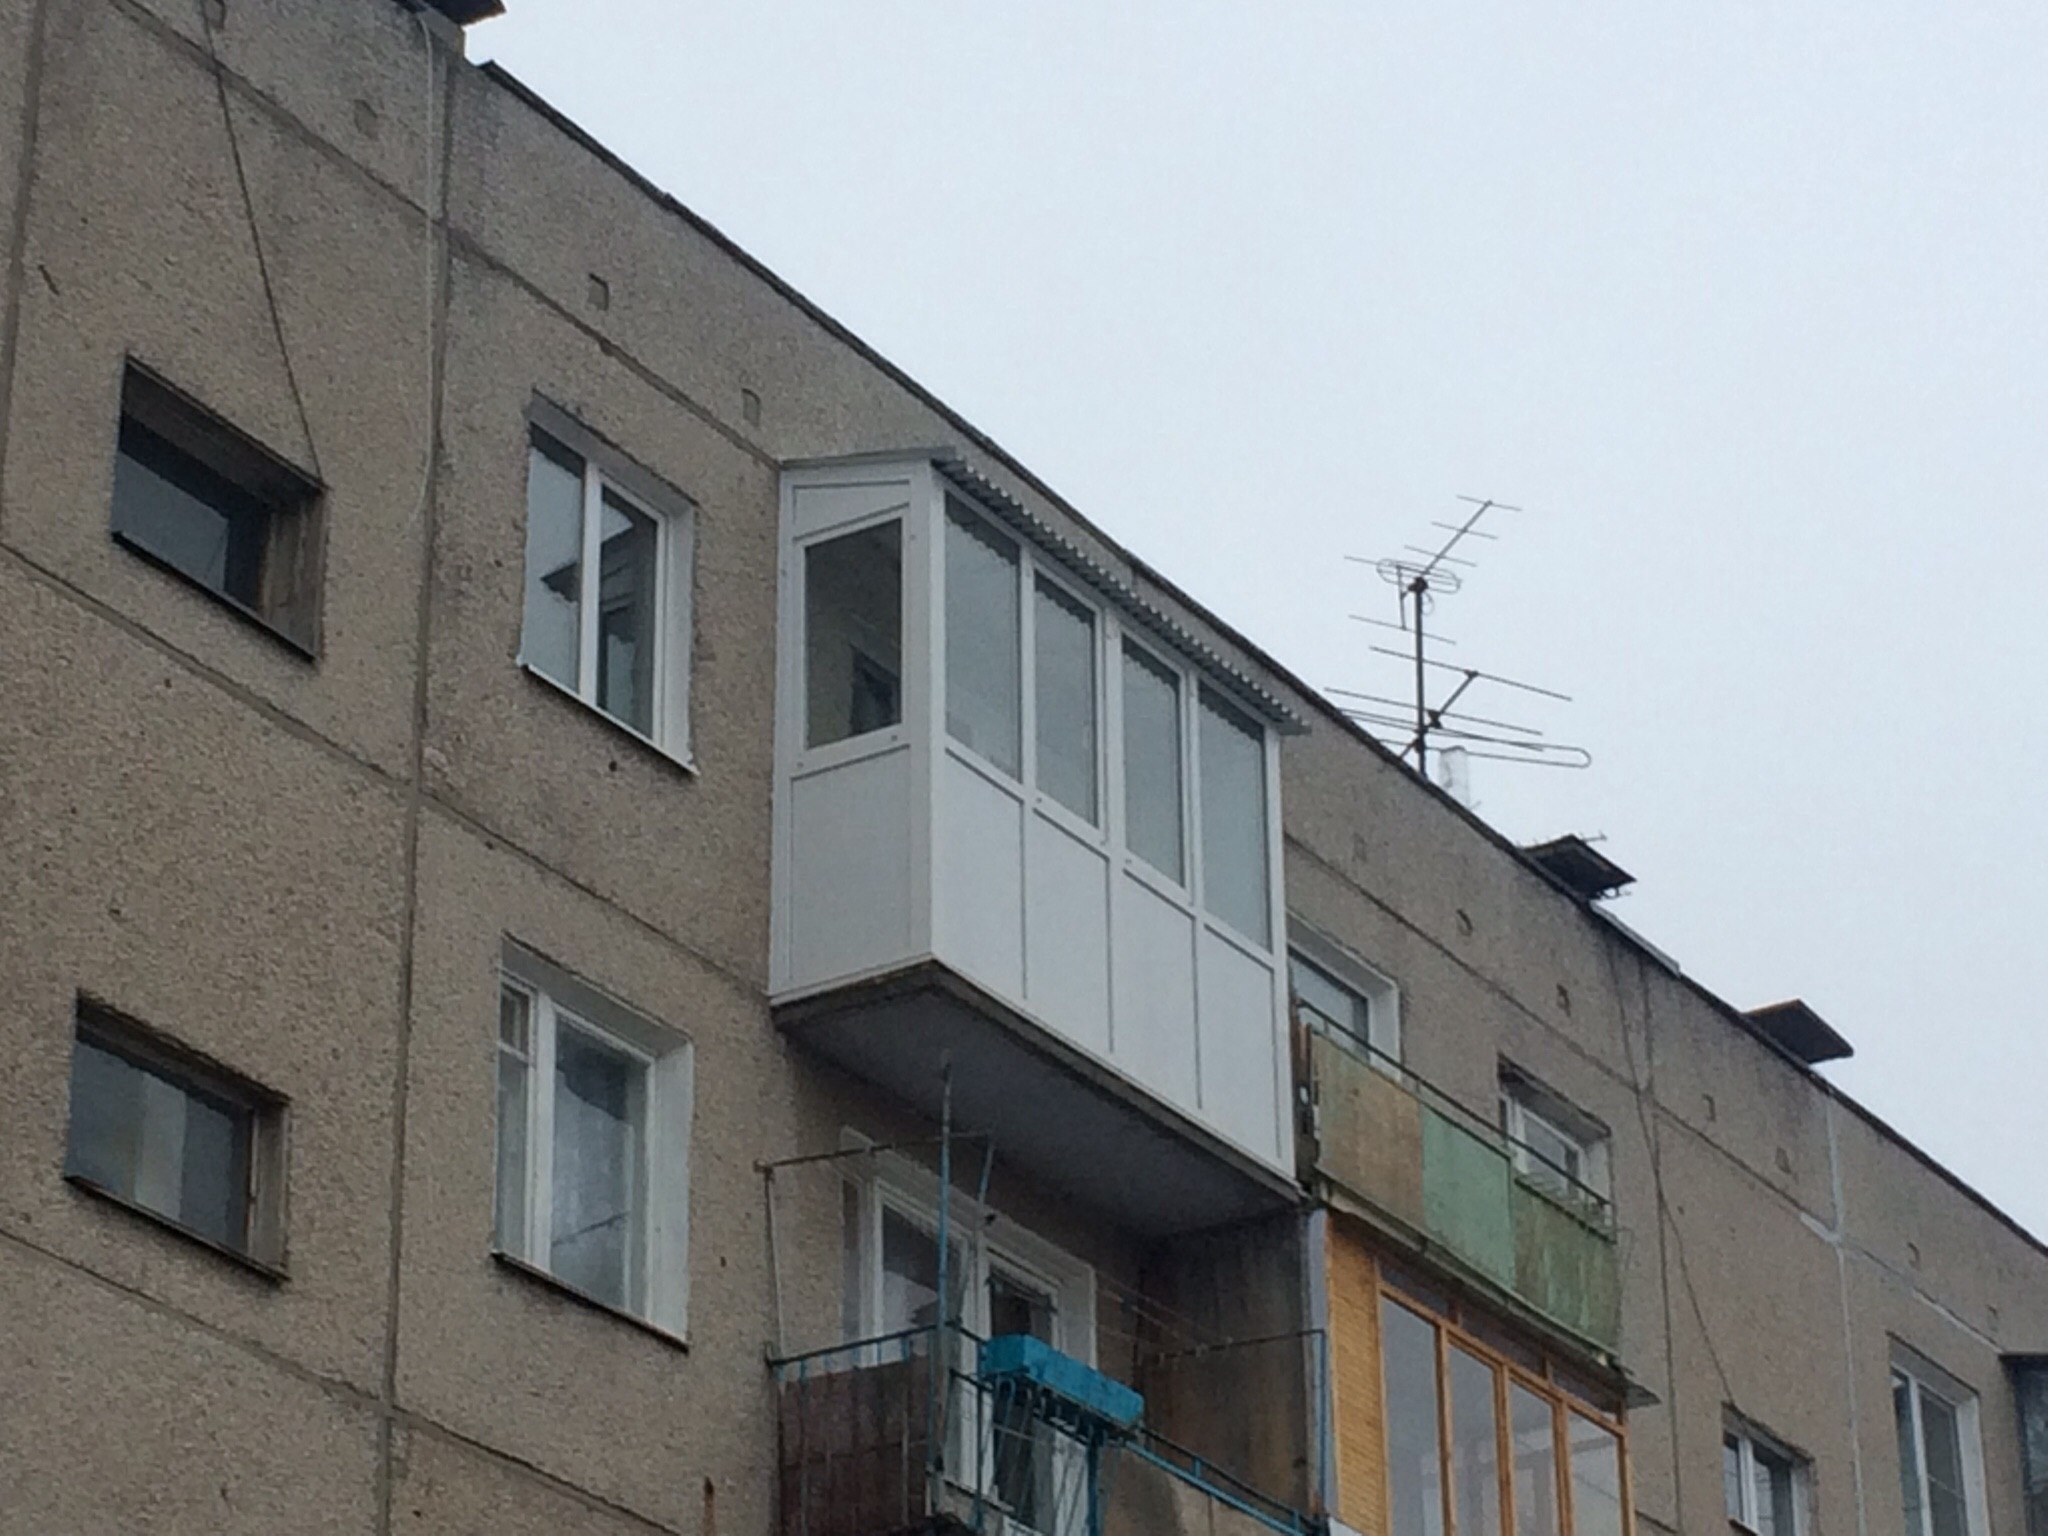
The disadvantage of this type of construction can be called the complexity of its manufacture, as well as the need for a large number of materials. If a straight roof is formed above the balcony, then the craftsmen will need to waterproof the structure.
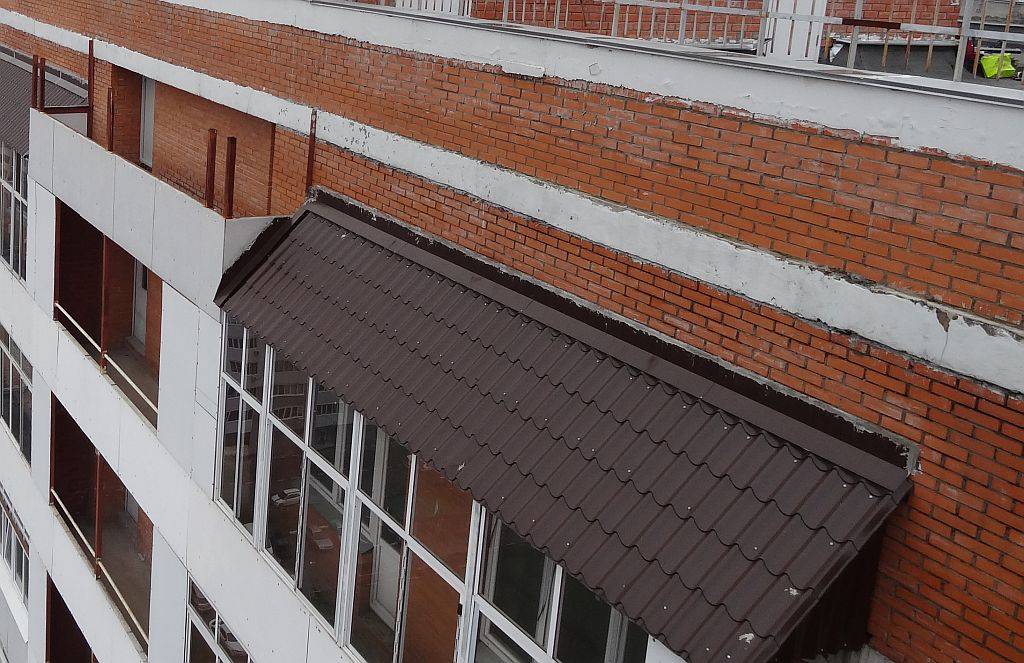
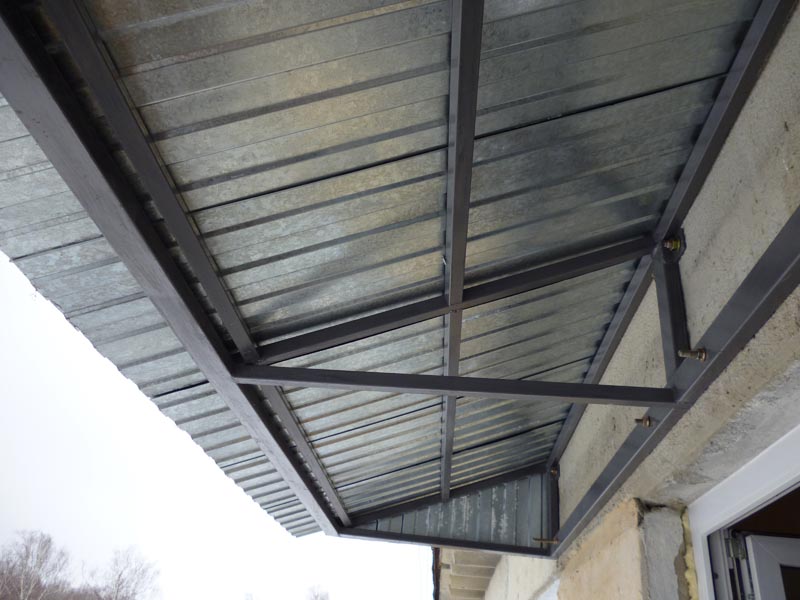
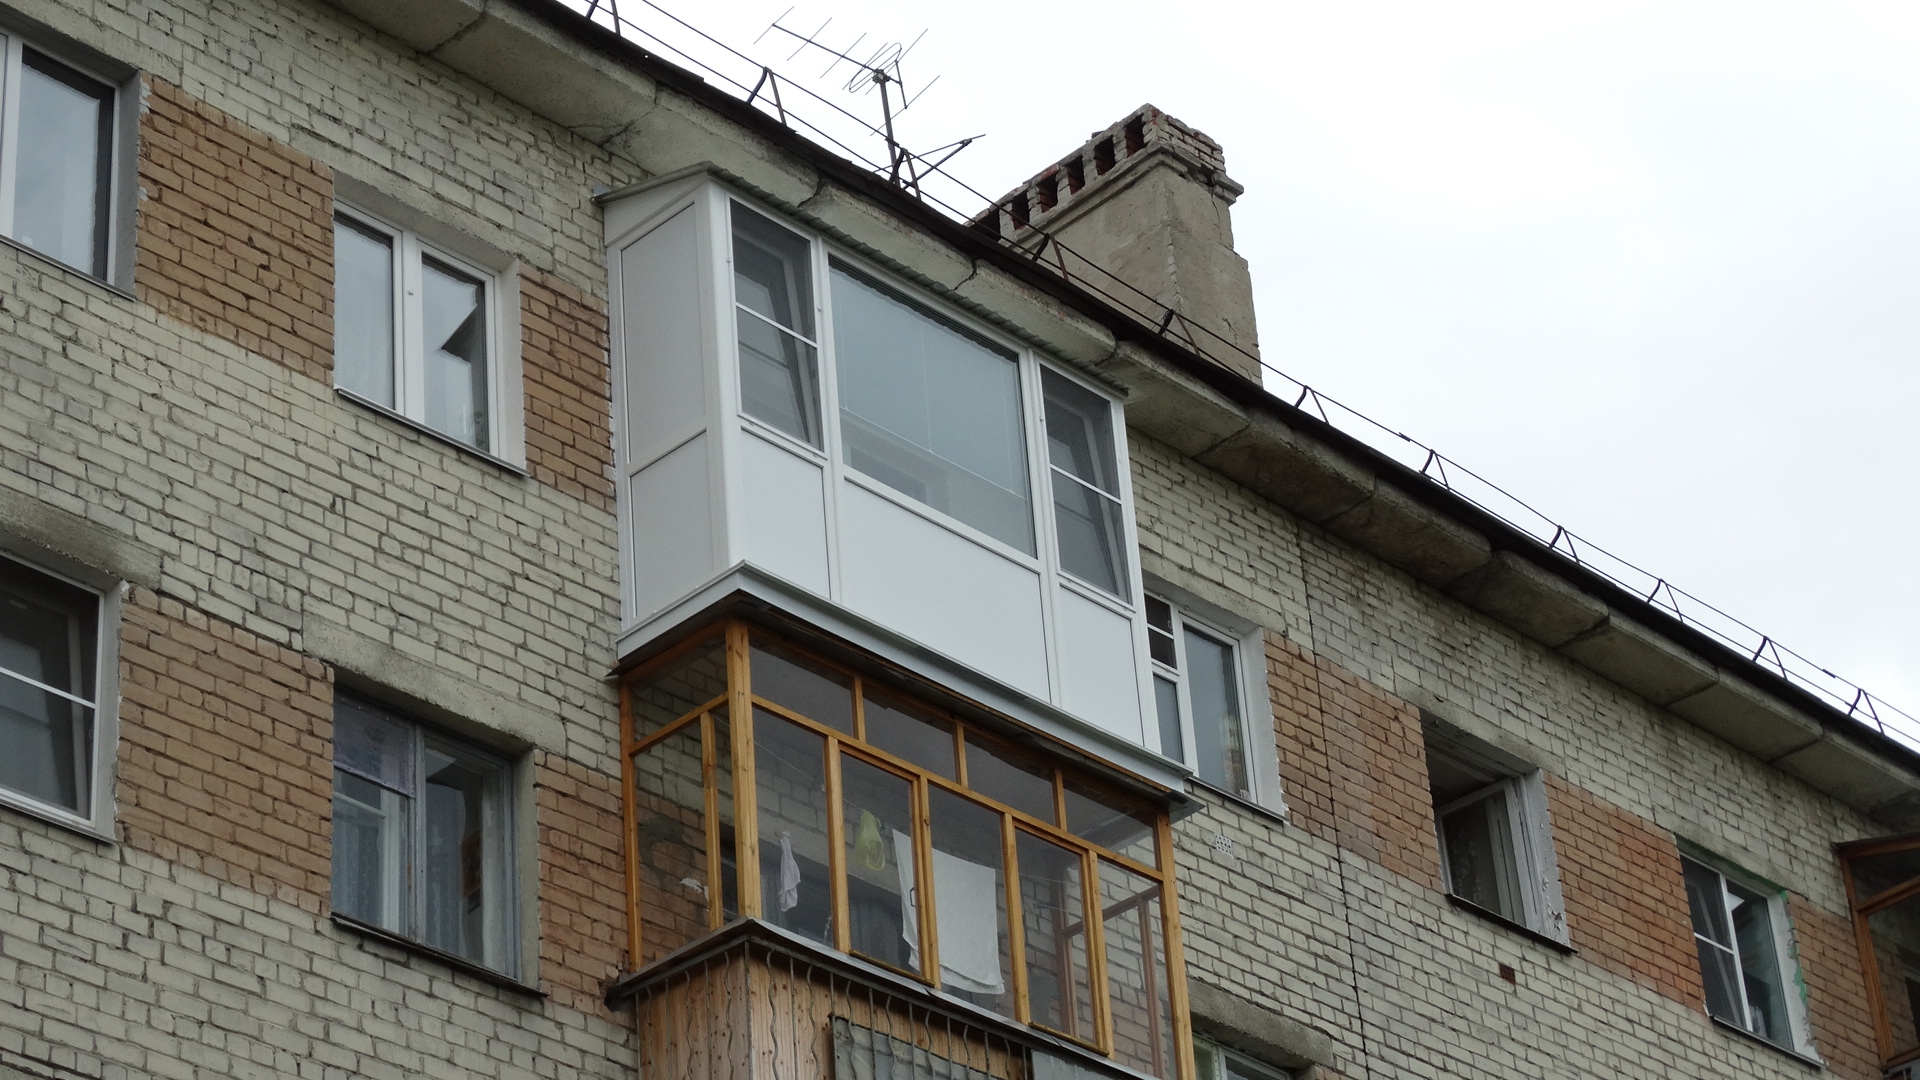
With an independent
An independent roof is a structure that is attached exclusively to the outer walls of a building, and its self-supporting frame is a triangular-shaped truss. As an additional independent element of the last floor, a canopy can be used. It will prevent snow from entering the structure. A balcony with an independent roof has the following advantages:
- simplicity and availability of the arrangement;
- minimum financial costs for installation work.

Cons to consider when forming an independent roof:
- to ensure the reliability and strength of the device, it is required to install it on narrow balconies;
- the need for lightweight materials for the construction of the roof;
- the occurrence of difficulties in the process of insulation and glazing of the balcony.
Tools and materials
To cover the loggia with a straight roof made of metal, polycarbonate, corrugated board, the master needs to prepare the following set of materials:
- metal corners;
- sheets of the selected material in the required quantity;
- beams;
- insulating material;
- mounting type foam;
- plastic profile for arranging the ceiling and walls;
- antiseptic;
- cement;
- hardware in the form of dowels, screws.

And also the master should have the following inventory:
- Bulgarian
- drill;
- scissors for metal;
- drill;
- screwdriver;
- screwdrivers;
- hammer;
- knife;
- pliers.

DIY installation
To correctly make the dependent roof on the 5th floor in the "Khrushchev" building yourself, you will need to follow the step-by-step instructions.
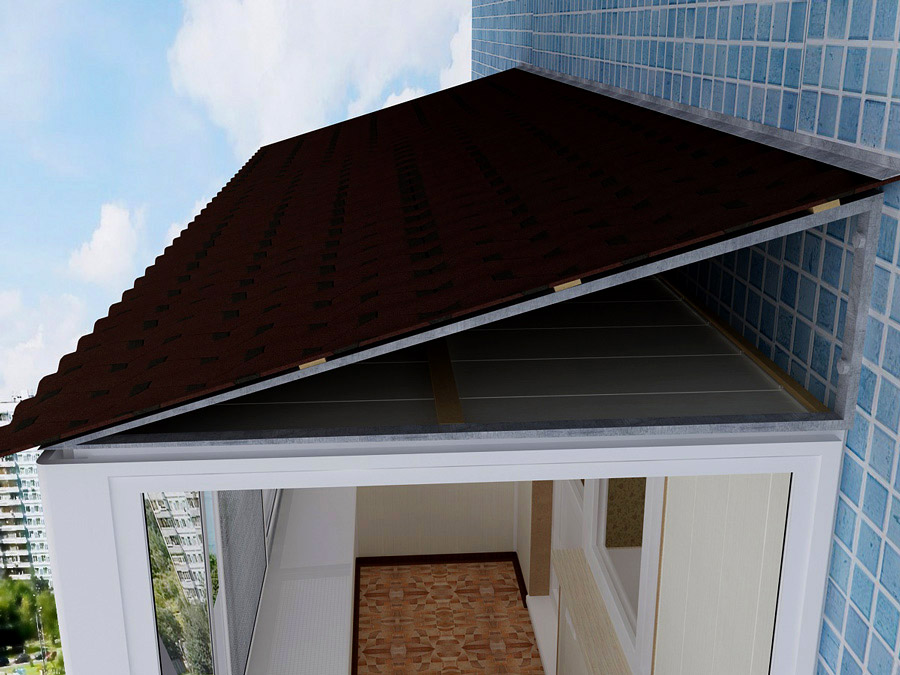
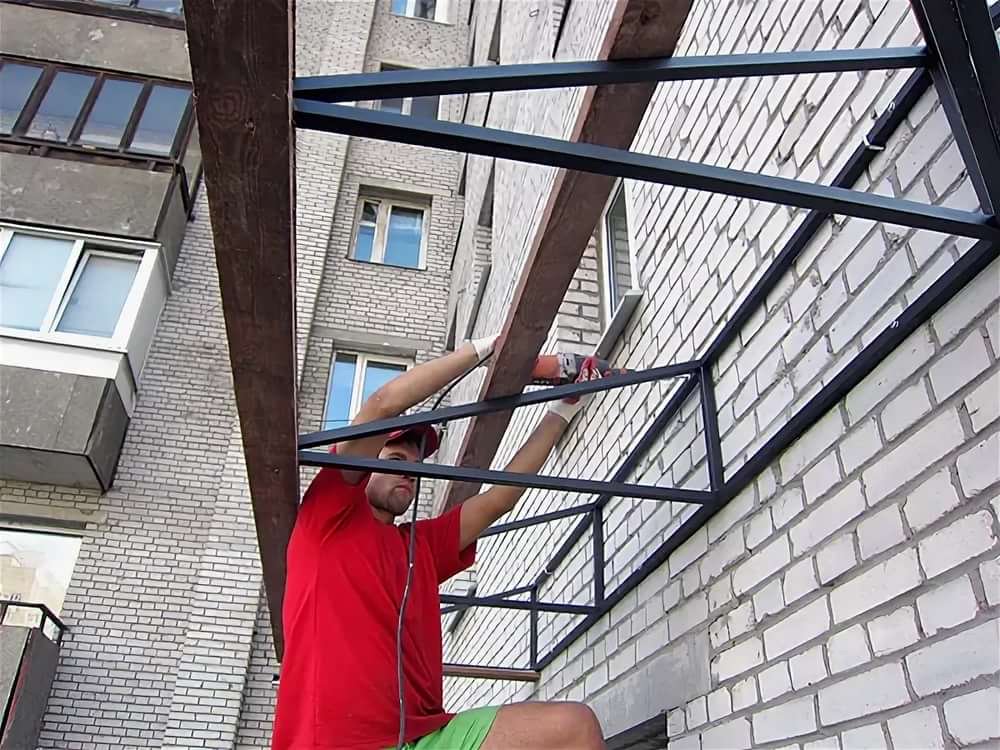
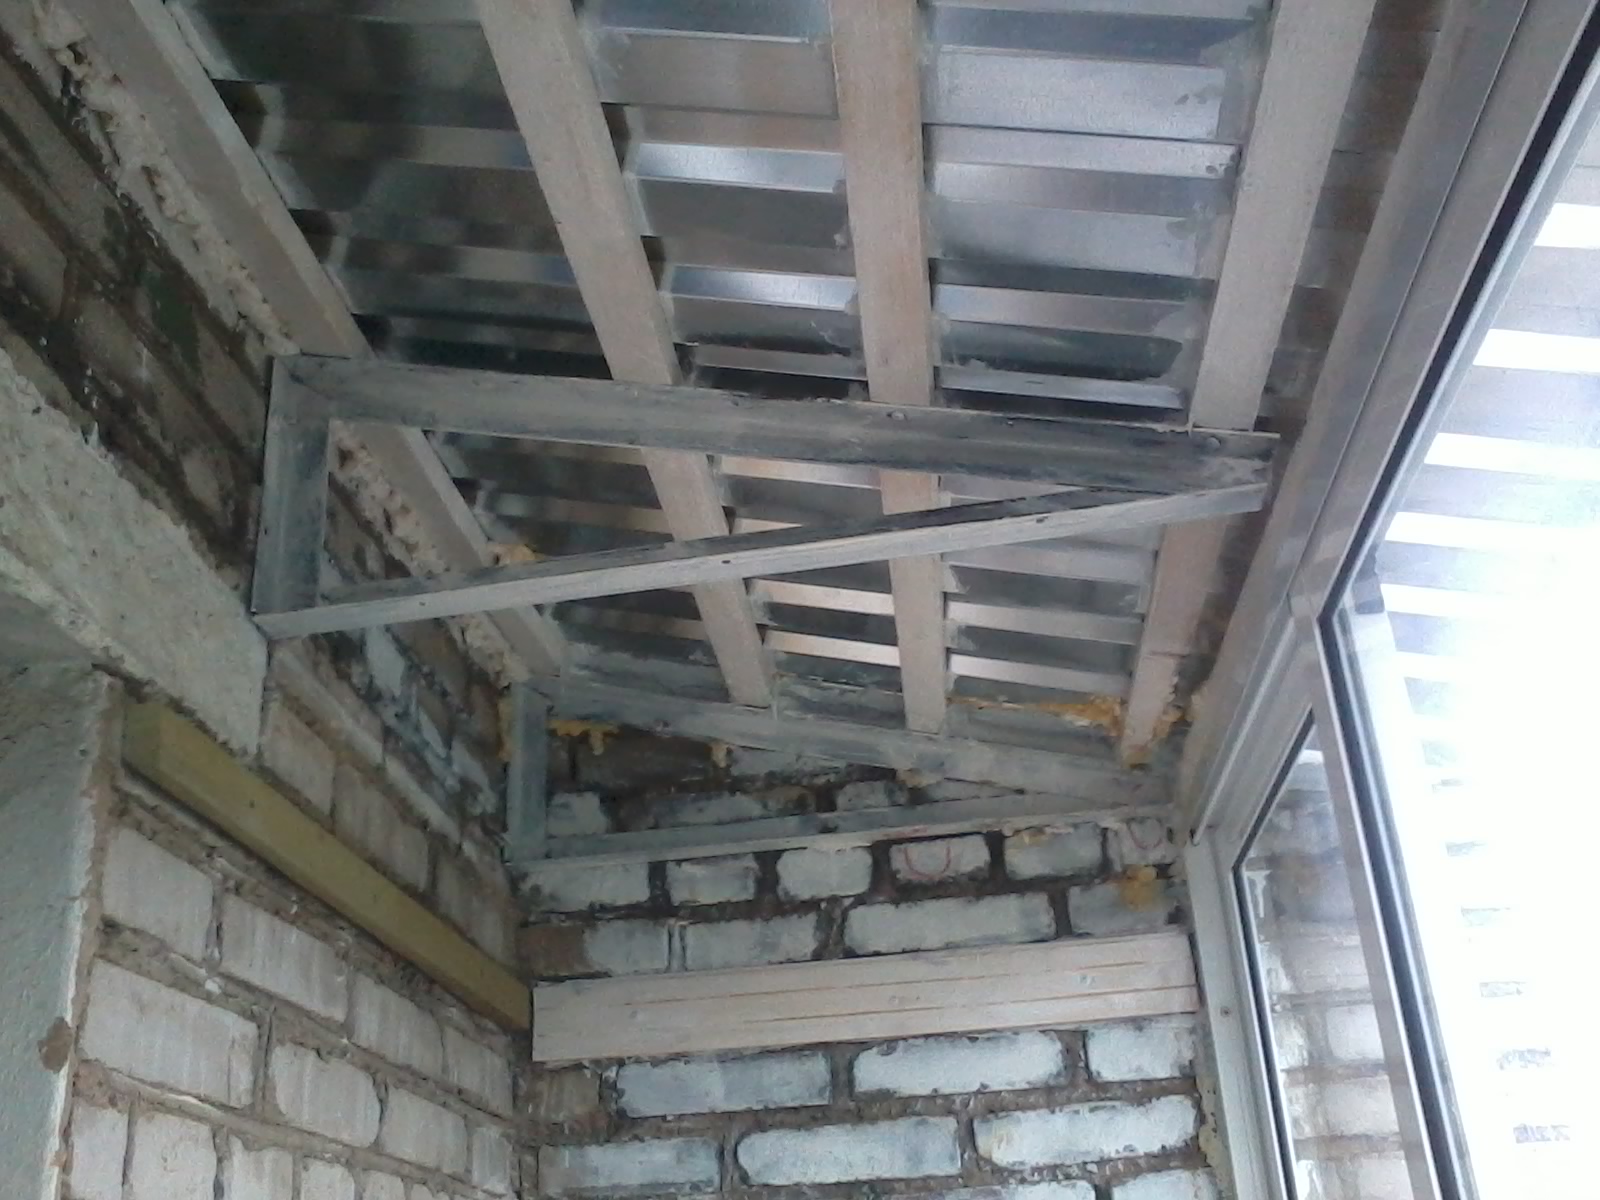
- Along the entire perimeter of the loggia, install special racks made of a profile (square pipe). The production of racks implies that they are cut to a given length. In the case of a flat roof, the fixtures will be the same. Otherwise, the rear pillars will be longer than the front ones.
- Using dowels, a metal mold is mounted to the wall. After that, with screws or bolts, it is fixed to the previously installed racks. The latter can withstand a fairly high load.
- The upper parts of the racks and the edges of the trusses are connected with shaped pipes.
- With the help of the bars, a crate is formed.
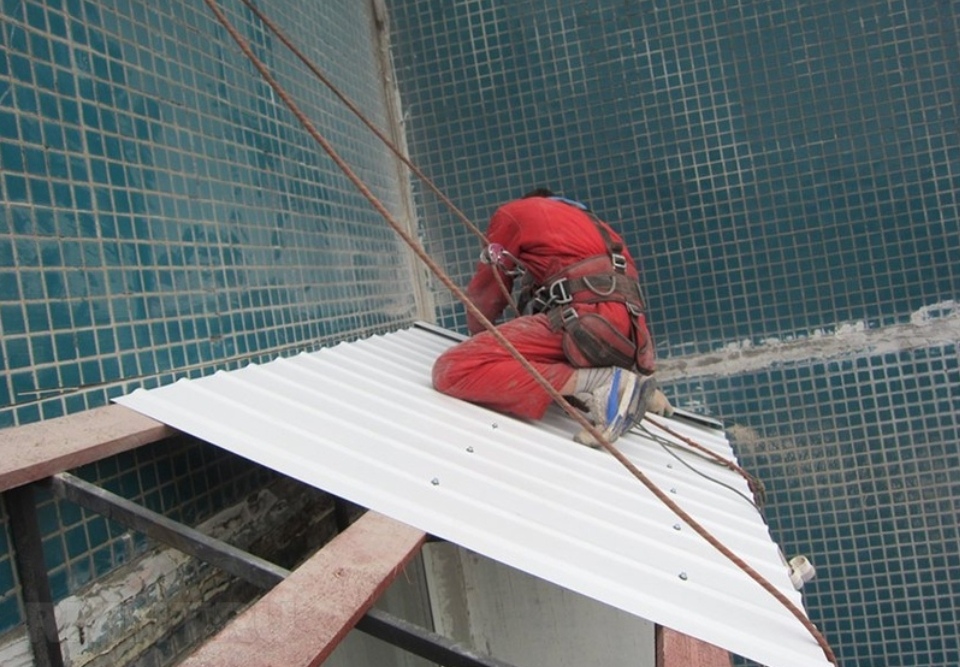
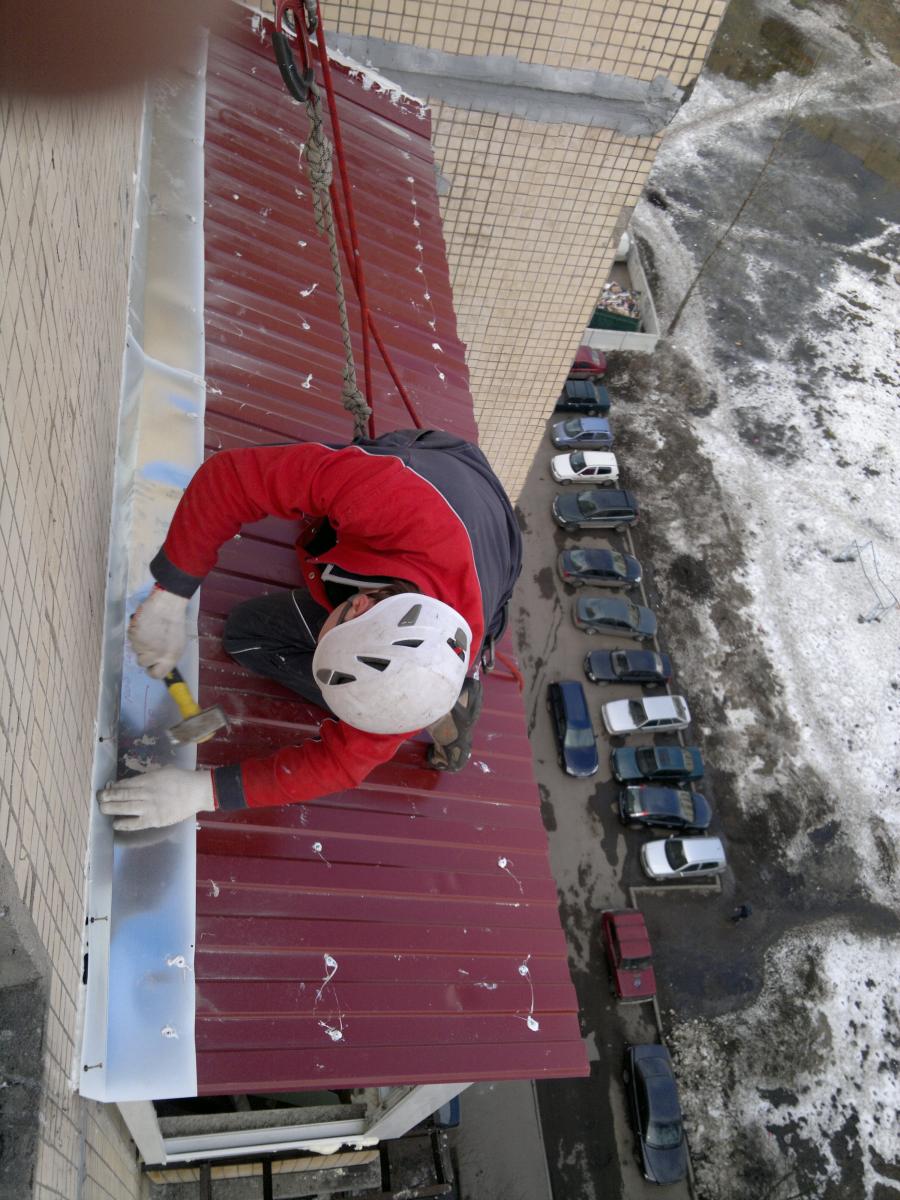
- Cover the roof with the selected material, securing it with dowels.
- If there are visible cracks on the border of the wall and the rack, then they should be sealed with polyurethane foam. Puttying is carried out outside.
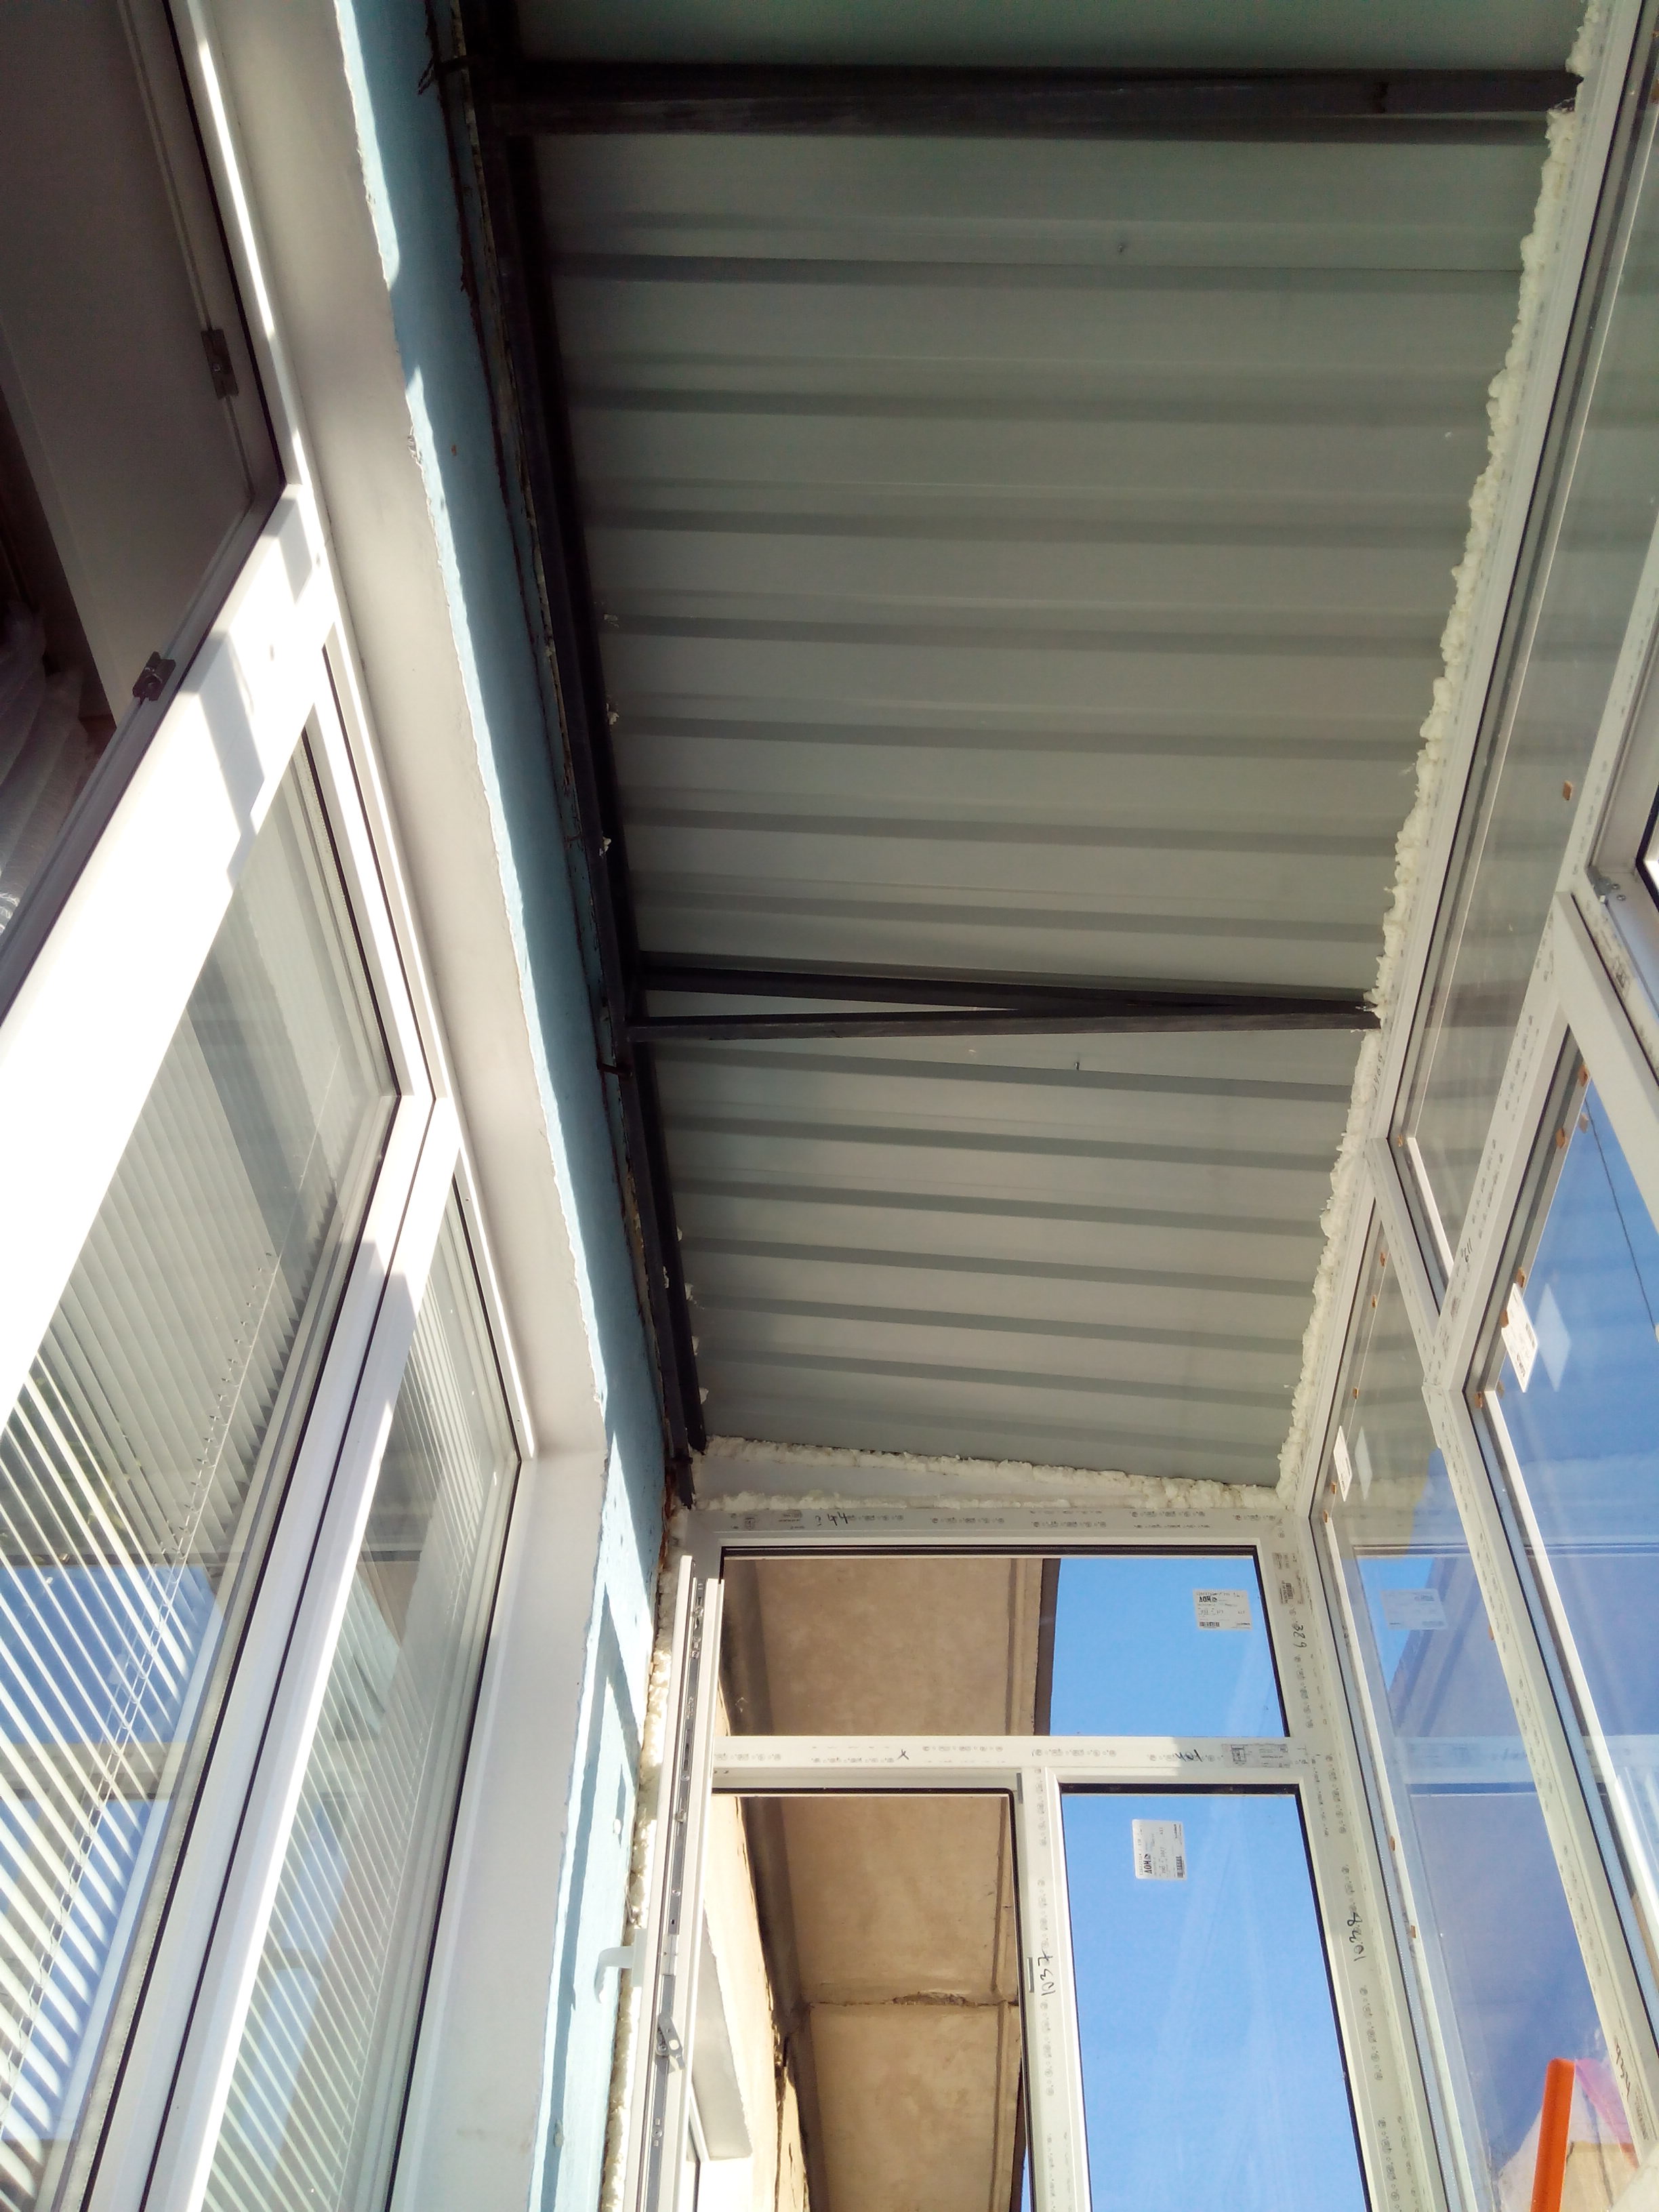
- The last step will be to fix the balcony, insulate it, as well as the formation of noise and waterproofing.

The process of homemade manufacturing of the dependent roof on the loggia will be completed with high-quality finishes, wall cladding and ceiling area. An independent roof has a lot of differences from the above-described option. It will take a little time to mount it yourself. In addition, such a design will cost much less than a dependent one. The work is done sequentially.
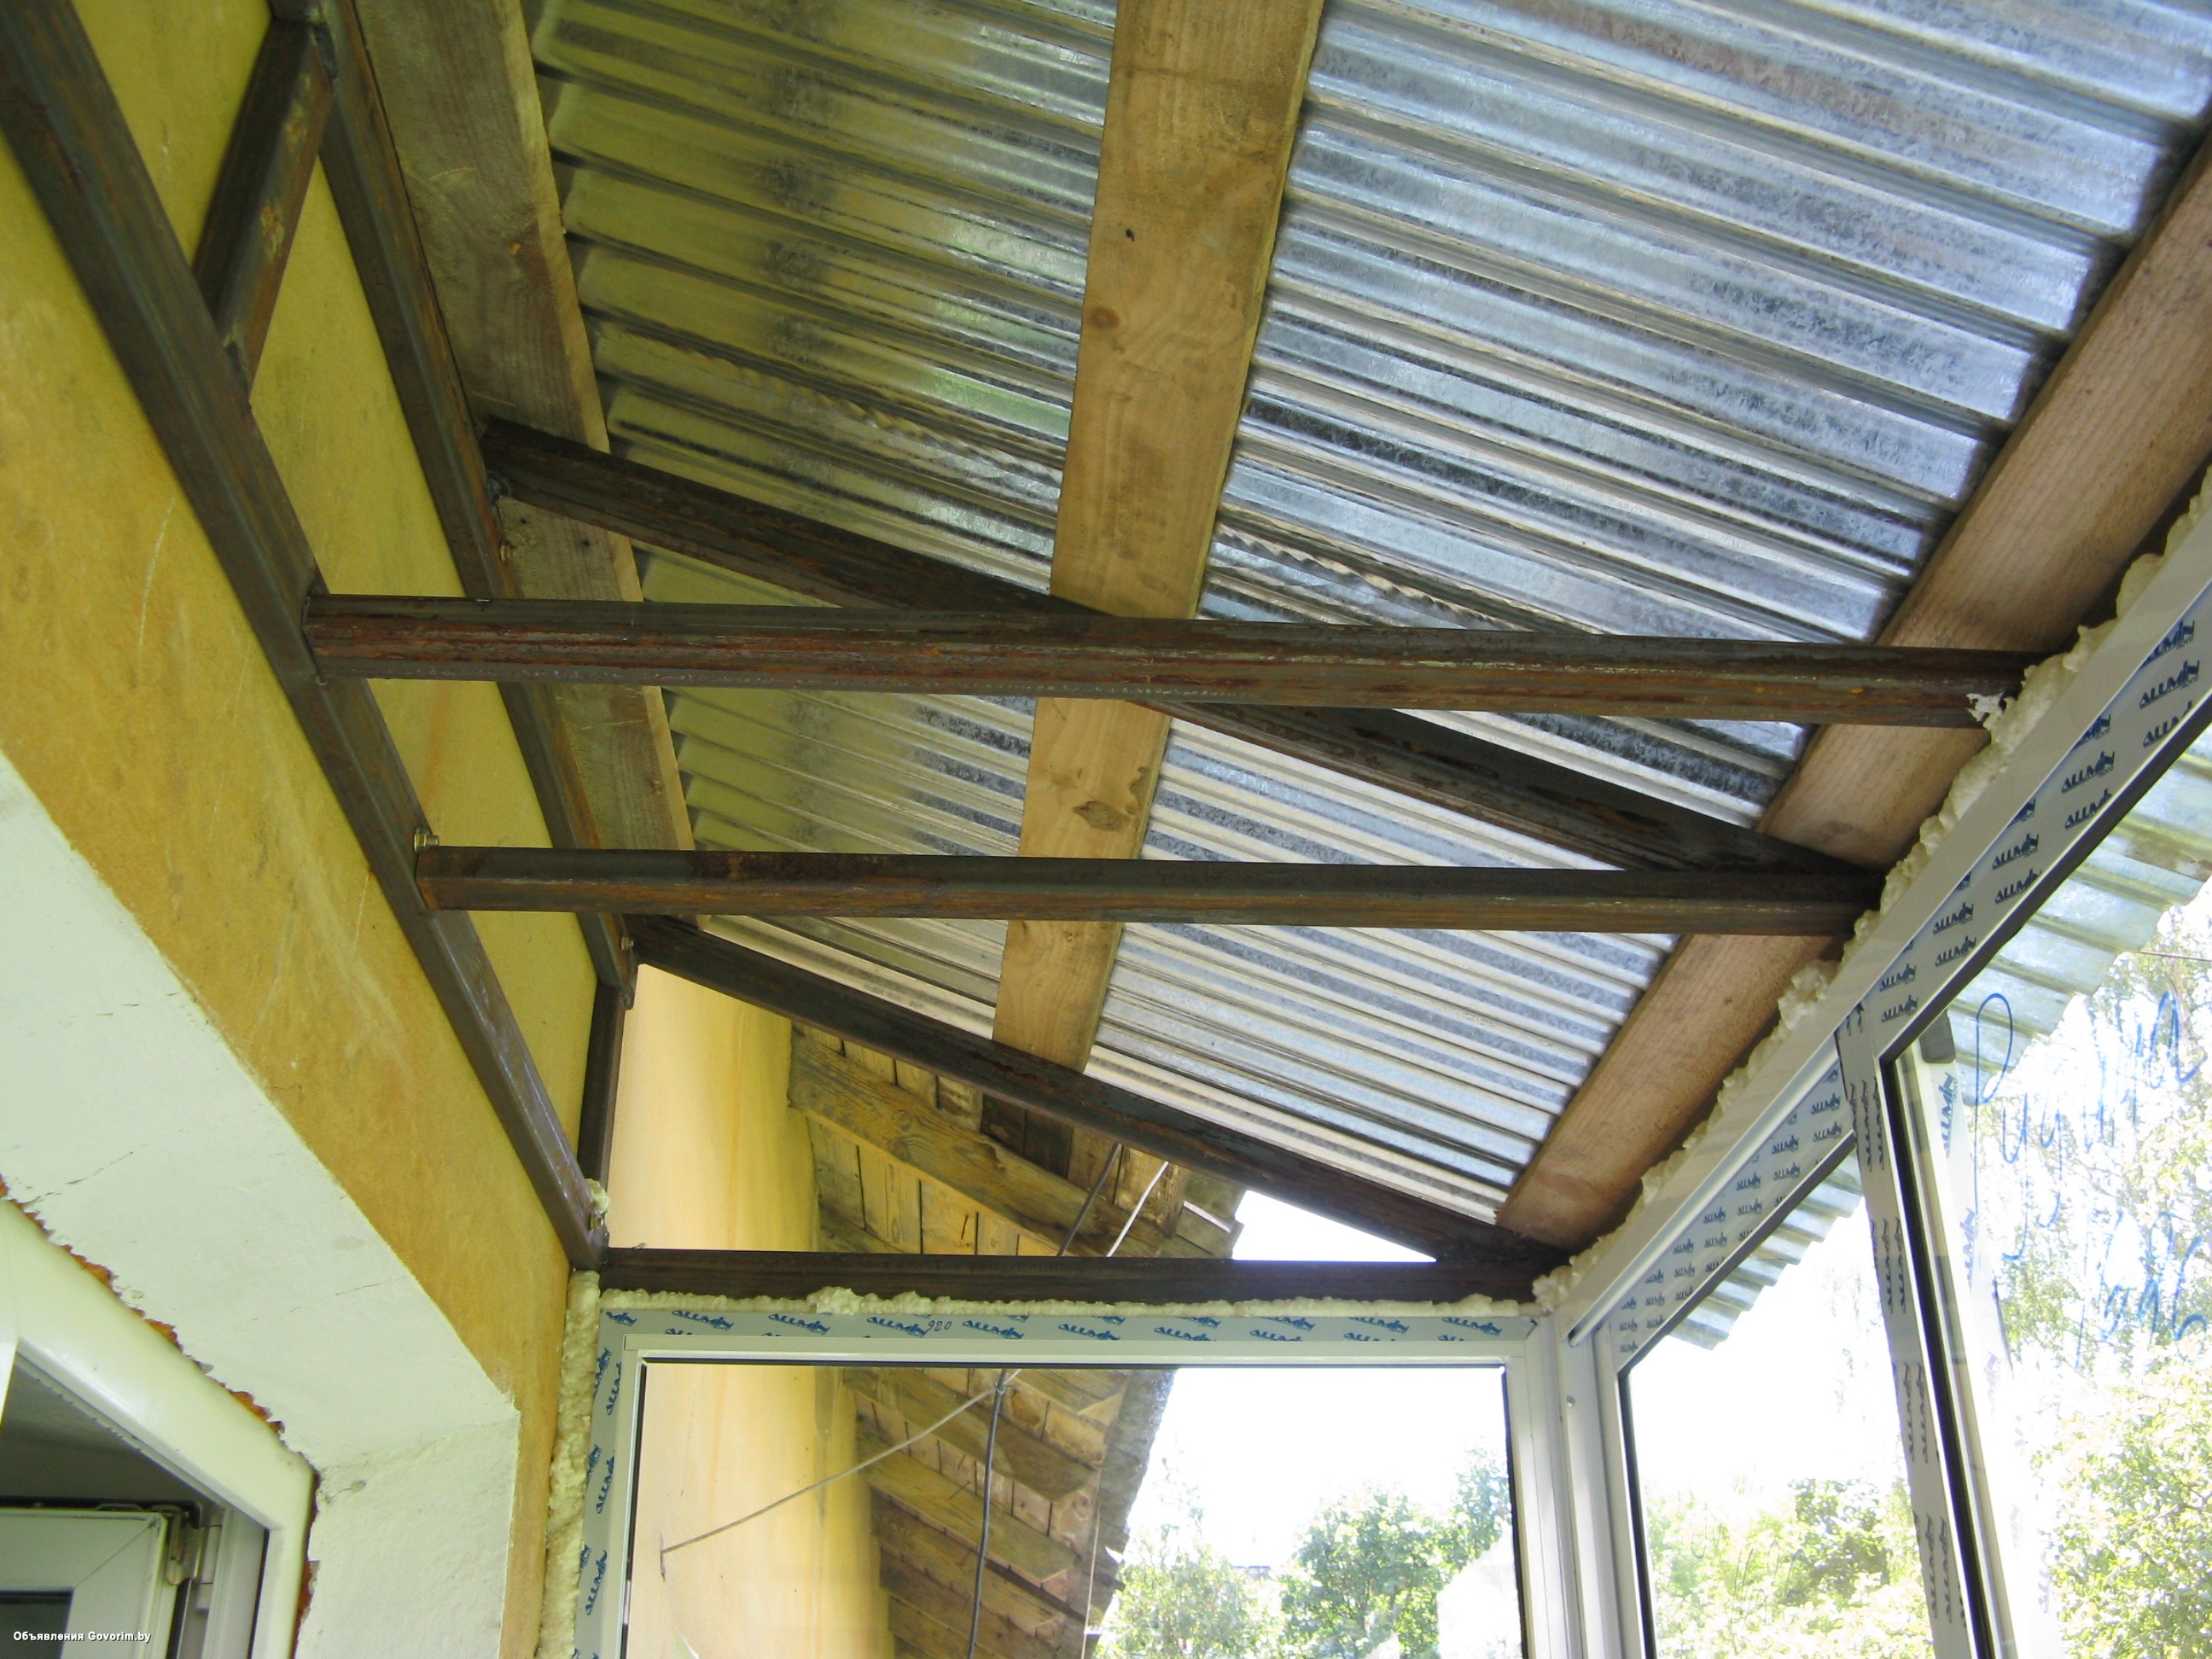
- A finished metal truss must be attached to the wall. After that, it is worth marking points for future drilling and subsequent fastening.
- The truss is fixed with anchors. For this work, spacers are useful, the thickness of which does not exceed 2 mm. Thanks to this moment, all cracks and cracks will be easily filled with polyurethane foam.
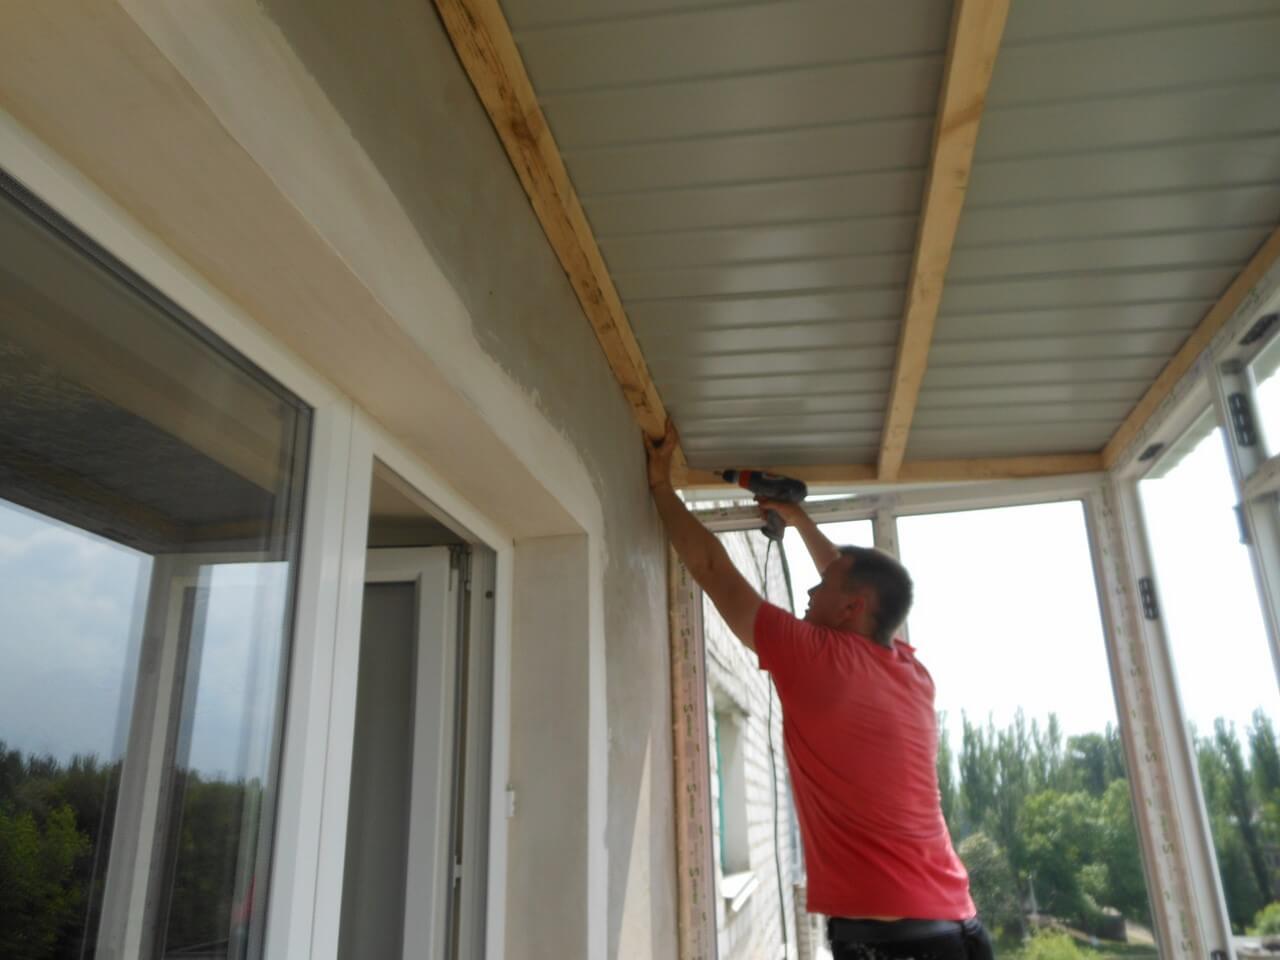
- A wooden crate is installed on a fixed truss.
- The pre-selected material must be measured in accordance with the required dimensions. In this case, it is worth considering the small overhang of the structure forward and to the sides.
- Using self-tapping screws, the flooring is attached.
- All existing gaps are sealed with foam.
- Decorative finishing of the lower part of the roof and the inner area of the walls is carried out.
This roof option is considered optimal for an apartment located on the top floor. The design looks pretty attractive. There are tips for the correct arrangement of the roof on the balcony.
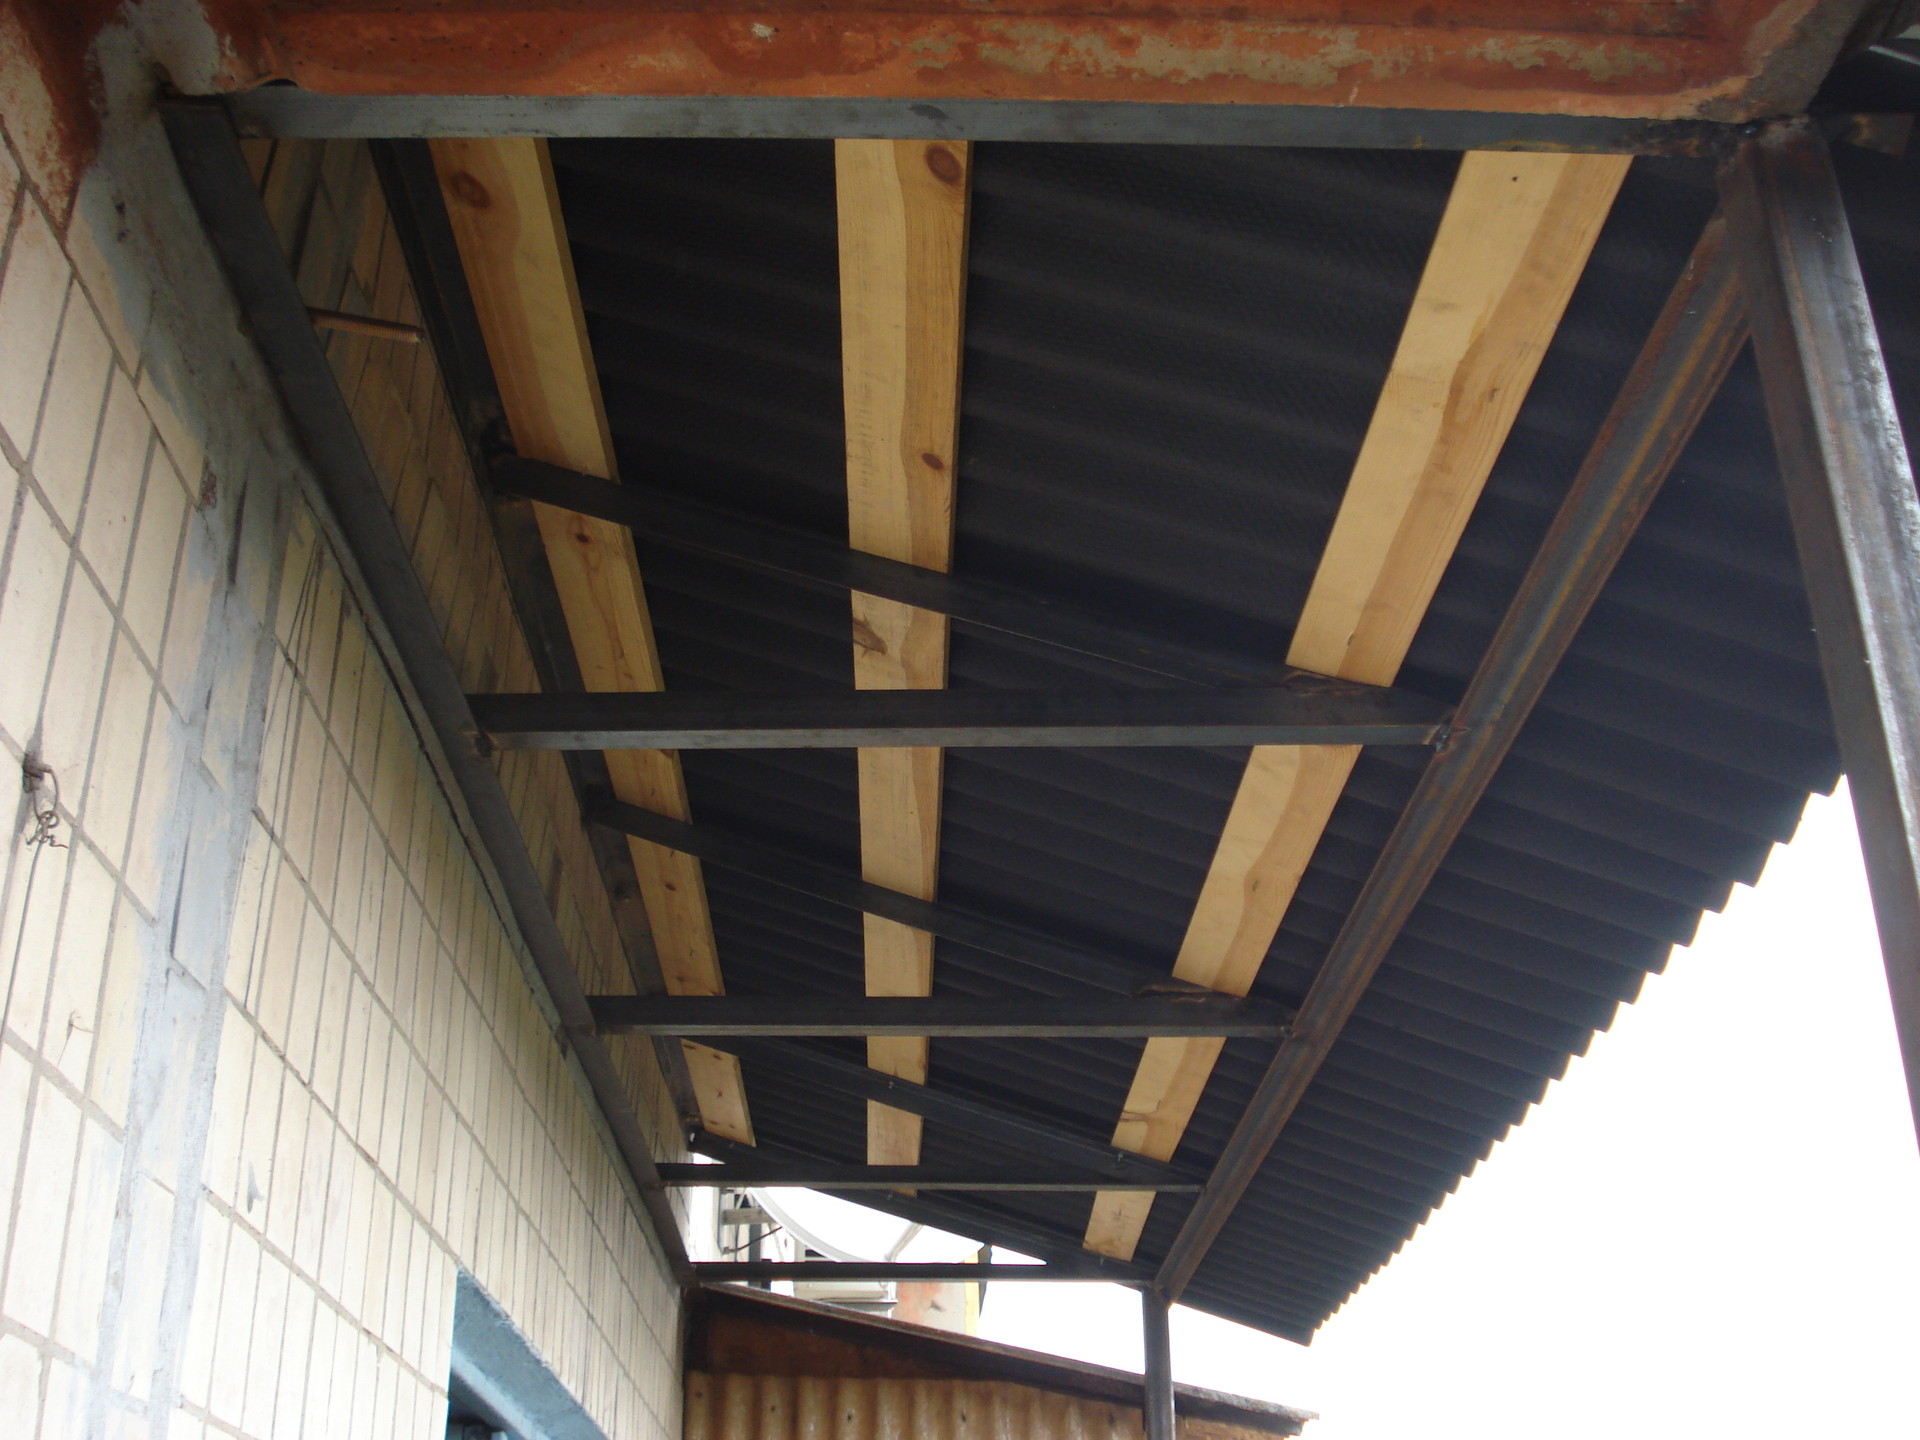
- If the dimensions of the loggia are equal to or more than 3 m, then it is worth using 3 fasteners. For greater reliability, there can be 4 of them. On the recommendation of specialists, 3 farms can be installed.
- For the strength of the truss fastening, it is recommended to use a square-type metal pipe. The crate is fixed to it.
- The metal structure is erected using electric welding. Then the metal is cleaned, primed and painted. After that, you can proceed to finishing.
- The best option for lathing is considered to be boards with dimensions of 20 by 120 cm. These devices must be pre-painted.
- When working with plastic and polymer products, do not use nails, as cracks may form as a result.


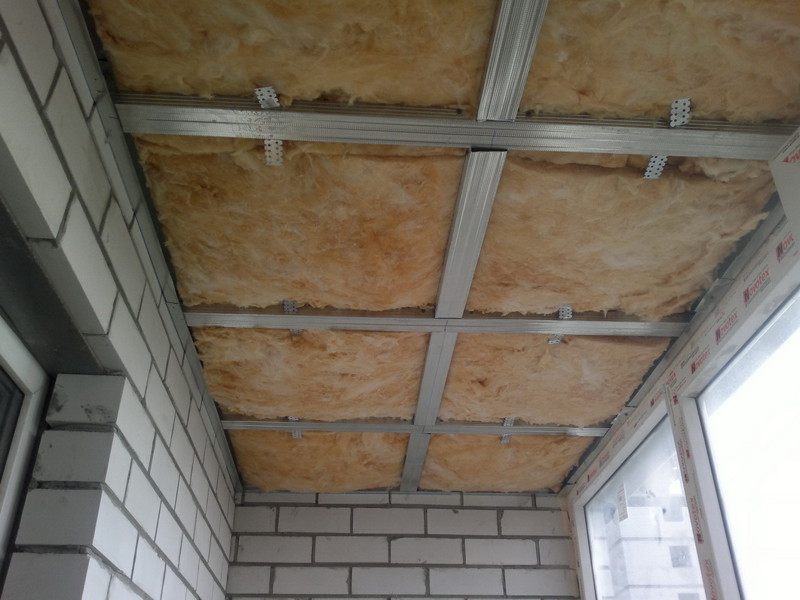
Warming and waterproofing
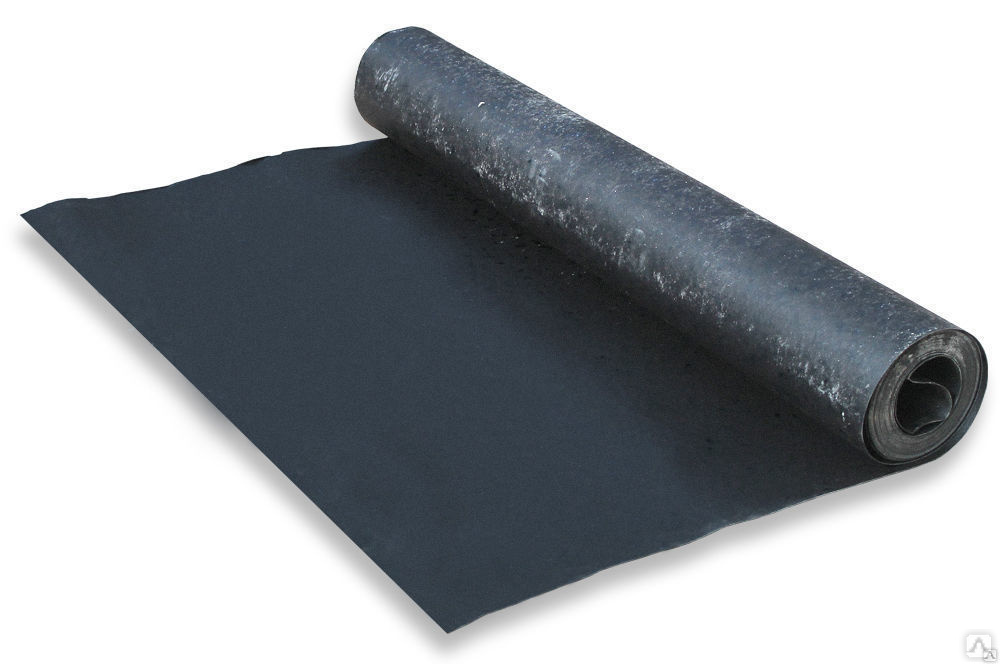
After the timber slats are equipped in the roof frame, you can proceed to the flooring of the upper waterproofing layer. The canvas needs to be cut and glued to the wooden base of the balcony roof using glue or bitumen mastic. The sheets for waterproofing must be laid with an overlap of 0.1–0.15 m. At the same time, do not forget about gluing the seams and rolling them with a roller.
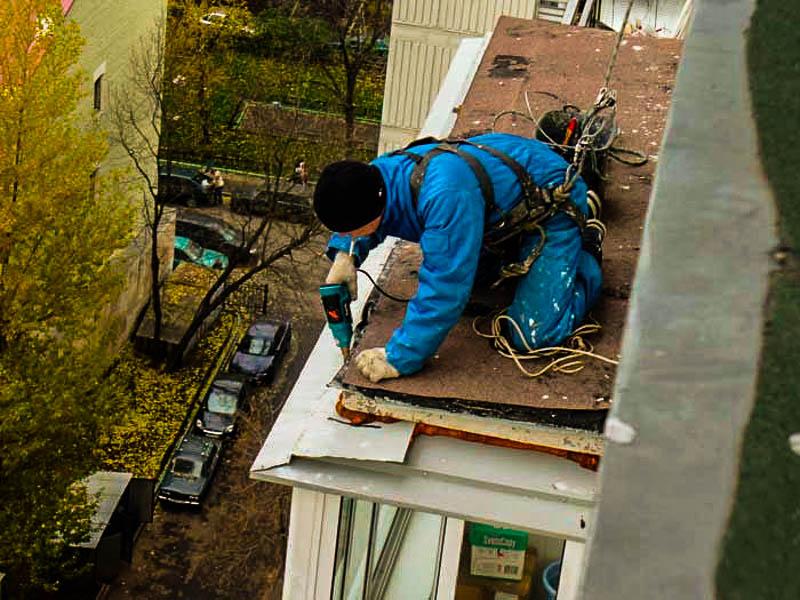
To prevent the occurrence of cracks, it is required to cut a niche on the brick at the border of the edge of the canvas and the vertical surface of the walls. Its depth should be 0.5 cm. The height of the niche should not exceed 0.1 m. The surface that has been cut should be cleaned of dust and primed. Then the edges of the waterproofing material must be glued into the niche.
Using a grinder above the formed niche, it is necessary to cut a groove, the width of which is 5 mm and the depth is 20 mm. During the assembly of the roof of the loggia, the extreme part of the corner strip must be inserted into the groove. It will protect the joint at the border of the wall and roof.
Experts advise to always insulate the roofs on the loggias in order to prevent freezing, as well as the accumulation of condensate inside. Such an event will allow solving the following tasks:
- keep warm;
- avoid the formation of ice on the structure;
- protect from heat;
- isolate from extraneous noise.
The main requirements for balcony insulation are high environmental friendliness, as well as low hygroscopicity. These characteristics are very important, since rainwater often gets on the roof of the loggia, which subsequently penetrates through the roof inside. Heaters for the roof are in the form of mastic, sheet and roll. Often, craftsmen use certain products to insulate the structure.
- Styrofoam. After insulation with this material, the room will be warm and silent. The procedure includes measurements of the balcony and the purchase of material. Then the crate is formed and the foam is cut in accordance with the step size. The sheets are fastened with self-tapping screws.

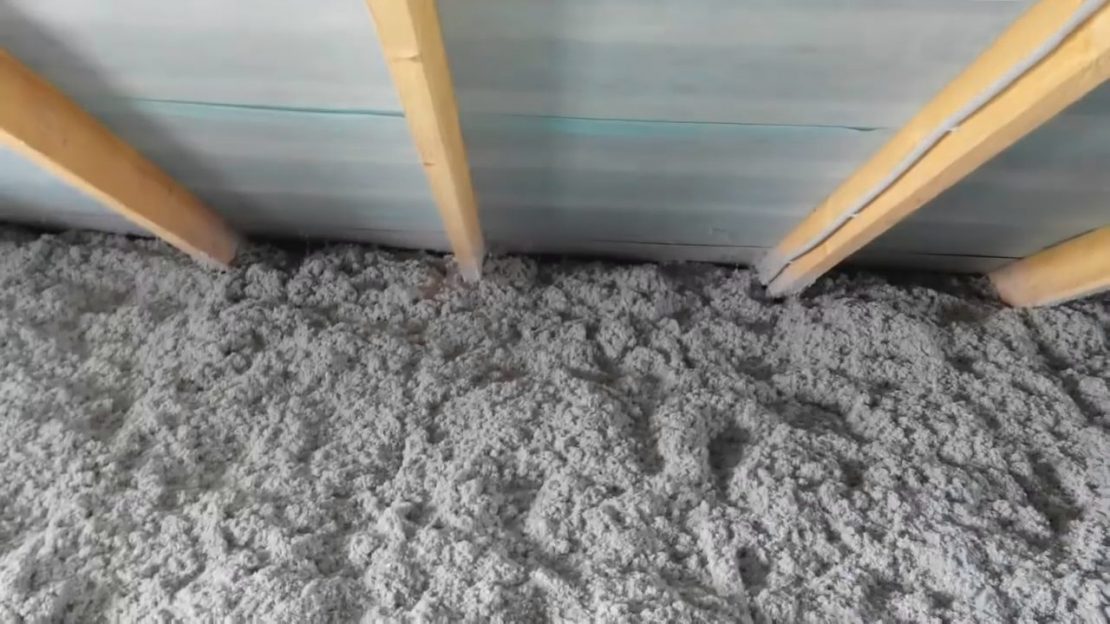
- Ecowool competes with the material described above. In the case of applying this material to the surface, high-quality noise and heat insulation is created.
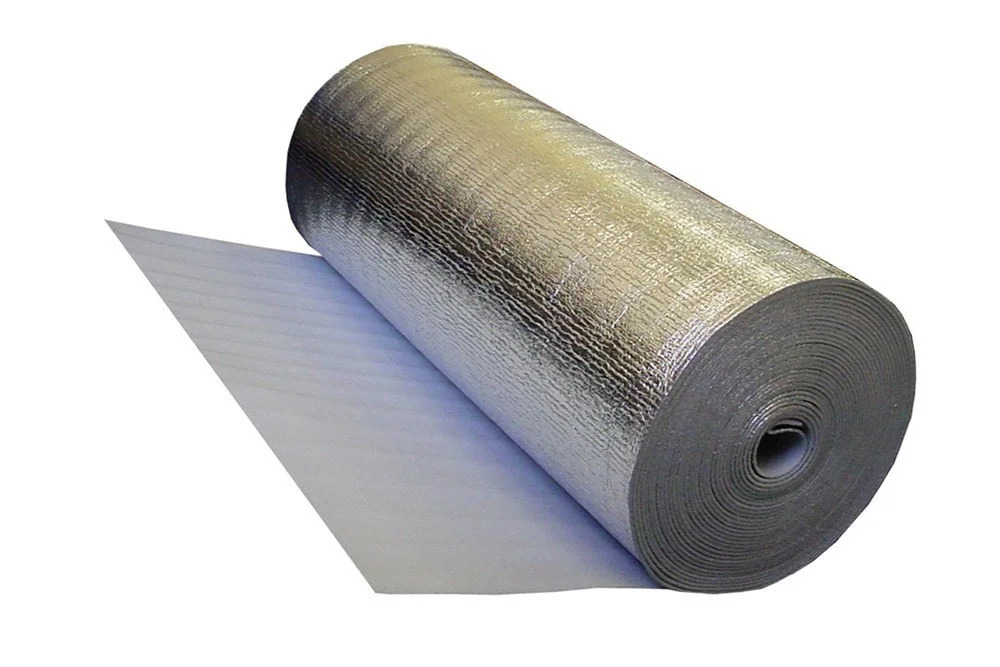
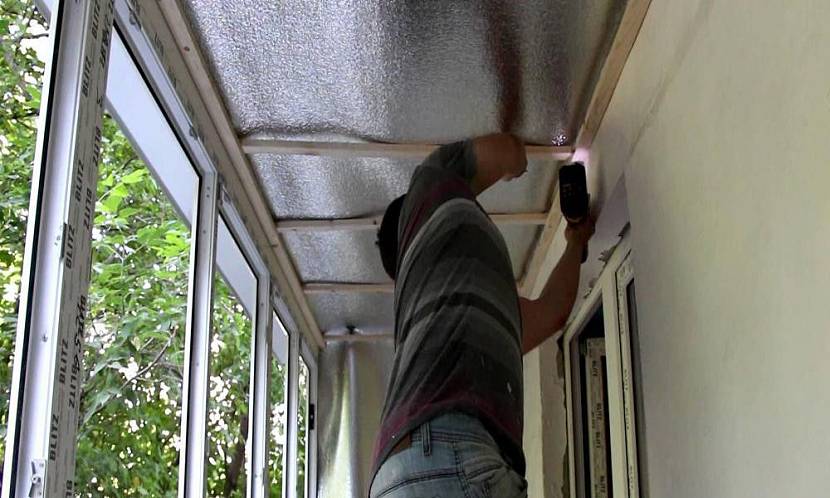
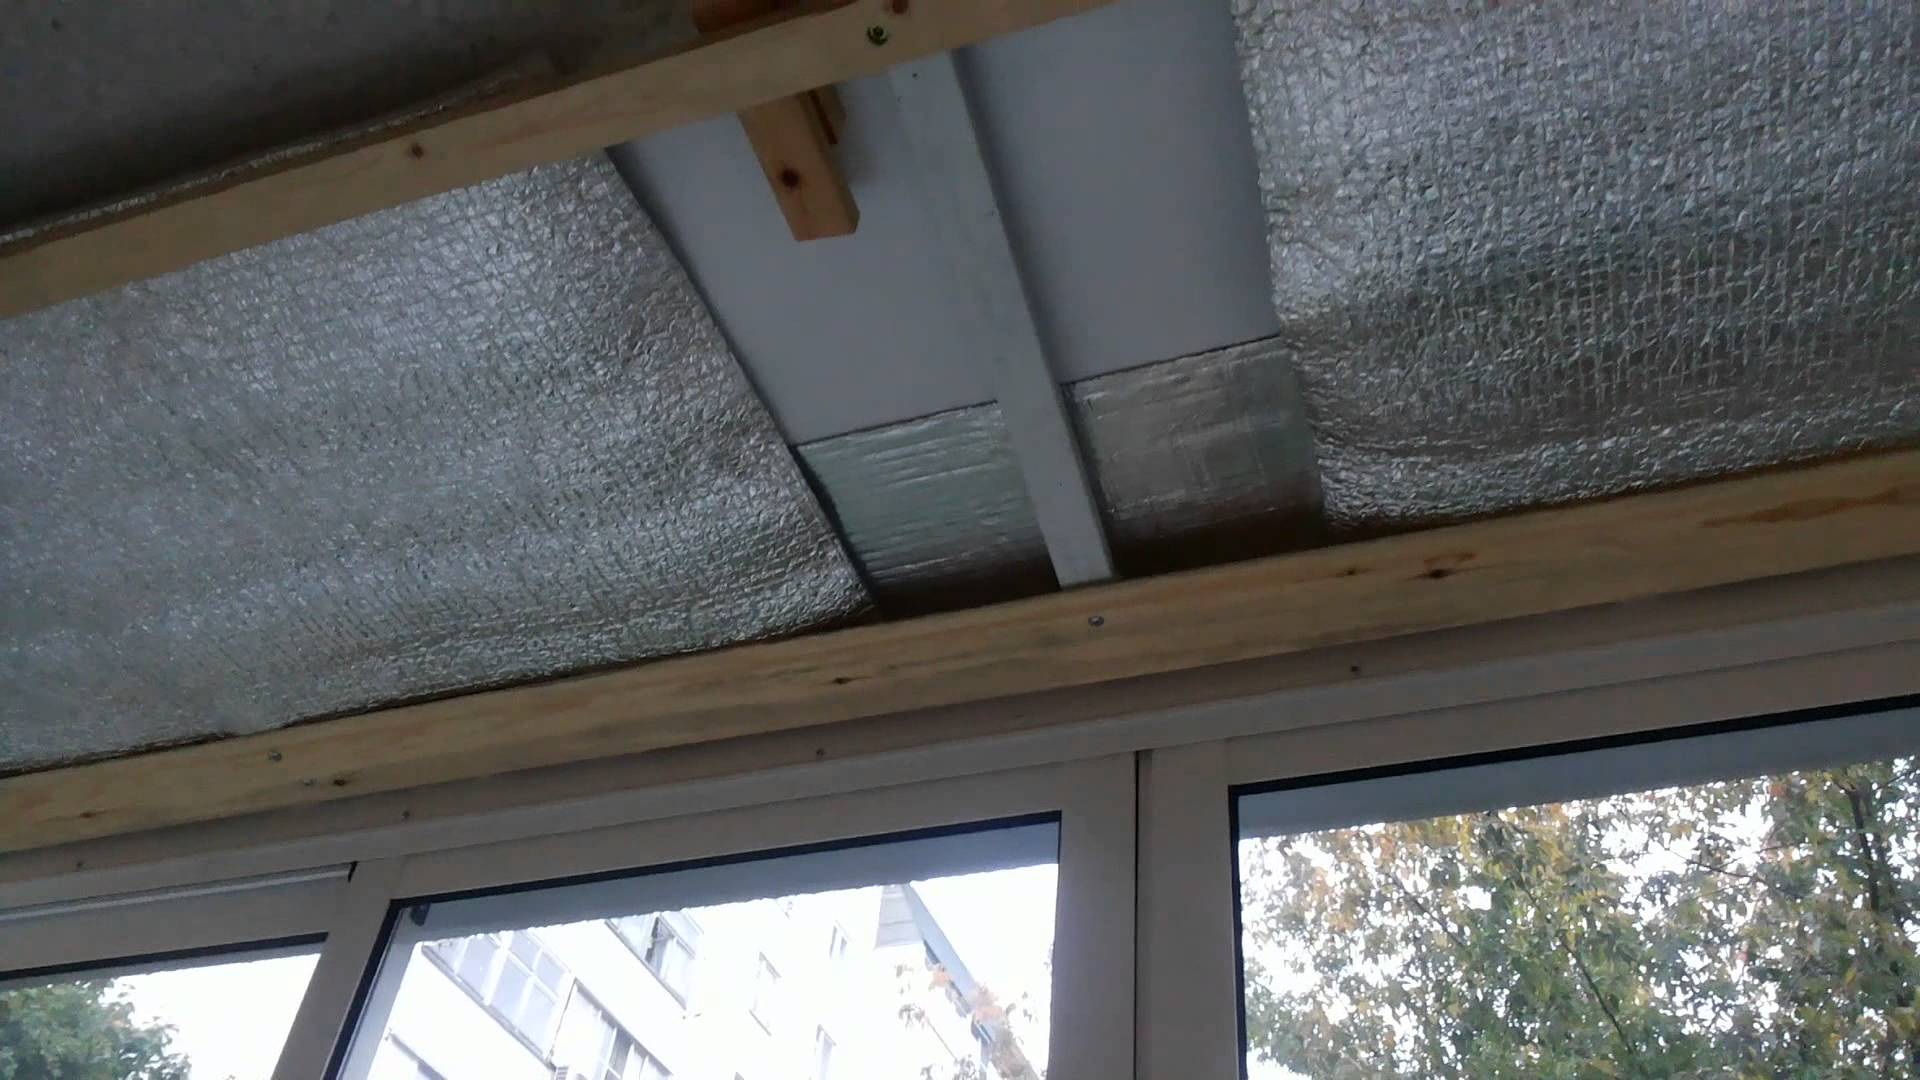
- Penofol and mineral wool. These modern materials can be easily compressed and fit into crevices. Fastening of cotton wool is carried out using wooden slats, which are screwed directly to the crate. The bottom layer should be covered with a vapor barrier film. It will reliably protect the insulation from the effects of condensation. To insulate the balcony roof with foam foil, it will be sufficient to fix it with a construction stapler, the foil should be directed downward.
- Combined heaters. Several types of products can be used simultaneously to insulate the roof on the loggia.Quite often, craftsmen use mineral wool, and roll insulation is mounted on top of it.
The roof to the balcony is an important element that is capable of performing a lot of protective functions.
In order for this structure to be reliable and fulfill its purpose, the craftsmen will need to choose good materials and hardware, as well as to carry out the installation work with high quality.
Installing a roof on a balcony in the next video.


